mrcomer
Past Ohio Chapter Leaders (Founding)
First off I cannot take credit for this really cool modification as I have completely stolen it from Jim B. and Terry H.
<O </O
</O
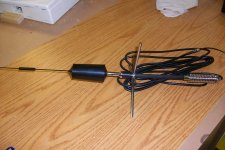
From the time I purchased my Sprint Aircard and external cellular antenna I have wanted to install it on the Augusta. I have tossed around many concepts for doing the installation but have decided that what Jim did really is ideal placement sooooooooo here I go.
<O</O
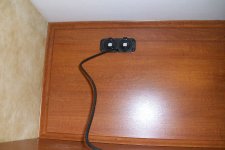
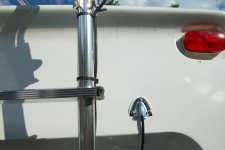
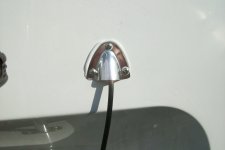
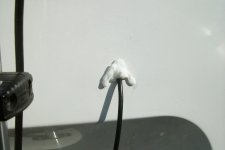
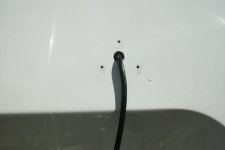
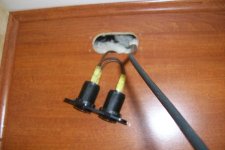
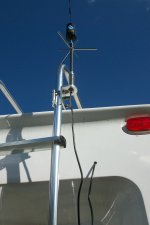
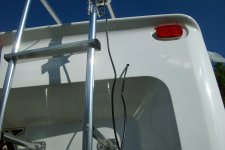
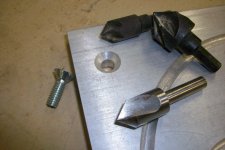
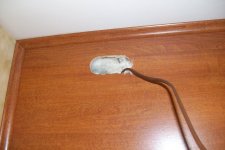
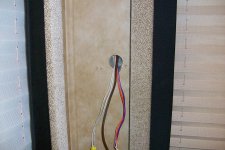
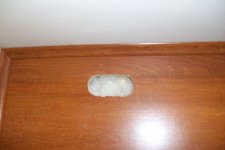
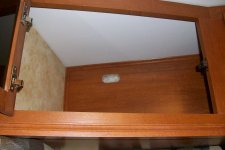
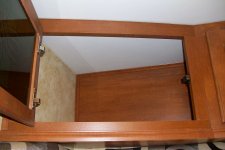
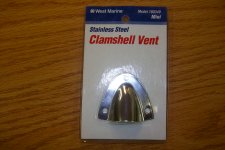
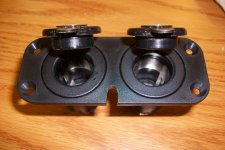
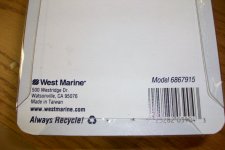
First off I purchased a dual 12 volt outlet from West Marine model #6867915. I took another idea from my father-in-law’s boat, I will be using a stainless steel clamshell vent from West marine #180349 to use on the outside of the rear cap to cover the hole that I will eventually drill thru to route the antenna cable into the coach. I used lamp cord wire for hooking up the power to the dual outlets. I also modified the faceplate of the dual outlets to accommodate for the antenna wire. The hardest part so far was routing the power wire from the oblong hole I created in the overhead cabinet to the wall light next to the rear window. As you can see from my pictures I opened up the hole for the wire were the lamp is to help feed the power wire. I made the connections to the outlets and tapped into the light wiring and we have power. Awesome! I then decided to mount the antenna on the ladder so I could get ready to drill the hole in the rear cap. Well as it turns out the bolts that came with the antenna mounts are too short so I will be going to Lowes tomorrow to get some longer stainless steel bolts. Hopefully I will get to mount the antenna this weekend. I am really not too happy with drilling that hole through the rear cap but I will muster the confidence, close my eyes and drill that hole. I suspect that routing that antenna wire from outside to the oblong hole in the cabinet.
<O</O
More later,
Mark
<O
</OFrom the time I purchased my Sprint Aircard and external cellular antenna I have wanted to install it on the Augusta. I have tossed around many concepts for doing the installation but have decided that what Jim did really is ideal placement sooooooooo here I go.
<O
</OFirst off I purchased a dual 12 volt outlet from West Marine model #6867915. I took another idea from my father-in-law’s boat, I will be using a stainless steel clamshell vent from West marine #180349 to use on the outside of the rear cap to cover the hole that I will eventually drill thru to route the antenna cable into the coach. I used lamp cord wire for hooking up the power to the dual outlets. I also modified the faceplate of the dual outlets to accommodate for the antenna wire. The hardest part so far was routing the power wire from the oblong hole I created in the overhead cabinet to the wall light next to the rear window. As you can see from my pictures I opened up the hole for the wire were the lamp is to help feed the power wire. I made the connections to the outlets and tapped into the light wiring and we have power. Awesome! I then decided to mount the antenna on the ladder so I could get ready to drill the hole in the rear cap. Well as it turns out the bolts that came with the antenna mounts are too short so I will be going to Lowes tomorrow to get some longer stainless steel bolts. Hopefully I will get to mount the antenna this weekend. I am really not too happy with drilling that hole through the rear cap but I will muster the confidence, close my eyes and drill that hole. I suspect that routing that antenna wire from outside to the oblong hole in the cabinet.
<O
</OMore later,
Mark
Attachments
-
 100_0260.JPG363.7 KB · Views: 378
 -
 100_0271.JPG412.5 KB · Views: 355
 -
 100_0270.JPG389.1 KB · Views: 362
 -
 100_0269.JPG328.4 KB · Views: 347
 -
 100_0268.JPG324.2 KB · Views: 351
 -
 100_0266.JPG315.8 KB · Views: 349
 -
 100_0265.JPG436.4 KB · Views: 353
 -
 100_0264.JPG337.4 KB · Views: 365
 -
 100_0263.JPG373.4 KB · Views: 379
 -
 100_0262.JPG329.4 KB · Views: 361