tdharleys draggin' wagon

tdharley

Well-known member
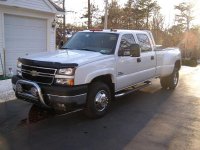
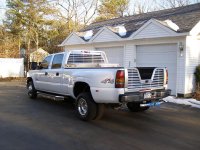
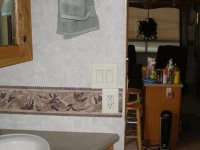
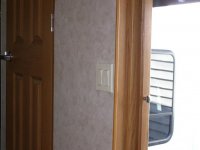
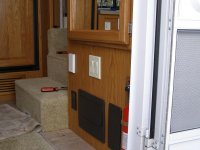
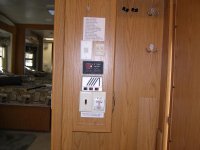
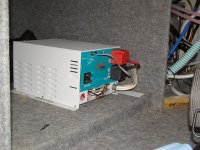
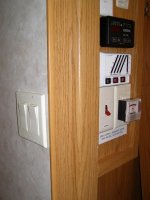
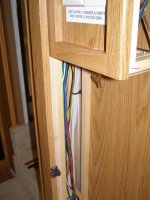
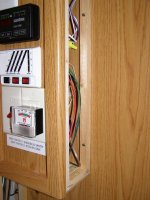
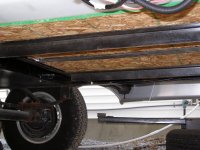
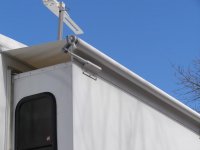
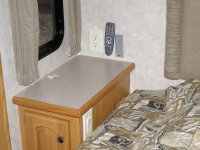
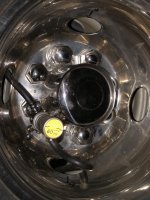
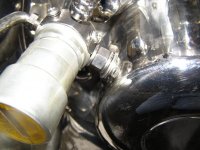
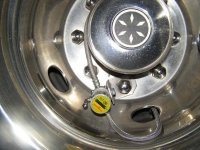
Here some pics of my latest mods.

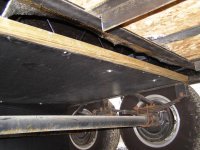
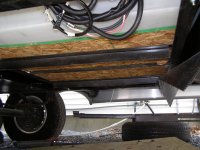
Excuse the blue tape on the back bumper hitch, I just installed a second backup camera and the silicone was not dry yet.

Be nice to your signifigant other and use a paper towel under you lip to catch the drool while viewing the pics.
 

Attachments

  • freont view truck shrunk.JPG
    freont view truck shrunk.JPG
    82.9 KB · Views: 120
  • rear view truck shrunk.JPG
    rear view truck shrunk.JPG
    82.6 KB · Views: 139
  • truck side view shrunk.JPG
    truck side view shrunk.JPG
    99.8 KB · Views: 112

trdeal

Past North Carolina Chapter Leader
tdharley said:
Yeah thats why my wife married me.
That was a good one.If you ever get tired of being a contractor, you should be a comedian.
 
K

Ken Washington

Guest
tdharley,
Sweet looking truck! I know you are going to do more to it and when you put the mud guards on, please add some more pictures.

Ken
 

tdharley

Well-known member
Ken

I did not like the look of the Husky mudguards and am going to send them back. I am looking for a set with a little more style. If you know of any let me know.
 

tdharley

Well-known member
Inverter install

I finished up the wiring on the Xantrex inverter today and wired the remote box. The remote box turned out to be more wiring than I thought it would be.

I also added some Decora switches & 3 ways, replacing those ones in the cabinet. I think that was a good idea until I was fumbling around looking for lights. I added 2 switches by the entrance door, one for the porch light & one 3 way for the overhead kitchen light. I added 2 switches going up to the second floor one for the overhead kitchen light and one for the living room lights. Alos relocated the bathroom light.

Pics below
 

Attachments

  • swiches 4.JPG
    swiches 4.JPG
    45.4 KB · Views: 61
  • switches 3.JPG
    switches 3.JPG
    56.5 KB · Views: 62
  • swiches 2 shrunk.JPG
    swiches 2 shrunk.JPG
    37.9 KB · Views: 63
  • switshes shrunk 1.JPG
    switshes shrunk 1.JPG
    59 KB · Views: 69
  • cabinet.JPG
    cabinet.JPG
    58.4 KB · Views: 78
  • inverter shrunk.JPG
    inverter shrunk.JPG
    84.5 KB · Views: 69

Uncle Rog

Well-known member
Good job on the light switches, I still have the slap lights to keep from having a catostrophic fall in the dark. You Will like that inverter too, nice going......
 

tdharley

Well-known member
The wires were accesible through the utility closet. There are 2 small panels that lead to a electical raceway , behind. I mounted the switches directly below and one to the side.
 

Attachments

  • switches side.JPG
    switches side.JPG
    58.3 KB · Views: 43
  • closet panelside 2.JPG
    closet panelside 2.JPG
    64 KB · Views: 48
  • closet panel side 1.JPG
    closet panel side 1.JPG
    72.4 KB · Views: 49

jbeletti

Well-known member
tdh,

Your switch upgrades look great. Good thing they were all in inside walls where you had the depth you needed. In my Landmark, while the switches look a bit nicer, I have one set on an outside wall just inside the main door. I'd have to dig out foam insulation to get some flush mounted switches in there.

Did you install open back blue Carlon ring-type boxes?

Jim
 

tdharley

Well-known member
I used basically the same thing but orange for low voltage. I did not even know they made a low voltage version until I seen them in HDepot. It seems the only difference is the color.
 

tdharley

Well-known member
I think I am done for the year with mods. & upgrades.

I never liked that there was no electric outlet for a clock next to the bed or a switch for the ovehaed lights so I installed one.

Installed the toppers & finished up the additional support for the water tank. I used (2) 2" peices of angle iron to beef up the exsisting peices and added 2 more parrallel to the exsisting band strap.

Pics below
 

Attachments

  • P3300225.JPG
    P3300225.JPG
    80.5 KB · Views: 66
  • P3300223.JPG
    P3300223.JPG
    73.7 KB · Views: 65
  • P3300222.JPG
    P3300222.JPG
    74.6 KB · Views: 66
  • P3300221.JPG
    P3300221.JPG
    35.4 KB · Views: 53
  • P3300219.JPG
    P3300219.JPG
    78.1 KB · Views: 62

tdharley

Well-known member
Just added these tire equalization valves.

I have them on the Itasca also, they work great.
 

Attachments

  • P4160219.JPG
    P4160219.JPG
    76.2 KB · Views: 42
  • P4160220.JPG
    P4160220.JPG
    52.3 KB · Views: 35

ct0218

Well-known member
How does that attach to the wheel? How long have you had them in use, and do they appear to hold pressure? I have had a couple of different types and was diasppointed in them. These look a little different. It is a real pain equalizing.
 

tdharley

Well-known member
I have just put them on the Silverado.

I had to do a custom install and drill these in since I cheaped out on the rims and only installed faux chrome rims. I do although have them on my Itasca motorhome and will take somes pics today. That was a normal lugnut install. They are a little difficult to install but are worth it in the end.

I have not had any leaking problems at all. These are very well made.
 

tdharley

Well-known member
Here is a closer shot of the mounting on the Silverado. I mounted them directly to the hub.

The other two pictures are on the Itasca they are mounted on the lug nut, they also have braded steel cables. I have never had any problems with them and they have been on for a few years now.
 

Attachments

  • valve mount shrunk.JPG
    valve mount shrunk.JPG
    67.1 KB · Views: 16
  • motor home valve shrunk.JPG
    motor home valve shrunk.JPG
    79.6 KB · Views: 13
  • valve mount motorhome shrunk.JPG
    valve mount motorhome shrunk.JPG
    85.4 KB · Views: 16
Top