Cutting hole for clothes dryer vent in 3110

bobca1

Well-known member
Picking up my new 3110 this weekend :cool: I would have already had it this week but the dealer ordered the wrong hitch (for a Ford), I'm not upset though because they delivered to the rv park for me last weekend then brought it back to their lot. Plus I am having a terrible time finding a place to store it.
In addition to my solar project (other thread), I am installing a Splendide stackable washer and dryer. Dealer wants $2000 for the washer+dryer and $400 to install it. I found same units online for $1500 + $125 shipping (including stacking adapter, floor brackets, vent).
There is a sticker on the wall in 3110 that indicates where to put the dryer vent. Has anyone else followed this guide to cut the hole? Would hate to start cutting and find out there is a aluminum brace in the way. I'm going to be real cautious try use a stud finder and drill small exploratory holes from the inside before breaking out the jigsaw and cutting through the fiberglass. Was just wondering if anyone else has tried to cut their own hole for the vent.
 

jbeletti

Well-known member
I suggest making a mark into the wall through the center of the sticker. Then peel it off and use a stud finder to see if you can confirm there are no studs within 2 inches either side of the mark.

I have heard a couple of stories (boatto5er) of this sticker being "off".

Also, consider using a finishing nail and a hammer and tap it through the interior decor board every 3/4" - out 2 inches from either side of the mark. This should tell you for sure that you are all clear for the hole saw!
 

lynndiwagoner

Well-known member
I used the finishing nail technique as suggested. Worked great. To cut the hole I used one of those bits that go into a dremel tool and cuts on the side of the bit. I forget what you call it but it worked great. A 4" hole saw was too expensive for a one time deal. Once I determined the center of the hole on the inside I used a long drill bit to drill through to the outside, marking the center of the hole. Good luck.
 

jeffdee

Well-known member
Picking up my new 3110 this weekend :cool: I would have already had it this week but the dealer ordered the wrong hitch (for a Ford), I'm not upset though because they delivered to the rv park for me last weekend then brought it back to their lot. Plus I am having a terrible time finding a place to store it.
In addition to my solar project (other thread), I am installing a Splendide stackable washer and dryer. Dealer wants $2000 for the washer+dryer and $400 to install it. I found same units online for $1500 + $125 shipping (including stacking adapter, floor brackets, vent).
There is a sticker on the wall in 3110 that indicates where to put the dryer vent. Has anyone else followed this guide to cut the hole? Would hate to start cutting and find out there is a aluminum brace in the way. I'm going to be real cautious try use a stud finder and drill small exploratory holes from the inside before breaking out the jigsaw and cutting through the fiberglass. Was just wondering if anyone else has tried to cut their own hole for the vent.

I have a 3110. Could you post some pictures of this vent installation? Thanks!
 

HornedToad

Well-known member
Would hate to start cutting and find out there is a aluminum brace in the way.

This may be hard to do in sunny California...
I agonized over locating the studs before I drilled a hole through the siding.
One chilly morning I walked out to find an outline of the framing in the frost pattern,
and marked it off.
 

JohnDar

Prolifically Gabby Member
If you have a stud finder that will locate metal studs, as well as wood ones, you should be able to locate the aluminum wall frame members. I've experimented with my Zircon TriScanner and it will find them. Still, from the inside, use a 1/16" bit to drill your exploratory holes. You don't need to go much further than a 1/4" to 3/8"" before hitting a frame section since the wall covering is very thin.
 

Garypowell

Well-known member
I am one of those that hit stud. The sticker was not correctly positioned. Checked with HL and was told the engineers had studied the problem and that whole stud could be cut through with no ill effects. I only had to remove 1/2 of it. 2+ years later no ill effects and lov'n the Splendide
 

bobca1

Well-known member
Hi All, Thank you for the suggestions! I will definitely tap some nail holes or drill some pilot holes so I can avoid the metal stud. Not sure why the dealer quoted me 4 hours. That's why I wanted to check here first in case I was missing something. Will post some photos of the install, will probably do it next weekend.
 

mobilcastle

Well-known member
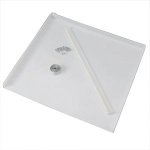
When you make your cut outside run your hole saw in reverse to score the fiberglass then reverse your saw and make the final cut. This helps to keep the fiberglass from cracking when you cut it. I also used the finsh nail to find a good spot to drill. I also installed a drain pan should the washer overflow. Good luck. You are welcome to PM me if you any other questions.
 

JohnDar

Prolifically Gabby Member
I have the Splendide combo and can attest to it being a heavy beast of at least 150 lbs., but a lot of that is the cement counterweight under the top cover. To work on mine (after the fact drain pan install) in the front closet, I placed furniture slider pads under the feet and could move it easily.
 

porthole

Retired
Hi All, Thank you for the suggestions! I will definitely tap some nail holes or drill some pilot holes so I can avoid the metal stud. Not sure why the dealer quoted me 4 hours. That's why I wanted to check here first in case I was missing something. Will post some photos of the install, will probably do it next weekend.


4 hours is probably fair to the average RV'r that is not a DIY'r. Muscling in the washer and dryer could be a challenge for someone not use to moving those large items in and out of an RV. Some have found out when installing the doors or trim may have to be removed.
 

Garypowell

Well-known member
One other thing to watch out for, at least on my set up, was the brass valve you hook up to had a protrusion that kept the female part from screwing on far enough to seal.

I found out 2 - 3 days after install when water started to drip off the front end. It was a really slow leak.....but leak it did.

I double washered the female end and it solved the problem.
 

vakthund

Well-known member
Not sure why the dealer quoted me 4 hours. That's why I wanted to check here first in case I was missing something.
Having had the pleasure of removing the washing machine to fix a water leak in the wall I certainly understand the four hour install time. Had to take trim off the door and the shelves in the closet to get it our.
Make sure the hose for the drain pan does not loop above the pan - as our factory installed unit did.
 

bobca1

Well-known member
Having had the pleasure of removing the washing machine to fix a water leak in the wall I certainly understand the four hour install time. Had to take trim off the door and the shelves in the closet to get it our.
Make sure the hose for the drain pan does not loop above the pan - as our factory installed unit did.

What is this drain pan you are talking about? Is this some precaution in case of leaks? I don't need that because on the 3110 the washer goes in the garage. If it leaks, we will notice it, and its a rubber floor so no big deal.
After installing the dryer vent in the wall, hoping the install should not be any more complicated than a household washer/dryer install.


On the 3110 the prep is in the garage,
 

mobilcastle

Well-known member
The pan is for overflows. Many units like mine are installed in the closet upstairs-in the bedroom. If they overflow it would be a disaster to say the least. You may not need it-others do. (Sorry Jim we posted at the same time)
 

danemayer

Well-known member
My drain pan has never seen a drop of water. But I think it's possible to have either freeze damage or a malfunction that could dump 10 or more gallons of water into your rig depending on the wash cycle. I'd rather have that water go out a drain hose under the trailer.
 

JohnDar

Prolifically Gabby Member
Not having a drain pan resulted in water dripping off my pinbox and deforming the overhang "skin." Cause was a leak from an incomplete winterization (my bad). I repaired the machine and installed a pan under it. Not as difficult as it looks, even in the front closet of an older 3670.


Sent from my iPhone using Tapatalk
 

bobca1

Well-known member
The pan is for overflows. Many units like mine are installed in the closet upstairs-in the bedroom. If they overflow it would be a disaster to say the least. You may not need it-others do. (Sorry Jim we posted at the same time)

I agree with that! If my unit was tucked into a closet in the bedroom the drain pan would be a essential. Mine will be in the garage, so any leak will be quickly noticeable and while the floor is not waterproof its rubber and would be trivial to clean up. I'm in southern CA so use my rig year round.

BUT not being tucked into the closet does make me wonder about it tipping over. I just received the retainer clips for the floor and the stack bracket - for the Splendide stackable washer/dryer. Guess I was expecting something a little more substantial. Are these little floor brackets really sufficient to keep it from shifting or worse case tipping over completely?
 

bobca1

Well-known member
Well I answered my own question. The unit WILL tip over and I don't think the little floor brackets will help much. Fell over on the way to get my new tires installed yesterday. This after I took it off road last weekend and washer/dryer stayed upright and didn't budge. But driving over local railroad tracks and apparently bounced it hard enough to launch the unit onto its side. Washer is pretty banged up now, but it still works ;) Whew! Pretty good test for the splendide stacking bracket when I found the unit on its side the dryer was still firmly attached to top of washer!
I have mixture of cables and earthquake straps on order won't be heading anywhere again until its strapped to the walls.

I agree with that! If my unit was tucked into a closet in the bedroom the drain pan would be a essential. Mine will be in the garage, so any leak will be quickly noticeable and while the floor is not waterproof its rubber and would be trivial to clean up. I'm in southern CA so use my rig year round.

BUT not being tucked into the closet does make me wonder about it tipping over. I just received the retainer clips for the floor and the stack bracket - for the Splendide stackable washer/dryer. Guess I was expecting something a little more substantial. Are these little floor brackets really sufficient to keep it from shifting or worse case tipping over completely?
 
Top