I've researched for the last couple of months how to install a washer and dryer in an RV and can't express enough how helpful it was to have forums and folks like this who shared their experiences and photos, so I would like to return the favor for the next lucky installer.
Vent
-----
My BC had the vent placement marked with a sticker, however it would have put the vent half way level with the washer instead of slightly over it. I also seemed to find a stud very near the center of the sticker marking via a metal stud finder so I didn't trust it and instead went a little higher after checking for studs as best as possible. I marked out the center of the hole, created a circle around the center point where the vent would be and drilled small holes around the circumference and in the cross pattern from center to double check for studs. I checked approximately where it would end up on the outside to verify it wasn't going to break/hit anything and placement was good, by using a measuring tape from the edge of the slide-out. I then drilled out the hole (from the inside) with a 4" hole saw just far enough to come close to the outer shell so the styrofoam insulation would be marked sufficiently to pry out. Once the styrofoam was out I used the hole saw to cut just enough into the outer wall (from inside) until the center drill bit went clean through but not enough for the saw portion to get through the wall. I then from the outside put the hole saw bit into the fresh new center hole and ran the drill in reverse slowly until it cut all the way through to avoid chipping the fiberglass in forward. I never had to run it in forward, the saw cut it just fine in reverse and left a perfect hole with no chips.
I installed the vent through the hole after cleaning both it and the surrounding wall thoroughly. I mounted the vent with the provided self tapping screws and made sure it was level. For each screw I dabbed a bit of caulk in the hole to help provide a seal and ran a bead of caulk around the plastic vent portion facing the wall. I did the same for the vent cover.
Drain Pan
-----------
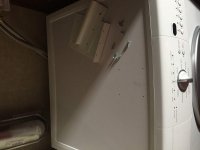
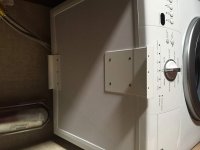
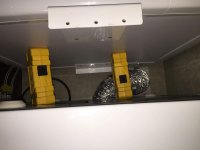
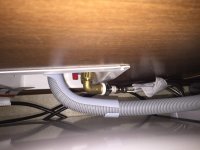
I bought some 1/2" plywood and coated it with Thompson's water seal spray and placed the drain pan over it. After measuring and test fitting the washing machine I drilled the 4 holes prescribed by the directions that came with the drain pan and mounted it and the plywood underneath to the closet area where the washer was to be placed. I bought a length of PEX hose and a shark bite 90 degree to 1/2" thread adaptor, drilled a small 3/4" hole between the closet and the refrigerator and ran the PEX behind the fridge/stove into the sink area where the water lines meet. Along with the PEX hose I ran a black/red 12v wire pair, connected a moisture relay at the drain pan and mounted a small solar pump in the back of the kitchen sink storage and routed the hose into a WYE ABS adaptor in the sink drain (like a dishwasher would). I then wired up the brain of the relay to the moisture sensor board and the 12v pump.
Washer
--------
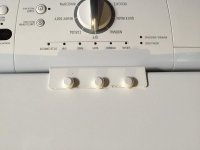
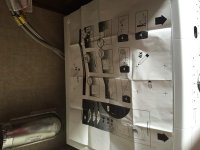
I bought steel braided hoses with 90 degree angles on them that connect to the washer and bought an additional two 90 degree hose adaptors for the connection to the inlets as the hoses stuck out well over the washer so I knew the dryer would run into them. I used pipe tape on all the threads as a precautionary measure even though you're not supposed to have to. The mounting brackets from Splendid for the dryer came with a template you set over the top of the washer with explicit instructions to only drill the holes a certain distance or risk damaging the washer. I used black electrical tape on the drill bit to prevent drilling any farther than instructed and measured several times to make sure the template was in the right position to house the dryer. For these two specific models the dryer sticks out over the washer and is about parallel with the washer dial/knob.
Dryer
------
The dryer was a pita! Since I had no access to the back of the dryer when it was in place and the vent hose for the dryer doesn't reach out far enough to try and put on before pushing the dryer back (all while holding the dryer above the washer), I chose to push the dryer in place above the washer (with the front mounting bracket off). Once pushed in place I pushed against the top of the dryer with an upward motion so the top was pinned against the back wall and lifted it up and put shims underneath so I could reach under the dryer to secure the vent pipe to the wall vent outlet (I secured the dryer side of the flexy pipe prior to pushing it into place). It was painful but worked; I then put the front dryer mounting bracket back on while the dryer was elevated since it mounts to the washer well underneath the dryer (I used a short screw driver). Once the dryer was down off the shims it snapped right into place in the bracket. I installed the three screws that came with the mounting kit into the bottom of the dryer.
Note About My Craziness
----------------------------
Most have routed their drain hose out of the trailer in some form or fashion but that requires making sure the hose stays flat for the run or slightly angled down or the water won't run out. I have attached a 3.0-GPH 12v pump to the hose and wired it to a moisture sensor relay to activate the pump if the pan is wet and pull the water into the front grey tank via the sink ABS. This route is far more work and can potentially have some faults if there is no 12v or the front sink drain is clogged but it's the route I chose so I'll post a followup on how well it works (if I ever need it to work, hopefully not).
Parts
-----
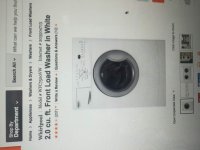
Washer - Whirlpool Model # WFC7500VW
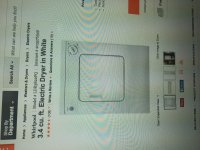
Dryer - Whirlpool Model # LDR3822PQ
Mounting Kit (Splendid) #
Experimental Parts
-----------------------
Yosoo Solar DC 12V Hot Water Circulation Pump Brushless Motor Water Pump 3M Low Noise (12V)Selling High Quality From Wasooo
GERITM Highly Sensitive 12V Rain Sensor Module + Relay Control Module for Arduino Robot Kit
Hope this post benefits someone!
Vent
-----
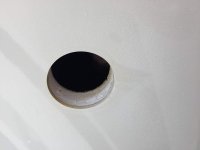
My BC had the vent placement marked with a sticker, however it would have put the vent half way level with the washer instead of slightly over it. I also seemed to find a stud very near the center of the sticker marking via a metal stud finder so I didn't trust it and instead went a little higher after checking for studs as best as possible. I marked out the center of the hole, created a circle around the center point where the vent would be and drilled small holes around the circumference and in the cross pattern from center to double check for studs. I checked approximately where it would end up on the outside to verify it wasn't going to break/hit anything and placement was good, by using a measuring tape from the edge of the slide-out. I then drilled out the hole (from the inside) with a 4" hole saw just far enough to come close to the outer shell so the styrofoam insulation would be marked sufficiently to pry out. Once the styrofoam was out I used the hole saw to cut just enough into the outer wall (from inside) until the center drill bit went clean through but not enough for the saw portion to get through the wall. I then from the outside put the hole saw bit into the fresh new center hole and ran the drill in reverse slowly until it cut all the way through to avoid chipping the fiberglass in forward. I never had to run it in forward, the saw cut it just fine in reverse and left a perfect hole with no chips.
I installed the vent through the hole after cleaning both it and the surrounding wall thoroughly. I mounted the vent with the provided self tapping screws and made sure it was level. For each screw I dabbed a bit of caulk in the hole to help provide a seal and ran a bead of caulk around the plastic vent portion facing the wall. I did the same for the vent cover.
Drain Pan
-----------
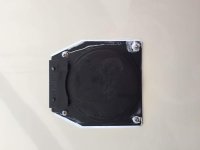
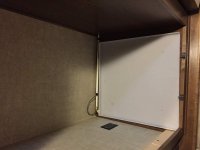
I bought some 1/2" plywood and coated it with Thompson's water seal spray and placed the drain pan over it. After measuring and test fitting the washing machine I drilled the 4 holes prescribed by the directions that came with the drain pan and mounted it and the plywood underneath to the closet area where the washer was to be placed. I bought a length of PEX hose and a shark bite 90 degree to 1/2" thread adaptor, drilled a small 3/4" hole between the closet and the refrigerator and ran the PEX behind the fridge/stove into the sink area where the water lines meet. Along with the PEX hose I ran a black/red 12v wire pair, connected a moisture relay at the drain pan and mounted a small solar pump in the back of the kitchen sink storage and routed the hose into a WYE ABS adaptor in the sink drain (like a dishwasher would). I then wired up the brain of the relay to the moisture sensor board and the 12v pump.
Washer
--------
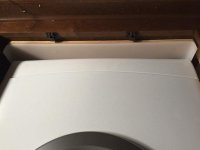
I bought steel braided hoses with 90 degree angles on them that connect to the washer and bought an additional two 90 degree hose adaptors for the connection to the inlets as the hoses stuck out well over the washer so I knew the dryer would run into them. I used pipe tape on all the threads as a precautionary measure even though you're not supposed to have to. The mounting brackets from Splendid for the dryer came with a template you set over the top of the washer with explicit instructions to only drill the holes a certain distance or risk damaging the washer. I used black electrical tape on the drill bit to prevent drilling any farther than instructed and measured several times to make sure the template was in the right position to house the dryer. For these two specific models the dryer sticks out over the washer and is about parallel with the washer dial/knob.
Dryer
------
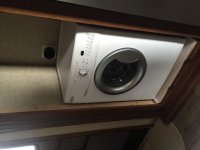
The dryer was a pita! Since I had no access to the back of the dryer when it was in place and the vent hose for the dryer doesn't reach out far enough to try and put on before pushing the dryer back (all while holding the dryer above the washer), I chose to push the dryer in place above the washer (with the front mounting bracket off). Once pushed in place I pushed against the top of the dryer with an upward motion so the top was pinned against the back wall and lifted it up and put shims underneath so I could reach under the dryer to secure the vent pipe to the wall vent outlet (I secured the dryer side of the flexy pipe prior to pushing it into place). It was painful but worked; I then put the front dryer mounting bracket back on while the dryer was elevated since it mounts to the washer well underneath the dryer (I used a short screw driver). Once the dryer was down off the shims it snapped right into place in the bracket. I installed the three screws that came with the mounting kit into the bottom of the dryer.
Note About My Craziness
----------------------------
Most have routed their drain hose out of the trailer in some form or fashion but that requires making sure the hose stays flat for the run or slightly angled down or the water won't run out. I have attached a 3.0-GPH 12v pump to the hose and wired it to a moisture sensor relay to activate the pump if the pan is wet and pull the water into the front grey tank via the sink ABS. This route is far more work and can potentially have some faults if there is no 12v or the front sink drain is clogged but it's the route I chose so I'll post a followup on how well it works (if I ever need it to work, hopefully not).
Parts
-----
Washer - Whirlpool Model # WFC7500VW
Dryer - Whirlpool Model # LDR3822PQ
Mounting Kit (Splendid) #
MK01
Vent Kit (Splendid) #
VID403A
Drain Pan (Splendid) #
PI24
PEX hose and Shark bite male 90 to 1/2"
Experimental Parts
-----------------------
Yosoo Solar DC 12V Hot Water Circulation Pump Brushless Motor Water Pump 3M Low Noise (12V)Selling High Quality From Wasooo
GERITM Highly Sensitive 12V Rain Sensor Module + Relay Control Module for Arduino Robot Kit
Hope this post benefits someone!


Last edited:
