And so it begins

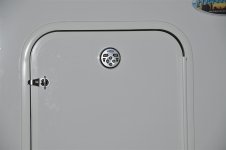
porthole

Retired
Adding my index list here so I can find things :rolleyes:

Mods

Awning second switch in basement area

Bed, under bed storage - over hydraulics Part 1 . Part 2 . Part 3
Part 2 mostly shows a repair, but you can see the cleats added to support the 1/4" plywood

Bent LevelUp jack fix

Electric power cord reel add on
Electric power cord reel enclosure

Electric Progressive hardwired EMS
Fuel tank-tote 14 gallon for generator
Fuel tank truck auxiliary tank


G-114 blowout

Garage patio door curtain

Garage tie downs aircraft aluminum bevel track

Goosebox and pinbox change

Hensley TS-3 :-(
Internet on the road


JT Stabilizers wth LevelUp

Mid ship LED turn signal blinkers

Molly


Onan issues

Ramp failure


SAT TV

Belden 7915A RG6/U Duobond Plus 3GHz Tri-Shield Broadband Coax
Belden 1829A-009-RG6-U-18GA 3 GHz Duobond Double Shield round Coax

Splendide door latch repair

Toilet, Dometic 320 and toilet sprayer
Truck Hoist mini crane

TST TPMS

Yellow Jacket vacuum power tip

Yellow jacket exterior exhaust

Water Softener

Water tanks

WiFi Ranger routers


Winch - garage for broken toys

First mod was while the trailer was in Indiana at the service center. MOR/ryde came over to replace the pin box

Next a visit to MOR/ryde for disc brakes and independent suspension.

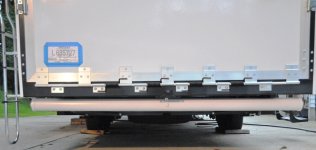
Found a sewer hose tube at RV Surplus, nice and long enough to have both my main hose and an extension in here

Blog edit
 

Attachments

  • Hose_tube_00_small.jpg
    Hose_tube_00_small.jpg
    303.4 KB · Views: 2,731
Last edited:
porthole

Retired
Ladder

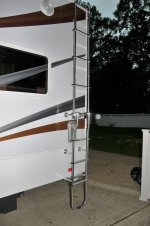
The ladder for these trailers is just a bit long. It is long enough that it doesn't fit on the bunks.

I found a bunk ladder at RV Surplus and adapted it to the Cyclone ladder.
Now I have two short ladders.
 

Attachments

  • Ladder_01_small.jpg
    Ladder_01_small.jpg
    281.8 KB · Views: 1,823

porthole

Retired
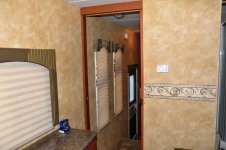
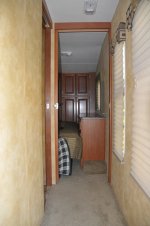
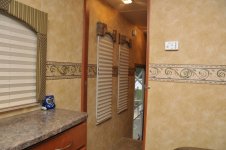
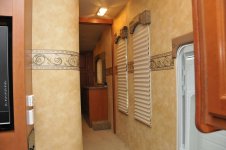
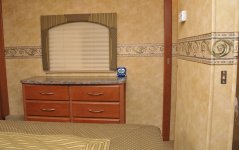
Chair rail wallpaper border trim

I got some extra border while in Elkhart. Didn't like the way the hallway and bedroom looked with the lack of trim.

Added another pic tonight.
 

Attachments

  • Cyclone_int_09_small.jpg
    Cyclone_int_09_small.jpg
    434.9 KB · Views: 1,728
  • Cyclone_int_36_small.jpg
    Cyclone_int_36_small.jpg
    362 KB · Views: 1,591
  • Cyclone_int_48_small.jpg
    Cyclone_int_48_small.jpg
    443.8 KB · Views: 1,518
  • Cyclone_int_49_small.jpg
    Cyclone_int_49_small.jpg
    382.2 KB · Views: 1,419
  • Cyclone_int_46_small.jpg
    Cyclone_int_46_small.jpg
    437.8 KB · Views: 1,388
Last edited:
porthole

Retired
Mark
I've looked at your pictures before and again today. The border is self stick and very easy to work with.

I like the way it came out well enough that I will be getting more for the garage. The garage is already finished in the same wall and cabinet used in the coach, they are no longer "white washed".

I see we think along the same lines :D.

I am trying to get a price on window valances made up for the garage to continue the trim.
They are not standard though. The size I need is what is in the bedroom, but the bedroom trim is different fabric.

I plan on adding the side piece to my narrow side windows in the hallway too.

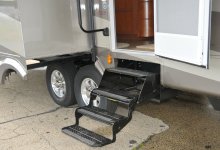
I also noticed your comment on the new style steps in your album.
I plan on adding the 4 step setup for ours, make it easier for my wife to get in and out. Tried picking them up when I was in Indiana, even drove out to Lippert - but it turned out to be more then "just picking them up.

I looked - measured a 2010 Landmark (with that custom full body paint!).
They look like they are back to the older style steps. The radius steps look much better.

The step picture is a new as 07-24-09 Landmark
 

Attachments

  • 4_steps_01_small.jpg
    4_steps_01_small.jpg
    510 KB · Views: 1,603
Last edited:
Delaine and Lindy

Well-known member
The 4 steps are great, the Landmark we had did have the 4 steps it does make a huge difference in getting in and out. We will have the 4 steps on our next 5th wheel. GBY....
 

SilverRhino

Well-known member
Wall paper Border Trim

Really like your idea of adding the wall paper border......did you get this from HL? I would be very interested in getting some for our BC.
 

porthole

Retired
Really like your idea of adding the wall paper border......did you get this from HL? I would be very interested in getting some for our BC.

Yes, and it is self stick, so easy to do.
Didn't show pictures of it but I also wrapped it around to the bathroom.
Also considering adding it to the garage now.
 

porthole

Retired
Jensen remote

The Jensen remote won't work from the side door when listening to the radio outside.
So, I found a Jensen wired remote on eBay for $10.
Put it in the LPG door, that way in case I ever change my mind it will only be a door that needs replacing.
 

Attachments

  • Jensen_remote.jpg
    Jensen_remote.jpg
    114.7 KB · Views: 866

porthole

Retired
Fantastic fan in bath

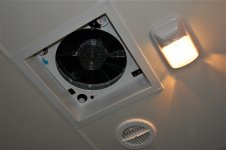
Found I liked the Fantastic Fans enough that I thought it would be great to get rid of the noisy vent/fan that came with the trailer.

Found this fan at RV Surplus in Elkhart.
BTW, if you ever get to Elkhart, make RV Surplus a stop :cool:

This fan is slightly different then the others supplied in the coach as it has a switch for the open/close and the thermostat control is right on the fan. It is also reversible. Perfect for the bath! Quiet too.


BTW - the deciding point on the fan was when I left the coach one afternoon and came back after some rain had gone through - 2 of the 3 vents were closed and there was a puddle in the bathroom ..............
 

Attachments

  • Fantastic_fan_bath.jpg
    Fantastic_fan_bath.jpg
    204.1 KB · Views: 722
Last edited:
porthole

Retired
Genset storage area

Saw something about this posted in another thread. This is what I did with my compartment.

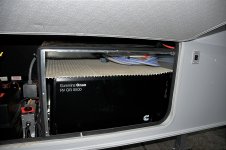
This is marine grade tile, mostly used for boat decks or compartments that get wet, allows air circulation. These tiles go for about $4 a square, so if I didn't happen to have a bunch of it in the basement from our "boat stuff" I'm not sure if I still would have done it - but maybe.

I put 6 interlocking squares on top of the genny and another 6 on top of the enclosure. Perfect place to store bulky, lightweight hoses and cables.
 

Attachments

  • Genset_storage.jpg
    Genset_storage.jpg
    283.2 KB · Views: 1,413

porthole

Retired
Basement water heater access

Don't understand why there would be an access hatch to get to the plugs for the converter and central vac but not the water heater bypass, winterizing hose and a visual on the water pump (leak check)

So I added a 4" port. I also took the winterizing hose and snaked it down behind the UDC and coiled up the hose between the bottom of the UDC and the bottom of the trailer, between the two access ports.
 

Attachments

  • Basement_access_01.jpg
    Basement_access_01.jpg
    223.6 KB · Views: 1,264
  • Basement_access_03.jpg
    Basement_access_03.jpg
    266 KB · Views: 1,222

porthole

Retired
Reflective door stripe

Until I get a chance to add some lights on the trailer I added this reflective 3M stripe. Found it at the more "retail" RV Surplus in Elkhart.
 

Attachments

  • Door_refective_stripe.jpg
    Door_refective_stripe.jpg
    223.7 KB · Views: 690
Last edited:
porthole

Retired
Sewer discharge gate

I like having a gate on the end of the pipe, especially since one of my grey tank valves leaks :confused:

I thought about just cutting the end off and gluing on a new gate because I was concerned about the twist on units just falling off. Others on the site have said they have never lost one.

So I added the twist on but then wrapped in in "Rescue Tape". If you haven't seen this stuff look for it a RV, boat shows etc. It is a self bonding silicone tape used for repairs. Great for a leaking pipe-hose etc.

This stuff should keep my valve on. And if the valve has to come off the tape can be easily cut off.
 

Attachments

  • Sewer_gate.jpg
    Sewer_gate.jpg
    245.4 KB · Views: 1,304

porthole

Retired
Kitchen outlet

Our coffee pot pretty much stays plugged in all the time.
The kitchen outlet is in a bad spot, right in the work area.
Since these are laminated wall constructed coaches it makes adding outlets a little more of a challenge.

Anyway, while having a few minor issues taken care of at the plant the shop added an outlet near the wall.

it is my understanding that this is now a running change on the line (new location, not additional outlet).
I'll just use the original outlet now for a nightlight.
 

Attachments

  • Outlet_kitchen.jpg
    Outlet_kitchen.jpg
    273.2 KB · Views: 1,177

porthole

Retired
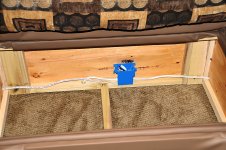
Dinette outlets

About my biggest peeve with the trailer is the lack of outlets on the ODS of the main living area.

It really was a hassle having to walk over or under my laptop charger wire everyday for the 9 days I was in Indiana. Which, BTW, was plugged into the outlet over the sink ..............

So a little searching and I found that Heartland was kind enough to leave a junction box under the slide out near the slide ram.
Not only did they leave a junction box but they filled it with a live 15 amp circuit.

:D Yeah, half the battle is done :D

I used marine grade Anchor brand cable. Anchor wire is finely stranded, silver tinned wire. Very flexible and great for damp locations or areas where the wire is subject to movement.

I ran the wire along the flex track, picked a location under the slide and drilled :eek:.

The spot I picked does not hit the seals on the outside and when the slide is closed the wire is not touching the main coach body.

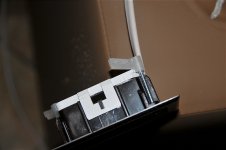
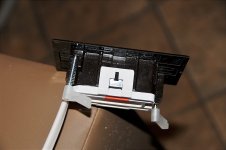
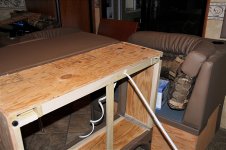
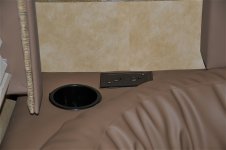
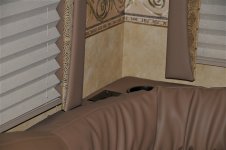
I pulled the dinette apart and as you can see by the pics the wires snake through the dinette to both sides.

I did it this way in case the dinette has to come out in the future. All I have to do is pull the wire out of the box and disconnect.

The tricky part was cutting into the top of the dinette :eek:

If you look at the "RV receptacles" I used you can see I had to "flip" the locking ears. The dinette where the cup holder is is over a inch thick!

We now have outlets at each end of the dinette for our laptops.

And, as an added Heartland bonus - the circuit is tied into the bathroom GFI circuit - so should a drink ever spill into the outlet .................... (not that "that" will ever happen).
 

Attachments

  • Outlet_slide_01.jpg
    Outlet_slide_01.jpg
    198.1 KB · Views: 1,169
  • Outlet_slide_12.jpg
    Outlet_slide_12.jpg
    385.6 KB · Views: 1,060
  • Outlet_slide_10.jpg
    Outlet_slide_10.jpg
    162.4 KB · Views: 970
  • Outlet_slide_09.jpg
    Outlet_slide_09.jpg
    218.8 KB · Views: 1,013
  • Outlet_slide_08.jpg
    Outlet_slide_08.jpg
    289.9 KB · Views: 1,037
  • Outlet_slide_06.jpg
    Outlet_slide_06.jpg
    452.4 KB · Views: 1,006
  • Outlet_slide_05b.jpg
    Outlet_slide_05b.jpg
    255.9 KB · Views: 1,045
  • Outlet_slide_04.jpg
    Outlet_slide_04.jpg
    141.2 KB · Views: 1,007
  • Outlet_slide_03.jpg
    Outlet_slide_03.jpg
    327.5 KB · Views: 1,066
  • Outlet_slide_02.jpg
    Outlet_slide_02.jpg
    286.6 KB · Views: 1,072
  • Outlet_slide_14.jpg
    Outlet_slide_14.jpg
    199.1 KB · Views: 1,083
  • Outlet_slide_15.jpg
    Outlet_slide_15.jpg
    213.8 KB · Views: 1,018

porthole

Retired
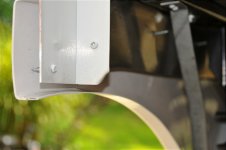
Slide out sharp edges

We all know well enough to watch our heads when walking around the slides - look in any campground to see the various "fixes" to prevent getting a few staples in your head.

The first time I crawled under the trailer to check out the sewer pipes and connection ............... while backing out I stood up too soon and hit the lower edge of the slide. I put a gash in my back about 3 inches longs and it made a mess :mad:.

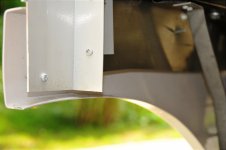
One of the first things I did at home was bend over the sharp edges
 

Attachments

  • Slide_sharp_edge_00.jpg
    Slide_sharp_edge_00.jpg
    151.5 KB · Views: 1,035
  • Slide_sharp_edge_02.jpg
    Slide_sharp_edge_02.jpg
    155.6 KB · Views: 1,001
Top