Levelup going Bonkers!

RoadJunkie

Well-known member
When we were setting up at the Jackson Rally, I hit the auto-level and the system went bonkers leaving wheels off of the ground and the rig looked like the Tower of Pisa. Using manual mode, I had a hard time getting it back to some degree of level because protection limits were engaged. I finally had to do a level reset, as if the coach were level, and could then move the levelers to get the rig leveled. I then, again, reset the unit to level and we were level for the remainder of the stay. On the way home we stopped for an overnight stay and I again hit the auto-level and the coach did not go to a level position, but at least the wheels didn't fly off of the ground. Front to back was ok, but side to side needed some help; doors were moving, etc. It was close, but not that close.

So, I called Lippert Tech Support and described my problem and the tech advised me that I "probably" needed a new $200.00 control module. Has anyone else had a similar problem? I have not done the standard remove connectors, clean and re-seat. Tech guy did not think this would help with this situation.
 

Gary521

Well-known member
Try removing the power from the controller for a few seconds and then plug the power back in. Then manually level the trailer and finally zero reset. The power is the single red wire on the controller.
 

cookie

Administrator
Staff member
Take a look up behind the Coroplast somewhere just ahead of the axles and look for a level sensor.
Be sure it did not come loose from its attachment.

Peace
Dave
 

Lou_and_Bette

Well-known member
Take a look up behind the Coroplast somewhere just ahead of the axles and look for a level sensor.
Be sure it did not come loose from its attachment.

Peace
Dave

My BH did the same as the OP, however, I kept manually resetting level and re-zeroing which would work for a time or two and then go crazy. As Dave suggested, my rear sensor had come loose and was laying on the coroplast. Smooth roads = OK, rough roads = reset. Returned sensor to original location and all was well. P.S. if I knew how to attach my thread on this repair I would...Search forum to find it.
 

RoadJunkie

Well-known member
Looks like I will be crawling under the rig and removing some coroplast to find and verify correct mounting of my sensor. I’ll try to post some pics. Thanks for the help.
 

Lou_and_Bette

Well-known member
Thanks for the assist Dave. Roadjunkie, you don’t need to drop the coroplast, I found my sensor by loosening along the side and, using a broom handle, pushed down the insulation enough to see the sensor laying there. The sensor sits on a small shelf area on one of the cross beams either in front or behind the water tank. The water tank is located by finding the over flow tubes on both sides of your rig. The cross beam is located by looking for screws in the center of the coroplast. My sensor was on the beam in front of the tank. Once located, I cut a 3 side flap (uncut side towards the front of the RV) through the insulation and exposed the correct position for the sensor. I used small nuts and bolts to secure so hopefully won’t fall off again. Not a tough job once you locate it. In your case, may not even be the problem. Good luck
 

RoadJunkie

Well-known member
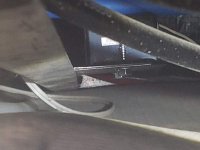
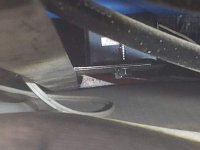
I removed three screws that support the Coroplast and was able to visually access the rear level-up sensor. The three screws I removed were on the door side of the rig behind the rear wheel. There is a cross member that runs about 27" behind the rear axle and one of the screws I removed supports the Coroplast at that point. The cross member is important as it supports a shelf to which the module is mounted. As Lou stated, it is necessary to get access to the top side of the insulation sheet to view the module. Unfortunately, or fortunately depending on your view, my module was anchored in a solid fashion and is probably not the problem. However, if I were going to cut an access flap, I would split the distance, on the open end of the flap, to center it on the cross member. This would allow you to install some type of flat material, e.g. 1" aluminum stock, to close the flap and support the Coroplast using a couple of small screws into the cross member. My sensor shelf was 34 1/2" from the edge of the Coroplast, as it fastens to the frame, to the shelf mount for the sensor. I estimate the sensor is about 4" long. The sensor shelf itself is mounted onto the cross member and extends towards the front side of the cross member, i.e. towards the front of the coach.

I was able to zoom in a get a closeup of the mounted sensor.


Sensor on Bighorn.jpg
 

Attachments

  • 20181003_090142.jpg
    20181003_090142.jpg
    50 KB · Views: 103

avvidclif

Well-known member
Did you clean the connector? Although supposedly waterproof mine had some in it. I cleaned it out and added electrical grease.
 

RoadJunkie

Well-known member
Water? Man, we're in the desert out here and would love to see some water. Maybe you can't see in the picture, but that area shows absolutely no sign of water penetration. Just dust. I don't want to cut the Coroplast and create a water entry potential if I don't have to. Just not convinced that's where the problem is...yet.

Actually, that is one question I had; Are there connectors on the modules or are the wires hard-wired in?
 

rcjar

Member
I have been having the same issues with my LCI leveling system on my Heartland Oakmont.. It would tip to the right side, and raise the wheels on the left side. I've had to manually level it the past two trips, but have never done a zero reset. Can someone explain that to me please? Thanks in advance.
 

cookie

Administrator
Staff member
In our Tools section, located in the tool bar above, you will find all kinds of useful information.
Here is a link to the area in the User Guide section that outlines the operation of the Lippert Level Up system. LINK
Once there scroll down and you will see Zero Setting the Control.

Peace
Dave
 

Geodude

Well-known member
I had something similar occur last year. I reinitialized the system several times to teach it "no, dummy, THIS is level". But to no avail. I did the full power-down, disconnect, etc., which also didn't work. Then I called Lippert and buddy said right off "oh, your hydraulic fluid is just slightly low" I didn't believe him but when I checked it was just ever so slightly low. Still didn't believe it. Topped up the system and it has been fine since...
 

rcjar

Member
In our Tools section, located in the tool bar above, you will find all kinds of useful information.
Here is a link to the area in the User Guide section that outlines the operation of the Lippert Level Up system. LINK
Once there scroll down and you will see Zero Setting the Control.

Peace
Dave


Thanks! I looked it up and found useful information and instructions in the manuals!

Ron

- - - Updated - - -

I had something similar occur last year. I reinitialized the system several times to teach it "no, dummy, THIS is level". But to no avail. I did the full power-down, disconnect, etc., which also didn't work. Then I called Lippert and buddy said right off "oh, your hydraulic fluid is just slightly low" I didn't believe him but when I checked it was just ever so slightly low. Still didn't believe it. Topped up the system and it has been fine since...

Thanks! I have done a zero reset now and will be going to Ventura Beach this weekend with the rig! I'll check the fluid out when up and retracted. Wouldn't think its that, but it worked for you so hopefully its that simple. Appreciate the input!

Ron
 

RoadJunkie

Well-known member
I did solve my issue by replacing the brain board. I’ve traveled and then leveled the rig 3 times now and all were successful.
 

NYSUPstater

Well-known member
The Level up is just like the DEF systems on trucks. When the work, they are the greatest thing. When they don't, biggest pieces of S***!.
 

rcjar

Member
On my last outing, I noticed a small leak in the left front cylinder. I went through my purchase paperwork and realized I had bought an extended warranty, which will cover the repair! Scheduled to take in for repairs in December. Hopefully that will take care of it. Thanks to all who responded, all good information for future use!
 

Oldelevatorman

Well-known member
On my last outing, I noticed a small leak in the left front cylinder. I went through my purchase paperwork and realized I had bought an extended warranty, which will cover the repair! Scheduled to take in for repairs in December. Hopefully that will take care of it. Thanks to all who responded, all good information for future use!

I just replaced mine after I had a leak in the same one. Heartland sent the new one as I’m still under warranty. Took about 1 1/2 hours start to finish!


Sent from my iPhone using Tapatalk
 
Top