Closet Flange

EPaulikonis

Well-known member
I have a 2015 Landmark Savannah with a damaged closet flange. Does anyone know if it's a glued ABS or a threaded piece?
 

JohnDar

Prolifically Gabby Member
Can you post a picture of what you are looking at ?

Sent from my SM-N950U using Tapatalk

That would be the toilet mounting flange. One would hope it's only screwed to the floor and not glued into the drain pipe. Not likely that the fitting is threaded, either.
 

EPaulikonis

Well-known member
Sorry, no pictures possible right now. I don't want to remove the toilet before I get the parts to fix it because I know the toilet flange is cracked in multiple places on the right front because I just did a band aid fix to get to my next spot. We'd seen some water on the floor and found it had run under the rubber o-ring seal, through the crack in the toilet flange, and was creating a small puddle on the floor. Luckily it was small and easily cleaned up with little mess. I have it sealed up for now, so I don't want to disturb the piece until I can fix it permanent.

I did put a call into Heartland on the issue. Parts is going to provide me the parts numbers for both the toilet flange and the rubber o-ring that seals the toilet to the floor. It's supposedly a slip collar joint that allows the toilet flange section to just slide into the affixed ABS pipe leading to the black tank. I'd tried to pull up on the flange when I had the toilet removed, but it didn't want to come and I didn't want to damage the tank. At least I now know it's supposed to slide up and no glue or other material was used to fuse the toilet flange to the down pipe.

I'll be sure to post some pics of the repair for the group's use.
 

wdk450

Well-known member
On one of Canadian contractor Mike Holmes's shows, I saw the plumbing subcontractor use a "toilet flange repair kit". You might want to research this on the internet, or ask at your hardware/home improvement store.
 

SLO

Well-known member
The toilet flange is, absolutely, glued to the ABS pipe leading to the black tank. The flange is then screwed to the floor. This keeps the toilet from moving when it is attached to the flange via toilet bolts. The best was to replace the flange is cut the pipe, if it is accessible, behind basement wall. Get a new piece of 3” ABS pipe. Glue new flange to new pipe. Attach new pipe to existing pipe with no-hub coupler. You’ll only going to need maybe 6” to 8” of new pipe. Screw new flange to floor. There’s nothing special about RV toilet flanges. They use the same flange as in your home


Sent from my iPad using Tapatalk
 

EPaulikonis

Well-known member
Thanks for some of your thoughts. As I mentioned, I'm on a short pause until I get some more information from Heartland.

I have seen a few videos and other posts talking about "RV toilet flange" removal. One in particular at https://thecampingadvisor.com/change-rv-toilet-flange/#tab-con-8 indicated that the flange could be either screwed on, or glued on. That gave me pause and is exactly why I went directly to Heartland for an answer for my specific coach.

The folks at Heartland, Dan actually, is the helpdesk technician who said it was a "no-slip" application that isn't glued or screwed into position. I'm still waiting for Heartland parts to provide part numbers so I can get a look at what the toilet flange actually looks like all by itself.

I'll be sure to follow-up on this post once I get the parts and work the fix. My temporary patch is working for now, so I'll nurse it until I get into SC for the winter and have more time to work on it.
 

EPaulikonis

Well-known member
I have a feeling this is exactly what I'll be doing before it's all said and done. I tried, unsuccessfully, to move the flange when I had the toilet up originally. It didn't budge. I can't imagine what I'll see when Heartland provides the part info. Regardless, I'm fairly sure I can access the pipe from behind the basement wall. I'll have to take some time to untangle and secure the spaghetti mess of wiring Heartland just stuffed in that space.

If I do have to cut the ABS and put something new in, I will probably take some time to research if using a threaded toilet flange makes more sense. I know they exist for non-pressurized applications, so it should make any future toilet flange repairs easier. I've found several options at etrailer and even local Lowes and Home Depot. Then I could buy a threaded hub to cement onto the cut pipe to put it all back in place.

The toilet flange is, absolutely, glued to the ABS pipe leading to the black tank. The flange is then screwed to the floor. This keeps the toilet from moving when it is attached to the flange via toilet bolts. The best was to replace the flange is cut the pipe, if it is accessible, behind basement wall. Get a new piece of 3” ABS pipe. Glue new flange to new pipe. Attach new pipe to existing pipe with no-hub coupler. You’ll only going to need maybe 6” to 8” of new pipe. Screw new flange to floor. There’s nothing special about RV toilet flanges. They use the same flange as in your home


Sent from my iPad using Tapatalk
 

hoefler

Well-known member
I have used all of these at one time or another

https://www.lowes.com/pd/Keeney-Met...VRb7ACh2xlAaIEAQYCyABEgKsF_D_BwE&gclsrc=aw.ds

038753427775.jpg


https://www.lowes.com/pd/Superior-T...VRb7ACh2xlAaIEAQYByABEgJXSPD_BwE&gclsrc=aw.ds

017197210150.jpg


https://www.lowes.com/pd/Keeney-Met...VRb7ACh2xlAaIEAQYCyABEgKsF_D_BwE&gclsrc=aw.ds

046224049258.jpg
 

david-steph2018

Well-known member
I have a 2015 Landmark Savannah with a damaged closet flange. Does anyone know if it's a glued ABS or a threaded piece?

It is glued. We just replaced the one in the front bath at the end of June this year. The black pipe in the basement had to be cut, install a joint then a piece of black pipe cut off from the piece that was took out, then a new 45 elbow, then piece of pipe from black pipe and then the new flange. Took less than a hour total.
 

ORV1980

Sherman
It is glued. We just replaced the one in the front bath at the end of June this year. The black pipe in the basement had to be cut, install a joint then a piece of black pipe cut off from the piece that was took out, then a new 45 elbow, then piece of pipe from black pipe and then the new flange. Took less than a hour total.

I had to replace the toilet flange on our front toilet about a month ago also. I found pretty much the same thing David did. I had previously tried a repair flange that slides into the pipe with a rubber seal and tightens down. That only lasted for a month and the toilet was wobbly again.

The main problem with mine was the toilet was installed by the same drunk monkeys that installed the wiring in ParkIt's rig. (See basement wall question thread). Actually I am pretty sure my whole rig was built by drunken monkeys and their cousins, but i wont go into that now.
The flange was glued to the pipe bellow crooked, so they tried to pull it straight by over tightening the screws which just destroyed the floor board.
After removing the basement wall, access to the pipe was easy.

I took a picture of the pipe and went to the local plumbing supply to get the parts i needed. The parts are also available at the large building supply stores, i am sure much cheaper than buying from Heartland.

I cut the pipe down low to give myself plenty of room to work.
The flange assembly i purchased has a metal flange for the closet bolts to attach to. Since the floor was not solid i purchased 4" stainless bolts that go through the flange all the way through the floor. I also put a metal repair flange underneath to give more strength.

I then glued the pipe pieces in place. I also installed a cleanout in the pipe, a hold over from doing commercial building plumbing i guess.
The toilet was unstable when we got the rig new, but now it is solid.

The connection into the top of the tank is rubber to accommodate flexing as you go down the road.

Hope this helps.
Sherman
 

noemer

Member
I had to replace the toilet flange on our front toilet about a month ago also. I found pretty much the same thing David did. I had previously tried a repair flange that slides into the pipe with a rubber seal and tightens down. That only lasted for a month and the toilet was wobbly again.

The main problem with mine was the toilet was installed by the same drunk monkeys that installed the wiring in ParkIt's rig. (See basement wall question thread). Actually I am pretty sure my whole rig was built by drunken monkeys and their cousins, but i wont go into that now.
The flange was glued to the pipe bellow crooked, so they tried to pull it straight by over tightening the screws which just destroyed the floor board.
After removing the basement wall, access to the pipe was easy.

I took a picture of the pipe and went to the local plumbing supply to get the parts i needed. The parts are also available at the large building supply stores, i am sure much cheaper than buying from Heartland.

I cut the pipe down low to give myself plenty of room to work.
The flange assembly i purchased has a metal flange for the closet bolts to attach to. Since the floor was not solid i purchased 4" stainless bolts that go through the flange all the way through the floor. I also put a metal repair flange underneath to give more strength.

I then glued the pipe pieces in place. I also installed a cleanout in the pipe, a hold over from doing commercial building plumbing i guess.
The toilet was unstable when we got the rig new, but now it is solid.

The connection into the top of the tank is rubber to accommodate flexing as you go down the road.

Hope this helps.
Sherman
I am quite relieved to find out I am not the only one who had drunken monkeys and their cousins assembling this RV. I show people pictures of stuff I have found and see jaws drop everytime. I texted a picture of my ceiling light wiring on my slide to a house builder friend of mine (they just left the pigtails dangle in the fiberglass insulation). He said "I don't believe that is code." I said well code is more like a suggestion when it comes to RV's.
 

wdk450

Well-known member
Doesn't following building "codes" imply that the work will be inspected by a government building inspector before occupancy is allowed? I'm afraid that there is no equivalent to the government building inspector for our housing unit vehicles (RV's) before human occupancy is allowed.
 

noemer

Member
That is why I said "suggestion." I would prefer common above all else. I see by these forums I am not the only one who has these issues. I gave Heartland the benefit of the doubt and didn't call my monkeys drunk. I said there must be a zoo near the RV plant, someone let the monkeys out and said "Hey, let's build an RV." When I bought an RV, I knew I would have to deal with "cheap" materials. I didn't know there would be issues of just pure laziness and incompetence.
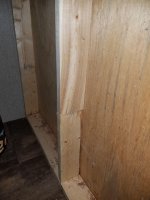
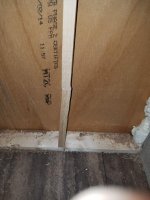
The first two pictures are of my pantry closet in my kitchen. In Heartland's defense I guess they never thought anyone would take the wall off.
The second is one is where my Tri-Glide shower was. I took it out and put a shower curtain in
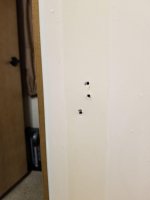
Three holes you are wondering, but here was one screw mounting it in. This is in four different spots on my Tri-Glide
This also happened in multiple other areas of my RV. My entry door has two screw holes for every one screw. Looks like they mounted it wrong and had re-mount it. Framing Pantry2.jpgFraming Pantry1.jpgShower.jpg
 

Attachments

  • Framing Pantry1.jpg
    Framing Pantry1.jpg
    175.4 KB · Views: 8
  • Framing Pantry2.jpg
    Framing Pantry2.jpg
    150.4 KB · Views: 9
Top