Loco
Well-known member
A lot of work to get it the way it should be from the factory and trouble fixes
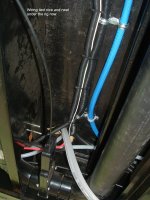
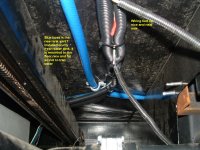
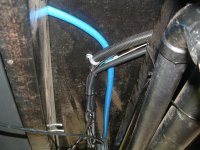
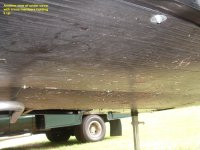
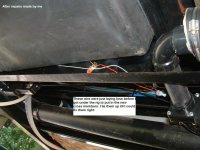
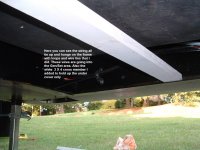
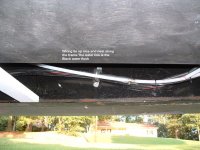
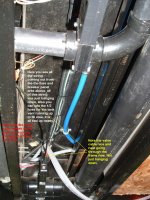
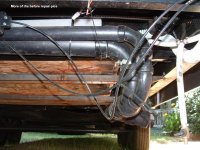
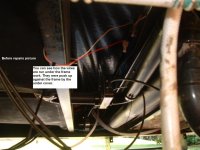
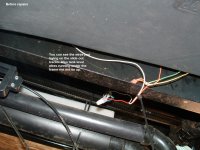
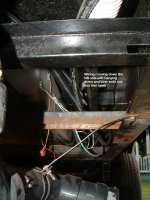
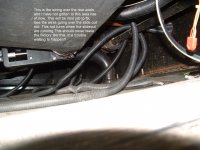
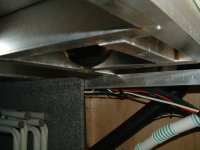
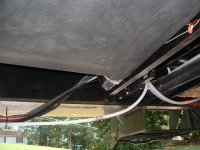
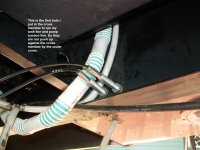
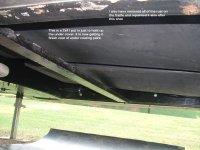
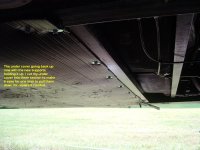
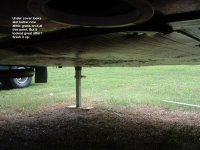
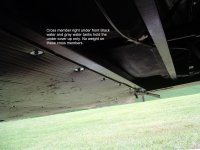
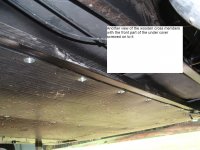
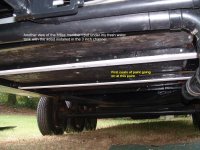
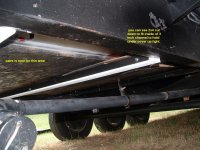
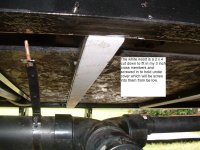
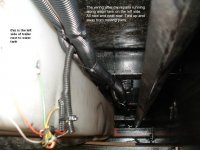
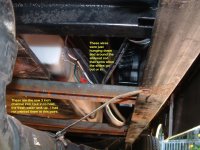
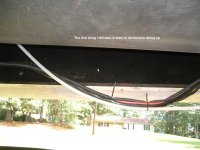
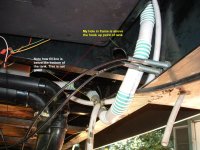
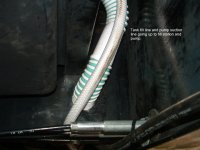
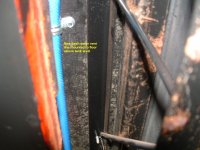
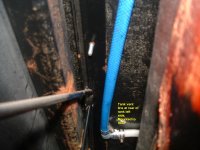
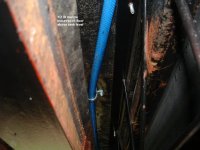
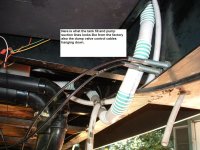
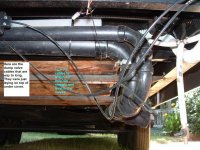
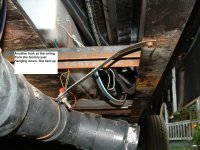
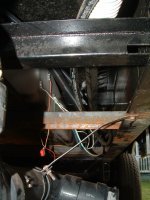
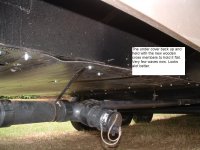
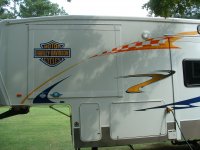
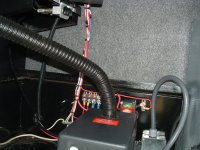
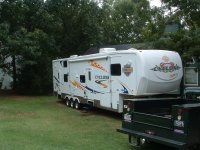
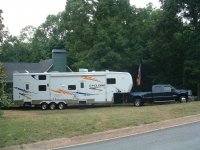
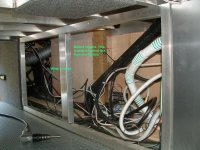
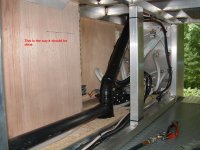
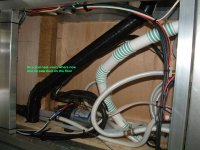
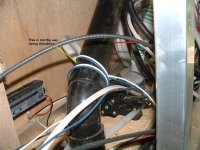
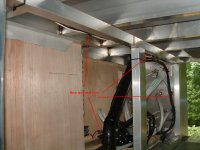
 Here are the before and after pictures of some of the repairs made to our 2007 3795 Cyclone if anyone would like to see them. These are water tank repairs and wiring repairs under the rig. Also the tank vent fix and the under cover fix. So far all the work on my rig has taken me about 48 hours of labor time. I should not have to do this on a new rig but I want it right and the only way I will get that is to do it myself. Just because I did this to my rig does not mean someone else with a Cyclone needs to do this. But I know I will not lose out on a rally or camping trip with with my family because the rig is in the shop. I still have alot to fix to bring it up to my standards. Like I told my dealer when he ask if I wanted to trade it in on a new Jayco that they now sell. I said no way my Cyclone is better built now after I spent all this time on it than anything else I could buy now. No I was not happy about the way it was wired and many other things about it after I got it, but it is well on the way to being the best one on the road now. So far we have made ever trip and put 11,000 HARD miles on it the first summer of use. I am also hoping that Heartland is making things better on the new rigs because of the pictures of my fixes I sent to them of my repairs. I also hope these will help some of the other owners of the older Cyclones
Here are the before and after pictures of some of the repairs made to our 2007 3795 Cyclone if anyone would like to see them. These are water tank repairs and wiring repairs under the rig. Also the tank vent fix and the under cover fix. So far all the work on my rig has taken me about 48 hours of labor time. I should not have to do this on a new rig but I want it right and the only way I will get that is to do it myself. Just because I did this to my rig does not mean someone else with a Cyclone needs to do this. But I know I will not lose out on a rally or camping trip with with my family because the rig is in the shop. I still have alot to fix to bring it up to my standards. Like I told my dealer when he ask if I wanted to trade it in on a new Jayco that they now sell. I said no way my Cyclone is better built now after I spent all this time on it than anything else I could buy now. No I was not happy about the way it was wired and many other things about it after I got it, but it is well on the way to being the best one on the road now. So far we have made ever trip and put 11,000 HARD miles on it the first summer of use. I am also hoping that Heartland is making things better on the new rigs because of the pictures of my fixes I sent to them of my repairs. I also hope these will help some of the other owners of the older CyclonesAttachments
-
 after rebuild 015.jpg225.7 KB · Views: 107
 -
 after rebuild 016.jpg240.7 KB · Views: 88
 -
 after rebuild 020.jpg221.5 KB · Views: 85
 -
 after rebuild 021.jpg308.6 KB · Views: 75
 -
 after rebuild 022.jpg175.7 KB · Views: 87
 -
 After repairs 009.jpg205 KB · Views: 81
 -
 After repairs 010.jpg173.4 KB · Views: 92
 -
 after repairs 011.jpg252.3 KB · Views: 76
 -
 After repairs 012.jpg267.2 KB · Views: 76
 -
 before rebuild 046.jpg222.7 KB · Views: 84
 -
 Before rebuild 006.jpg128.1 KB · Views: 66
 -
 before rebuild 007.jpg172.1 KB · Views: 59
 -
 before rebuild 013.jpg206.4 KB · Views: 57
 -
 Before repairs 032.jpg179.4 KB · Views: 63
 -
 camperfdic 001.jpg366.2 KB · Views: 48
 -
 during rebuild 003.jpg310.5 KB · Views: 50
 -
 during rebuild 008.jpg166.5 KB · Views: 51
 -
 during rebuild 017.jpg169.9 KB · Views: 50
 -
 during rebuild 018.jpg163 KB · Views: 52
 -
 during rebuild 019.jpg255.3 KB · Views: 45
 -
 during rebuild 023.jpg175.7 KB · Views: 43
 -
 during rebuild 024.jpg215.5 KB · Views: 43
 -
 during rebuild 026.jpg251.7 KB · Views: 50
 -
 during rebuild 027.jpg241.6 KB · Views: 45
 -
 during rebuild 028.jpg210.4 KB · Views: 51
 -
 during rebuild 029.jpg164 KB · Views: 52
 -
 New tank supports 005.jpg176.7 KB · Views: 53
 -
 rear of water tank 036.jpg153.5 KB · Views: 43
 -
 start of repairs 004.jpg167.6 KB · Views: 42
 -
 Tank fill line 045.jpg213.9 KB · Views: 51
 -
 Tank fill line moved 050.jpg141.5 KB · Views: 50
 -
 Tank vent rebuild 033.jpg142.7 KB · Views: 45
 -
 tank vent rebuild 034.jpg139.5 KB · Views: 48
 -
 tank vent rebuild 035.jpg141.5 KB · Views: 42
 -
 trailer rebuild 001.jpg211 KB · Views: 52
 -
 trailer rebuild 002.jpg231.4 KB · Views: 61
 -
 trailer rebuild 014.jpg225.7 KB · Views: 47
 -
 trailer rebuild 048.jpg309.8 KB · Views: 41
 -
 trailer rebuild 049.jpg313.8 KB · Views: 45
 -
 trailer rebuild 051.jpg181.1 KB · Views: 55
 -
 trailer rebuild 052.jpg197.1 KB · Views: 68
 -
 under cover front 037.jpg223.9 KB · Views: 56
 -
 under cover rebuild 038.jpg229.1 KB · Views: 56
 -
 under cover rebuild 040.jpg239.2 KB · Views: 78
 -
 Harley bar & shield 041.jpg335.9 KB · Views: 63
 -
 camperfdic 035.jpg319.1 KB · Views: 63
 -
 trailer rebuild 043.jpg591.5 KB · Views: 72
 -
 camperfdic 006.jpg316.1 KB · Views: 88
 -
 camperfdic 036.jpg236.6 KB · Views: 78
 -
 camperfdic 038.jpg189.6 KB · Views: 70
 -
 camperfdic 040.jpg199.6 KB · Views: 77
 -
 camperfdic 037.jpg244.2 KB · Views: 64
 -
 camperfdic 043.jpg310.9 KB · Views: 71
 -
 camperfdic 039.jpg153.5 KB · Views: 77
Last edited: