Been working on the rig since delivery date of Feb 28. I've attached some photo's of the improvements that i made. Perhaps a little extreme. 
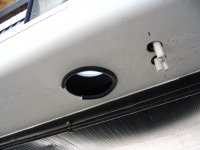
1. Docking station access hole looking from the bottom up. Covered the exposed edge with wire loom so as to not cut my hand when routing water / cable/ phone connections.
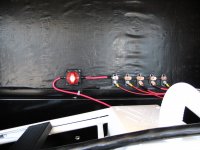
2. Battery cut off switch. No explanation needed.
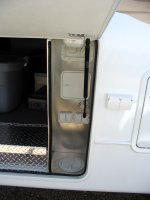
3. Docking station closeout edge. Covered the vertical edge with same diameter wire loom and removed soap dispenser. Now have addtl room for making necessary connections without scraping my arms.
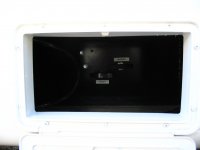
4. Dump valve identification.
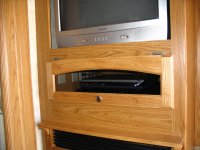
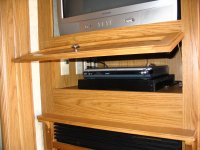
5 & 6. Entertainment Cntr. Built 16x16 stand so that CD / DVD player is positioned so that I can see it with the cabinet door closed. Also better line of sight for the remote control when operating. Painted it black to match the player.
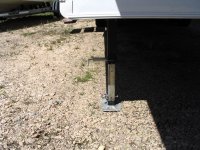
7 & 8. Front landing gear legs. Installed eye bolts for easy retracting. Actually utilized bed stake pocket tie downs Perfect fit with zero investment.
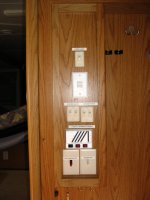
9. Service panel switch identification labels. I know a little extreme but will help others who may enter the trailer and need to turn on a light.
I am done for now and will start to enjoy the rig without re-engineering it.
1. Docking station access hole looking from the bottom up. Covered the exposed edge with wire loom so as to not cut my hand when routing water / cable/ phone connections.
2. Battery cut off switch. No explanation needed.
3. Docking station closeout edge. Covered the vertical edge with same diameter wire loom and removed soap dispenser. Now have addtl room for making necessary connections without scraping my arms.
4. Dump valve identification.
5 & 6. Entertainment Cntr. Built 16x16 stand so that CD / DVD player is positioned so that I can see it with the cabinet door closed. Also better line of sight for the remote control when operating. Painted it black to match the player.
7 & 8. Front landing gear legs. Installed eye bolts for easy retracting. Actually utilized bed stake pocket tie downs Perfect fit with zero investment.
9. Service panel switch identification labels. I know a little extreme but will help others who may enter the trailer and need to turn on a light.
I am done for now and will start to enjoy the rig without re-engineering it.
Attachments
-
 Access Hol1.JPG187.6 KB · Views: 59
 -
 Batt swtc.JPG245.7 KB · Views: 61
 -
 Doc Stat.JPG173.5 KB · Views: 61
 -
 Dump vlv.JPG91.2 KB · Views: 51
 -
 Ent 1.JPG247.1 KB · Views: 46
 -
 Ent 2.JPG265.7 KB · Views: 47
 -
 Lt leg.JPG481.7 KB · Views: 57
 -
 Rt leg.JPG380.3 KB · Views: 52
 -
 Ser Pnl.JPG426.5 KB · Views: 57
 -
 1 Jacking up slide.jpg44.6 KB · Views: 0
 -
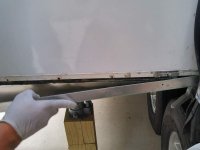
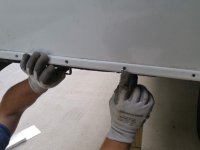 2. Remove Lower trim.jpg50.7 KB · Views: 0
 -
 3 Dry Fit.jpg72.2 KB · Views: 0
 -
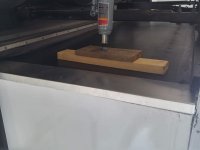
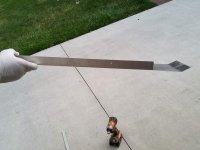
 3 Where to bend the Aluminum (see black mark).jpg114.7 KB · Views: 0
 -
 4 Drive fit 2.jpg53.5 KB · Views: 0
 -
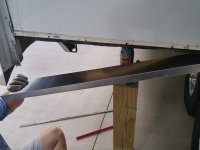
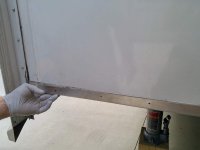
 5 Match up lower trim.jpg47.6 KB · Views: 0
 -
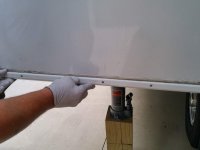
 7 Put Lower trim back on.jpg59.5 KB · Views: 0
 -
 8 Reposition the jack under aluminum.jpg46.6 KB · Views: 0
 -
 Bend made, Holes drilled.jpg97.6 KB · Views: 0