Bighorn 3570RS Mods

Alan_B

Well-known member
I have been making a few modifications to our Bighorn 3570RS so I thought I would share them here.

The first big mod was replacing the king bed with a queen. We wanted more walk-around space in the bedroom and we were used to the queen sized bed at home. We also wanted to upgrade the mattress.

The original king bed, taking up a lot of room:
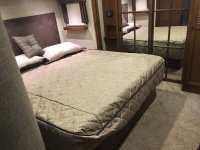
Before_King_Bed_1.jpgBefore_King_Bed_2.jpg

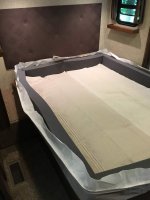
Cutting down the platform and building the new Sleep Number mattress. We did not modify the storage box underneath. There was sufficient toe space as it was.
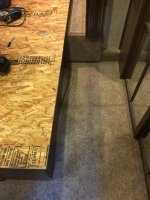
Cutting_Down_The_Platform.jpgAssembling_The_Queen.jpg

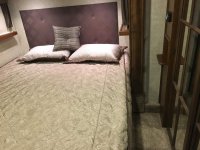
The new queen bed. It is a bit hard to judge from the photos due to the big fluffy bedspread, but there is noticeably more room in the bedroom.
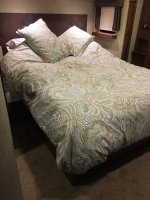
After_Queen_1.jpgAfter_Queen_2.jpg

We are both very happy with the result.

And here is a simple outdoor modification. The 7-pin cord on the fifth wheel was bad, so I replaced it with a 12' coiled cable and added a plug holder. I did not go full jesstalkn, perhaps I will add the junction box later.
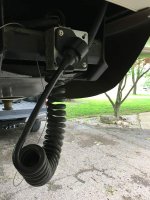
7_pin_Cord.jpg

One last item today, I added the Furrion observation camera:
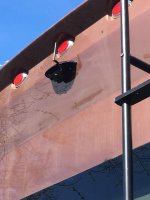
Camera.jpg

I have done a few other (hopefully) interesting things so I will post more later.
 

Oregon_Camper

Well-known member
Nice work. :)

Weren't you surprised at how easy the Furrion installation was? Think it was all of 20-25 mins to do mine. Now that I have done one, I think I can get it down to 10 mins. :)
 
Last edited:

CoveredWagon

Well-known member
Nice work. :)

Weren't you surprised at how easy the Furrion installation was? Think it was all of 20-25 mins to do mine. Know that I have done one, I think I can get it down to 10 mins. :)

I love how easy the camera install was,,,,,, BUT on our 2018 3270rs it's hot all the time. Now I've got to spend an hour or two (probably) to install a relay somewhere. ☹️
 

Alan_B

Well-known member
I love how easy the camera install was,,,,,, BUT on our 2018 3270rs it's hot all the time. Now I've got to spend an hour or two (probably) to install a relay somewhere. ☹️

The camera install was easy even without the camera prep setup on the fifth wheel. I wired the camera into the center marker light above so the camera has power when the marker lights are on.
 

Alan_B

Well-known member
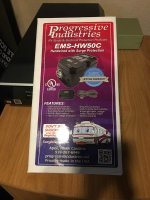
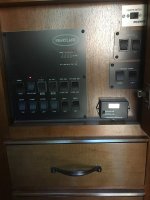
Our next modification was installation of an energy management system (surge protector). We went with the Progressive Industries EMS-HW50C, the hard wired 50 amp model.

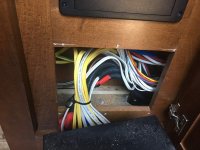
  1. The unit was mounted behind the circuit breaker panel in a small open space at the bottom of the cabinet.
  2. After removing the panel cover and pulling the breaker panel from the cabinet wall, I detached the main power cable (in) from the bottom left corner of the breaker panel (power off of course).
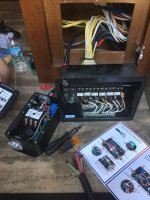
  3. Then I wired the main power cable to the input side of the surge protector.
  4. I used about 2½ ft. of 6 gauge 4 strand SO wire, attaching it to the output side of the surge protector.
  5. Then the surge protector went into the bottom of the cabinet. Don't forget to attach the data wire for the display first.
  6. The SO wire was then attached to the breaker panel.
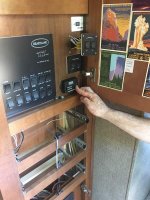
  7. Then we removed the shelves above the breaker cabinet and fished the data wire up to the control panel. It was zip-tied in place along the right side of the cabinet. After drilling one hole in the control panel for the wire we used double sided tape to mount the display.
  8. Then we put the breaker panel back and panel cover back in in place.

Overall the job was not too difficult. There is not much room to maneuver in the area but it was still nice having a second person assist.
 

Attachments

  • EMS6.jpg
    EMS6.jpg
    95.2 KB · Views: 358
  • EMS11.jpg
    EMS11.jpg
    107.8 KB · Views: 392
  • EMS2.jpg
    EMS2.jpg
    109.5 KB · Views: 382
  • EMS3.jpg
    EMS3.jpg
    137.1 KB · Views: 387
  • EMS4.jpg
    EMS4.jpg
    122.5 KB · Views: 377
  • EMS5.jpg
    EMS5.jpg
    88 KB · Views: 371

terribruce

retired Oregon Chapter Leaders
Hi Alan, nice job on the mods. We actually did the same thing with our King mattress. Modified it to a queen, so much more room
to get around the bed.

Looking forward to seeing the other mods you do.
Thank you for sharing.

Terri
 

Alan_B

Well-known member
Here is the latest modification.

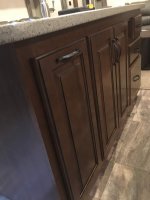
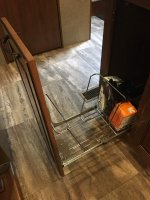
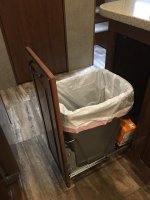
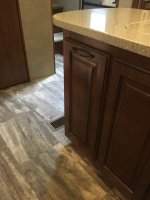
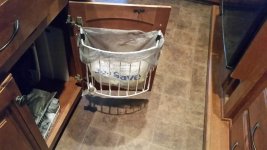
The trash can was inside an island cabinet, on the left side. The cabinet door hinged on the left. It was awkward to use the trash can from most angles, having to swing the door open and reach inside to deposit trash.

I removed the cabinet door and installed a pullout trash can holder (Home Depot link here). Then I attached the cabinet door to the front of the trash can holder, so it pulls straight in and out.

I also removed the cabinet knobs and replaced them with pulls. I removed 4 matching cabinet pulls from a dresser in the bedroom closet so that the island pulls would match the others in the kitchen. Then I replaced the bedroom dresser pulls with close (but not exact) matches from Home Depot.

The hardest part of the job was aligning the cabinet door mount to the holder so that it closed straight and flush.

One of the DWs favorite modifications.

Sorry, no "before" pictures.
 

Attachments

  • IMG_3014.jpg
    IMG_3014.jpg
    57.8 KB · Views: 310
  • IMG_3013.jpg
    IMG_3013.jpg
    109.9 KB · Views: 309
  • IMG_3012.jpg
    IMG_3012.jpg
    85.1 KB · Views: 294
  • IMG_3011.jpg
    IMG_3011.jpg
    76.1 KB · Views: 299

TravelTiger

Founding Texas-West Chapter Leaders-Retired
Here is the latest modification.

The trash can was inside an island cabinet, on the left side. The cabinet door hinged on the left. It was awkward to use the trash can from most angles, having to swing the door open and reach inside to deposit trash.

I removed the cabinet door and installed a pullout trash can holder (Home Depot link here). Then I attached the cabinet door to the front of the trash can holder, so it pulls straight in and out.

I also removed the cabinet knobs and replaced them with pulls. I removed 4 matching cabinet pulls from a dresser in the bedroom closet so that the island pulls would match the others in the kitchen. Then I replaced the bedroom dresser pulls with close (but not exact) matches from Home Depot.

The hardest part of the job was aligning the cabinet door mount to the holder so that it closed straight and flush.

One of the DWs favorite modifications.

Sorry, no "before" pictures.

Looks great!!


Sent from my iPhone using Tapatalk
 

violinini1

Active Member
I love how easy the camera install was,,,,,, BUT on our 2018 3270rs it's hot all the time. Now I've got to spend an hour or two (probably) to install a relay somewhere. ☹️


OR< you can connect it to the trailer lights and it will only be on when your headlights are on./
Don
 

CoveredWagon

Well-known member
OR< you can connect it to the trailer lights and it will only be on when your headlights are on./
Don

You certainly could, and many have. I just chose to install a relay. Jokes on me 😡 Remote turns it on from the truck but doesn't turn it off ? Huh ? Beasts me. It will turn it off about 1/2 way back to the Rv. That's ok because the intent was to leave it on while driving.
 

danemayer

Well-known member
You certainly could, and many have. I just chose to install a relay. Jokes on me 😡 Remote turns it on from the truck but doesn't turn it off ? Huh ? Beasts me. It will turn it off about 1/2 way back to the Rv. That's ok because the intent was to leave it on while driving.

Sounds like a latching relay. Maybe a non-latching relay would be a better choice.
 

CoveredWagon

Well-known member
Sounds like a latching relay. Maybe a non-latching relay would be a better choice.

It's just a cheapie relay from Amazon. It cycled on and off from a much greater distance before I installed it in the Rv. I stuffed it in a hole behind the camera then fed the antenna wire down the back wall and sealed things up. I bought the observation camera as opposed to a backup camera, so I don't have any problem leaving it on. The fob will turn off the really at a shortened distance. Why on and not off, who knows.
 

Nuclearcowboy

Well-known member
Here is the latest modification.

The trash can was inside an island cabinet, on the left side. The cabinet door hinged on the left. It was awkward to use the trash can from most angles, having to swing the door open and reach inside to deposit trash.

I removed the cabinet door and installed a pullout trash can holder (Home Depot link here). Then I attached the cabinet door to the front of the trash can holder, so it pulls straight in and out.

I also removed the cabinet knobs and replaced them with pulls. I removed 4 matching cabinet pulls from a dresser in the bedroom closet so that the island pulls would match the others in the kitchen. Then I replaced the bedroom dresser pulls with close (but not exact) matches from Home Depot.

The hardest part of the job was aligning the cabinet door mount to the holder so that it closed straight and flush.

One of the DWs favorite modifications.

Sorry, no "before" pictures.
Our pullout trash can was installed under the sink such that you had to open both doors in order for it to slide out. I had to reinstall the pull out holder one inch to the right so wife only had to open the right door for it to slide out. While it was an easy fix, these are the kinds of things that ought to be checked during construction.
 

TravelTiger

Founding Texas-West Chapter Leaders-Retired
Our pullout trash can was installed under the sink such that you had to open both doors in order for it to slide out. I had to reinstall the pull out holder one inch to the right so wife only had to open the right door for it to slide out. While it was an easy fix, these are the kinds of things that ought to be checked during construction.

I noticed that in a coach at the RV show. I looked and it was because of some plumbing in the way. I guess the plumbing was adjusted in your rig but no one told the trash can installer...


Sent from my iPhone using Tapatalk
 

CoveredWagon

Well-known member
I noticed that in a coach at the RV show. I looked and it was because of some plumbing in the way. I guess the plumbing was adjusted in your rig but no one told the trash can installer...
Sent from my iPhone using Tapatalk

Our 3270 is the same a Nuclearcowboy's. The plumbing is actually under the other side well most of it is,so clearance is not a problem. I guess they build in a manner that will work for as many models as possible. As soon as I get going this am I'm heading to Home Depot to fix it like AlanB did. I showed my wife pictures last night and now it's an immediate must &#55357;&#56881;
 
Last edited:

BobTheBuilder

Active Member
Here is a similar but simpler solution to the trash can coming out. It is a Grayline trash bag holder from Walmart for $15. Open the door and it comes out. It is smaller but we never let much kitchen trash accumulate before removing it. We also have a recycle can under there, root veggies, wine, dish strainer and cutting boards. I installed one of the motion sensor LEDs just above the doors and it makes a huge difference in seeing what you need.20170720_063910.jpg
 
Top