2011 Edge M18 Leak in front storage compartment

dq72

Member
Hi folks,
I have a 2011 Heartland Edge M18 with water issues in the front storage compartment area that I recently noticed and am looking for any other user experiences with this.
Issue: Front (right side - the side with the large storage access door) directly in front of the door the lino is discolored (thus obviously wet at some point) however the floor is still solid. Front (left side - side with the smaller access door and hot water tank, slide-out) there is no discoloration, but I was testing the floor and it definitely seems soft right in front of the storage door in a small hand-side area.
There has never been any issue with water on top of the floor at all. However, there is a gap all around the underbelly corrugated cover, and shining a flashlight up there it definitely looks like its wet. I checked underneath again during the last rain, and on the slide-out side (left side) looking up underneath it with a flashlight, and in between the storage door and water heater and directly against the inside of the outer wall, it was wet enough to form a droplet.
There are no sagging areas in the underbelly, and I've driven in the rain a few times, the last time this past September.

Thus far, over the last month I've re-caulked the front and rear caps (top with dicor, and sides with proflex RV), both on the roof and down the sides. (it actually didn't look bad at all before though).
I definitely found a potential leak toward the top of the front right window (as when I lifted the window and inspected the rubber seal it was a gooey mess in around it) so I re-caulked around both front window seals. I'm quite confident that fixed one of the issues on the right side. However, on the left side (slide-out side), the front window looked just fine even before I touched it.
I also caulked around the right side of the rear perimeter of the water heater flange. It was caulked around the left side and top, but nothing previously on the right.
A couple of years back I also removed the trim over the wheel wells and caulked that seam that is well discussed in these threads. No more water in the inside through the wheel wells since.

TODO - Has anyone had issues with the storage doors themselves leaking, either wicking through the rivets, or replacing the seals? I'm thinking I should caulk the rivet heads to seal them, as water definitely sits on there all winter. Someone else also said to seal the hinge, but I don't understand how caulking over a hinge (which moves every time you open it) can provide any benefit. I do notice that water sits at the bottom front of the storage door compartment frame long after any rain. However there's no holes, screws or rivets there so I don't see how water could get in the wall.
What about the top orange lights? The rubber looks to be in good condition, but maybe if they leaked at all water could run down the front to the underbelly?
Since I have kept the right side slightly above level, I've not had any issues with water pooling on top of the slide, and the trough at the bottom of the slide (the upper portion of the bottom wall under the slide) is bone dry. I can't really see it well, but I can see atleast one screw in it, which seems like a horrible idea, as that is a place to collect water. Has anyone done any mods to that area around the slide out? For water that enters that plastic trough (upper portion of the bottom wall under the slide) how does it escape that area? I can't really see it very well.
Has anyone else with one of the Edge models had similar wetness in the front underbelly area, along the walls?
Any additional tips are appreciated!
 

dgoy

Member
I too have had the same thing happen on the right side of the front storage compartment. Although the lino has not become discolored, I have noticed that the wallpaper on the wall is wavy and loose from the plywood. An RV technician once told me if the wallpaper is wrinkled and the wood behind it is soft it maybe a water leak somewhere nearby. I believe this was water damage was caused from the right front clearance clearance light. It is located in front of the storage door. I have since re caulked the light fixture. Not sure if this is the cause and will keep you posted if there is any more damage in the future. In my opinion you have done the proper caulking on the the trailer using the proper materials. Just as a precaution I would suggest that look at my entry on water leaks on the older Edge models https://heartlandowners.org/showthread.php/61913-Window-Water-Leak. I hope this link works for you. If not let me know.
Also I don't know if your trailer was equipped with rain gutters. My M18 was not and have installed after market gutters from http://www.trimlok.com/prod/Drip-Rail/Plastic-Trim/All-Product-Categories_141/Drip-Rail_67.aspx as I had experienced a little amount of water entering under the side to the interior. Beside installing the gutters at the roof line, I have placed a strip above the slide out and have not experienced any water entering the cabin after that. Also the black streaks have been reduced. Hope this helps.
 

dq72

Member
Hello dgoy, thank you for the excellent information.
When you mention the right front clearance light, do you mean one of the 3 orange LED lights at the very top front of the trailer? Mine has 3 (one at each side and one in the middle) and they are in-set in rubber housings at the top of the front cap. Did you simply caulk around the rubber to insure its sealed off?
Mine did come with a rain gutter above the slide-out, but no where else. I may look into running one along the entire roof line on both sides too. Sounds like a great idea. Do you have any pictures of your camper showing the placement?
This is the first I've heard anyone mention the end caps on the rail above the window. I'm going to check mine out too, and likely copy your idea "I have improvised by sandwiching white silicon caulking between the trailer wall and the cap. Also the caulking was injected into the screw hole."
I've completed nearly everything else, and yesterday following a good rain I crawled underneath the camper, and again saw drips directly up against the inside of the (slide-out side) and in-line with the front storage compartment area.
Does your M18 also have a small gap all around the edge of the black rain guard and the edge of the camper? I checked out a bunch of new ones this weekend, and most other models seem to have it sealed right off, whereas I have maybe 1/4 inch or so all around both sides. When I'm not driving I guess it shouldn't matter, (and in this case allows me to see moisture up alongside the wall).
 

dgoy

Member
The light I was referring to was the lower right front clearance light directly to the right of the storage door and not one on the cap. I didn't caulk the lights on the cap as I didn't think it was necessary. From what I understand those lights are mounted on the cap and not on the body of the trailer. During the build, the factory uses a water proof membrane on the front of the body and then the cap is mounted. See http://www.youtube.com/watch?v=2_FbcaQta74 I think there is a space between the body and the cap. If those lights leak it should not enter the body but drip through the cavity onto the ground. The only way it could leak into the body is that the membrane was not sealed properly during the build. Maybe you could phone Heartland to confirm if my theory is right. But on the other hand if the membrane is leaking, maybe a person could caulk the lights on the cap.
As the trailer is in storage, I can't send you pictures of the complete set up on the gutters, but this is a partial picture. gutter.jpg
In your question Does your M18 also have a small gap all around the edge of the black rain guard and the edge of the camper? I checked out a bunch of new ones this weekend, and most other models seem to have it sealed right off, whereas I have maybe 1/4 inch or so all around both sides. I assume you were referring to the slide out seal. On mine I have not noticed it. Maybe the seal is getting stiff or dry. A rubber conditioner such as "Slide out Rubber Seal Treatment" may help. Some people use baby powder. See http://www.youtube.com/watch?v=X701hbSO_ko .
Hope this helps.
 
Last edited:

dq72

Member
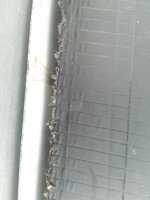
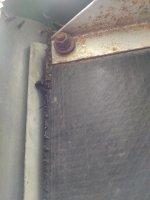
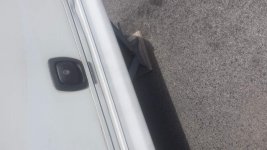
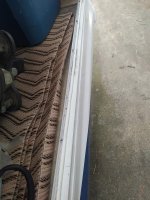
I finally got a picture of the problem area I'm struggling with. The gap I was referring to is looking up underneath the camper, and in between the black underbelly guard and the tin flashing. Its hard to see in this little picture, but on the first one (about 1/3 of the way down) there is a visible path (rust colored) where droplets form. After it rains, I can shine a light in that crack and see the edge of the wood is wet, and enough so that it will develop a water droplet on the tin. The problem area is on the slide-out side, and under the front storage compartment door. I don't get any water inside on top of the floor, but rather its looking up from underneath that I can see the issue. The only thing I haven't re-caulked are the screws along the top of the camper, but that's next. I even taped plastic all around the front storage doors and sealed them off (just to try and narrow it down) and the problem was still present. If its not coming in from those upper screws it must be an issue around the slide-out, with water somehow getting inside the wall in that area.
When I store it, I have it level front to back, and just slightly leaning down towards the slid-out side, so water won't come in the slide. Unrelated, but interestingly, I also found that the nut on the bolt (in the second picture) at the front of the camper wasn't ever tightened. Which makes me wonder what else was missed from day one.

EdgeM18Drip.jpgEdgeM18UnderneathFront.jpg
 

dgoy

Member
I see you have still problems. One option is to pressurize the trailer and locate the leak by spraying a soap solution on all the joints. If there is a leak the area will bubble. This link describes this method better.
http://www.sealtechusa.com/media . It maybe is expensive to have it tested but will prevent your trailer from being ruined. This website also provides the locations of their testing centers.
 

Rgill

Member
I had a very similar problem with water intrusion in my M21. After a year of searching I discovered the source. Where the latches of the baggage doors latch into its frame there is a small plastic cup, this cup is to catch water from running down the latch and getting inside the wall. These cups were installed below the baggage door frames and the seal between the cup and frame had come loose allowing water to get inside the wall and migrate wherever.
My solution was to remove the baggage door and frame, remove the plastic cup and reinstall the cup under the latch plate above the door frame. This fix cured my problem.
Ray
 

dq72

Member
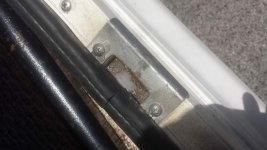
Thank you for the input Ray. I can't quite visualize the area (with the plastic cup) you've mentioned and wonder if the M18 has a different storage door configuration. I replaced the generic keyed locks with combi-cam locks about 5 years back. Both the previous, and these new ones don't latch 'into' the frame on mine, but simply twist the little flat bar (cam) on the back of the lock around around so its hugging the tin lip inside the storage compartment frame. There aren't any actual entry points or holes in the frame that I can see. I'll post a picture later to help clarify. The locks I got are like the ones on this site https://www.rvupgradestore.com/Combi-Cam-Cam-Locks-p/31-0007.htm
I'm leaning towards an issue with the slide-out. I just finished caulking down the side of the slide-out (on each side against the trailer) along the black weather stripping and the camper. It was done from the factory from the top and about 12 inches down, and then nothing the rest of the way. Next, I'm also considering a slide-out awning, hoping that will add a second level of protection just in case its from there.


I had a very similar problem with water intrusion in my M21. After a year of searching I discovered the source. Where the latches of the baggage doors latch into its frame there is a small plastic cup, this cup is to catch water from running down the latch and getting inside the wall. These cups were installed below the baggage door frames and the seal between the cup and frame had come loose allowing water to get inside the wall and migrate wherever.
My solution was to remove the baggage door and frame, remove the plastic cup and reinstall the cup under the latch plate above the door frame. This fix cured my problem.
Ray
 

Rgill

Member
I wasn't sure if the M18 and M21 baggage door latches were the same or not. I will include some pictures of how mine are.
Good luck.
Ray
20170530_140726.jpg
20170530_140703.jpg
 

dq72

Member
I wasn't sure if the M18 and M21 baggage door latches were the same or not. I will include some pictures of how mine are.
Good luck.
Ray

Oh yeah, I could see that. The M18 doesn't have quite as beefy of a lock. Mine is flat all the way astound, with no holes on the outside of the lip.
IMG_20170605_1844392.jpg
 
DG72:
I have the m18 edge. It has the exact leaking issues as your. Matter of fact I could had written your post verbatim. I am working my way through issues I am finding. I even climbed into compartment when flooding, I found that the water fill hose leaks when tank full and it burps. So I fixed that, but it not the issue.I believe it comes from the slide out because way to much water for screw hole or caulk issue.
Did you fix issue ?
 

dq72

Member
DG72:
I have the m18 edge. It has the exact leaking issues as your. Matter of fact I could had written your post verbatim. I am working my way through issues I am finding. I even climbed into compartment when flooding, I found that the water fill hose leaks when tank full and it burps. So I fixed that, but it not the issue.I believe it comes from the slide out because way to much water for screw hole or caulk issue.
Did you fix issue ?
Hello Sparky6619, Sorry I hadn't returned to the forum for quite a while. I've re-caulked all of the exterior joints, including all screws, vents, lights, windows, everything (except around the 3 lights at the top of the front cap).
The rainy season came again here in Victoria and I still have a HUGE problem with this thing. I bought a slide-out awning (just waiting for a sunny day to install it), but that is really the last thing, other than having the slide-out re-worked somehow.
The primary water issue is approximately a 3 foot by 2 foot area on the inside, slide-out side, in front of the wheel well and just in front of the (bed). I checked the hot water heater, and can't see any water entering around it. Water ends up on top of the floor, as well as under the floor between the layers. It's now discoloring.The second issue is at the front right of the camper under the storage compartment. I never have any water in the compartment, but rather in the underbelly layers themselves. As shown in an earlier picture I posted, it's looking up under the camper with a flashlight I see water droplets between the black membrane and inside edge of the camper, at the front. The inside walls and roof all look fine. However the floor itself is getting inundated with water between the layers. I still think its partly due to the channel UNDER the slideout. I could reach in and feel moisture in there, and along the bottom there are screws. I bet it runs into that channel, and then drains down around the screws and in through the last foot of the wall to the floor and underbelly. If so, that is a massive flaw. I haven't had any support from the dealer as of yet.

dg72: I finally fixed mine. It the exact same issue as you have. I replaced the D seal around the slide out. yours will be the same. It will be the front seal follow it from top to bottom you will see that they did not properly tuck the ends. Also when worn the seal becomes loose. water will drip at bottom of seal into the camper run under couch into storage and under water heater and puddle in front of storage door. Sometimes into cabin floor if camper tilted toward awning side. Mine fixed now
 

dq72

Member
dg72: I finally fixed mine. It the exact same issue as you have. I replaced the D seal around the slide out. yours will be the same. It will be the front seal follow it from top to bottom you will see that they did not properly tuck the ends. Also when worn the seal becomes loose. water will drip at bottom of seal into the camper run under couch into storage and under water heater and puddle in front of storage door. Sometimes into cabin floor if camper tilted toward awning side. Mine fixed now


Great, thank you for the update!
I'll replace the D Seal around mine too, in addition to installing the slide-out awning. Did you do it yourself? If so do you have any tips? Did you replace the bottom section under the slide-out? On mine, the bottom one looks a bit loose, however I don't know that I can replace it without removing the slide-out room from the camper.

dq:
I only replaced the exterior D seal. Not the interior seal. The seal under the slide out is easy to change. If yours like mine. It is a 2 piece seal
You more than likely do not need the bottom portion of the seal assembly. The top portion (D seal) slides into the lower section.
Yes i have a suggestion. There will be a upper and lower screw that holds the vertical D-seal in place to keep it from sliding out of the lower seal.
The lower seal is comprised of the wiper and a sloted groove for sliding D-seal into. I removed mine and used Black weatherstrip adhesive to re-install
the piece back on. I used Rubber gloves and Denatured Alcohol to clean back of lower seal and the trailer wall. I used thin rubber gloves to apply
the adhesive. I used a foam brush the same width as the seal to put it on both parts. Get several and its darn messy and you have to be quick to apply it
to the part or else it will smear and try to pull back off the partas you smear it along the path. Then i used new Stainless Steel screws
to attach the lower piece. Followed by sliding the D seal into the vertical positions first followed by the horizontal
and then attaching the ends of the D-Seal with Stainless Steelscrews and a small washer to resist pull through.
I almost forgot. I cleaned the lower seal wiper portion really good and applied pure silicoln luricant to ONLY the wiper portion. And then wiped it felt dry
. Dont get silicoln on the part you will place adhesive on or adhesive will fail. Also when placing screws into lower section, be mindful to
not overtighten as it causes the lower section to hump away from trailer wall and will leak.
It sounds complicated but it was easy. No need in paying for it to be done and if you do it you will know it was done the way you want it.
I bought my D-seal on Ebay. Got it quick but that stuff is expensive!!! they sell it by the foot so be sure to measure then add a couple feet
for mistakes becouse you not want to have to splice this stuff.
Okay now to stop a issue that does not help the water intrusion proplem, but maybe not a direct issue for you. Buy some gutter extension.
Place them onto gutter above slide out. They are a little plastic elbow that will divert the water (Especialy from the AC) from running around seal
and also splashing on the water heater door hinge. It helped me to get that possibility off the checklist.
Next Get some low expansion foam. pick the coach up enough to get access to the corner where the bed and coach meet. then remove the plwood panel
couple of screws. Clean up the dirt from around the 2 pipes going into the storage area. Fill up the entrance hole. I used the remaining foam to reseal where
the factory came up short around the fender wells under coach and under the sink.
Once done then get some clear water resistant fungicide type of silicoln sealant. Place a small un noticable bead around the entire kitchen
and in front of coach where the tile meets the wood, Go into the storage compartment, remove the trim piece and use the foam between the front of compartment
floor and the wall, be sparing then quickly re- install the piece of cheap junk trim. Then place a bead of silicoln where the entirior wall meets the storage
compartment floor along with the side walls.
Be sure to check that your water tank fill nozzle clamp is tight and no leaks from it. Especialy when it burps air water mix.
If this dont fix the issue and dry it up then sell the darn thing!
But be for warned that i have searched the blogs and every trailer seems to have some kind of leakage with slide outs, and if they dont then the floor will fall out when they
find that they do.
 
Top