Well many of you watched my troubles getting a 3612 in my other thread
Getting ready to pick up 3612 tomorrow, found a problem.
We took the unit home a couple weekends ago, and loaded it up for the shake down this week. We're currently at Pigeon Forge Tn just outside of Gatlinburg despite a blown tire at 1am this side of Kentucky. it's a great place to visit if you haven't been there before. I recommend it for everyone for at least one trip.
In any event, just wanted to drop a line with some of my initial impressions. Keep in mind that I expect these to change over time of course.
1) After changing the one tire I got wishing I had two spares. With 6 tires the chances of two problems is just too great for me. I'm not sure what we'd have done if I'd have lost another along I-75. This of course is no fault of Heartland of course. I swapped the spare tire to the mag wheel, and bought another spare. This was the 6 still match. I then picked up another steel wheel and an extra spare. Now I have two. Probably never change another one in my life now (LOL), but that'll be well worth the money anyway. I think I'll look into another under carriage lift for the additional spare.
2) 3612 is a great floorplan. Despite some very nice rigs in this newer campground we seem to be the envy of many here. We've had several comments on the rig. The space is very usable, and it working out great for my three kids and Lab.
3) 3612 seriously needs a light switch at the inside doorway. When coming home to a dark trailer, all you can do is fumble for a cabinet, then fumble for the correct switch in there (of which there are many). Heartland DEFINITELY needs to address this oversight. I plan to tap the wires and install one myself. There are very few wall switches in this rig. Everything but the bathroom is on the light itself. for little guys like mine it means a walking through a dark trailer. This needs some redesign work overall.
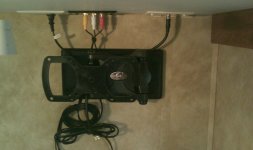
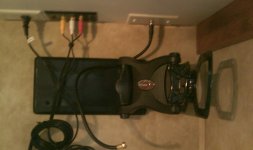
4) TV's hook ups are great and easy enough to derstand. Heartland should include some labels on the ones in the bedroom though. Took a bit of fiddling to figure them all out. Worse then that though, the wall below the TV hookups doesn't seem to have any solid backer to it. It's just another aluminum tube running through there. I had a hard time figuring out what (or how) to mount a tv in there. Heartland should consider a 2x in there somewhere and give people a layout of it. Perhaps with a sticker. Lord knows there's a zillion of those on this thing. I have a book of them I've peeled off the rig already.
5) TP holder was for the birds. Bought a cheap one at Walmart that's considerable better and matches better. Seems like a rig this expensive shouldn't cheap out of such things. Once again, no backer to mount to in there.
6) Should put some thought into the cabinet in the master, the upper door hits the slide so it can only be opened about half way. Since it's a deep cabinet, everything is a stretch to get to. Not too great a move there.
7) It's near 90 here right now. the AC unit is running full tilt, but it's not keeping up during the heat of the day. Put some thought into 2 Ac unit's if it's in your budget, It's 86 outside right now, and 81 inside. Oddly it feels pretty decent though in here.
8) the docking station works great. Love how it's all right there. It could use some labels as well though. took me a bit to figure things out.
9) Unit comes with two wrenches. Not labeled either. Since I couldn't figure out what the one wrench went to, I almost left it at home. Don't do that...it's lowers the spare. wish they'd have made it common with the slide wrnech. Wouldn't be that hard. My slide wrench doesn't fit btw. Not sure why yet.
10) Table legs are a little high. Not sure why there's like that. It's not offensive, but I do find my face in my plate. Might have to knock an inch or two out of them.
11) Under the kitchen cabinet on the right is a panel going to the back of the hot water heater. I found myself fighting to get hot water. I figured it was in bypass mode since cracking the pressure relief gave hot water. Tried to take the panel out with a screw gun, but it's been stapled as well. So that'll take some work to get out. The only other way to get to the valves on the back is to take a drawer out on the side, be a contortionist and fumble around while on your belly. I'm young, so that works, but I have to think if they quick clipped the panel in, it would be a superior solution. I'll be changing that as well. If you buy a 3612...good luck. I just helped you out telling you there back there.
12) Wish I had a second toggle switch at the nose that light the exterior lights as well as those blue lights. That would be slick and is on mt mod list.
I'm sure I'll remember some other things, but this will do for now. Overall we love this unit. It's so nice to own.


