Garypowell
Well-known member
When Linda and I had our first 5[SUP]th[/SUP] wheel in 1996 we had a stackable washer/dryer. Frankly since we just moved from our house and where full-timing it we did not like how small it was and how long it took. 17 years later we got to talking about reevaluating that dislike. After discussing it we were tired of the wait and uncleanliness of the park’s laundry and also the time spent if we went outside of the park. We felt we could pay back the investment in about 1.5 years.
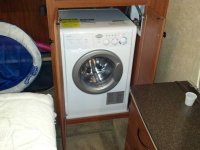
About the same time the forum had a discussion thread about Splendide and it sounded inviting so we decided to try this combo unit for our 3010RE. It was outfitted with a washer prep (which I think is standard) so it should be a simple matter of installation.
There were several wrinkles in the process…..and so I thought I might write about the install so that it might help others.
One of my “tricks” when I purchase something “new” or that I don’t fully understand is that I call that company’s Technical Support (TS) line. If I get good support….and a few questions answered then I am more encouraged to purchase from that company. I was quite pleased that less than 2 hours after I left a message I was called by their TS. After a few simple questions I asked one of my favorites. I asked “what is the biggest mistake that people make when they install the unit?” I was told “people install it on top of carpet….and that never works well due to its 1,200 RPM”. I think I had thought I would just set it in place…..but decided to remove the carpet based on that comment…..and glad I did.
Wrinkle number 1.
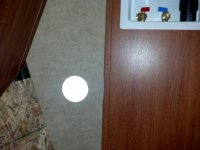
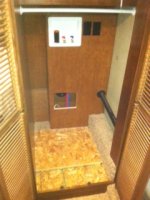
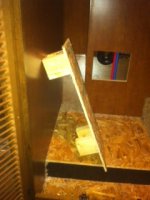
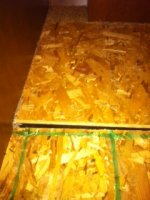
Since we were on the road I decided to do all the prep work prior to buying the unit at a Camping World in Byron, GA. So the night before we were going to pick up the unit I started cutting out the carpet in the closet. To my surprise the front 8 inches of the closet was actually a false floor. The pictures might not be clear enough but you can make out a black piece of the frame and that 8 inch void in front of it. You can see the “plug” that I removed….it just pulled out by hand. Once I got to looking at it I realized this closet was deeper than “Linda’s” closet….and probably that way to be big enough to hold the washer/dryer. Once all the carpet was removed (there was carpet under the plug too) I put the plug back in and you can see in the picture there was now a mismatch of the floor level.
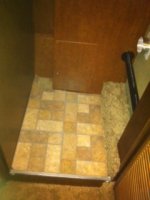
I bought a 3/4 “ piece of plywood and some shims and did my best to make the plug level and then use the plywood to make a new floor surface. My interior design consultant also insisted that we put down some sticky tile….you can see that in the pictures too. I fastened the plywood down with 1 ½” screws. Mainly being in a hurry….and some because of being on the road the floor is not as solid as I would like. As expected the unit shakes a little….well more than a little, but once home in a week I think I will take the floor apart and make it all stronger.
Wrinkle number 2.
I had called Heartland to check out the dryer vent location. There was sticker on the wall but I would have to move it down considerably per my measurements. Heartland, as always, was very helpful and said I could put the vent anywhere up or down and would not run into anything. But I was also told that even if I hit a “tube” this would not be a problem as engineering had studied this and even if the tube was cut all the way through there would be no loss of strength.
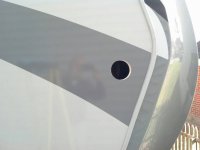
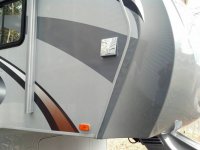
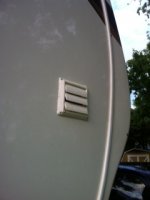
So I figured the right height and drilled my pilot hole. I already knew about where it would come out as I had taken some measurements off of the window in the bedroom. I put the vent pipe up against the skin, drew a circle, and began to drill a series of holes to facilitate the plug removal. All in all it was not that difficult UNTIL…..I hit the tube. Broke a drill bit or two….but finally had enough holes I could use a hacksaw blade to finish the hole. Ugly as all get out…..but once the vent is in place…..can’t tell the war that I had getting it installed.
Fortunately, the tube was only cut through about in half.
Wrinkle number 3.
OK….so we are installed and clean clothes are coming out by the basket full. We came back to the RV (in the Atlanta area) after a day of seeing customers and there on top of the front right pad was a wet spot. And then there was a drip, drip, drip.
I looked everywhere around the install and could find nothing. Took the false wall apart from above and looked down the cavity and saw nothing. Took the trim off in the bedroom where the pipes run….nothing. Then I went up on the roof…..just in case…..again nothing.
Alright, I’ll take the unit out. Once it was out I could begin to see the water behind the false wall…..still not sure why I could not see it before. But was still not sure where it was coming from. What it turned out to be was that the valve Heartland had used had a piece of brass that stuck out by where the hose hooked on. The nut of the hose hit this piece of brass before the connection was actually sealed. It felt tight because it hit this piece of brass….but it was not sealed. So I found two hose washers and simply double washered the connection…..so now it is tight and sealed.
Then I spent two hours with a hair dryer trying to dry out everything. The outside drip continued for 2 more days…..but it has now stopped.
And basketfuls of clean clothes are now coming out again.
We’ll be home in a week…..before the next trip I will take out that floor I put down and reinforce it better. Probably even raise it up to the level of the threshold for easier removal when needed. I mentioned above that the washer shakes a little too much; I am sure some of this is because the floor is not as stable as it should be. I’ll probably redo the plumbing and electrical too after removing the false wall.
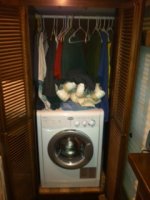
I raised the clothing bar (as you can see in the picture) but it has not worked out very well and I think I’ll put the shelf back in that I removed to facilitate all the work that needed to be done. Linda will have to “move over” a little in her closet.
So I learned a few things…..but all in all very pleased with the Spendide and the clean clothes it has produced….and the time we have saved washing and drying outside of the unit.


