TXBobcat
Fulltime
Well, thanks to TerryH I now have a new Pinbox Bicycle rack.
If your intrested in building one of these, it is pretty simple in the long run.
Here is what I did.
I found a company that repairs and builds trailers, went by and asked them if they had any 2" receivers. They had a number of 2" receivers. I looked at the 6" and 9" long receivers. (These in some places called Combo's). Some come in lengths from 3" to24". I used the 9" and recommend this one. I think Terry also used the 9" also. The 9" was about $17.
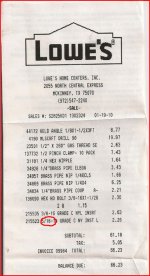
I bought a number of items at Lowe's to convert the air valve for the pinbox and hardware for the bike mount. I am showing the reciept that shows the parts. Oh, by the way one set of lock nuts were in the wrong box and of course I picked it up thinking it was correct. Look at each part closely before checking out.
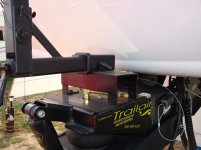
I took the 9" receiver to a local welder and he cut and welded the angle to the receiver. I had him use 2" angle piece for the feet. I made a cardboard template of the top of the pinbox showing the location of the air valve and the two bolts holding the air bag on the TrailAir Pinbox. I marked the locations of the feet and how I wanted the receiver positioned.
I then took the receiver to a company called Crosslink Powder Coating LLC to put a good finish on it. That only cost me $10.63. I was really suprised, but they were working on an order using black and would include mine at the same time.
I went to Lowe's and purchased a set of Titanium drill bits (they cost the same as two Carbide bits and worked well) and a 90* chuck for my 1/2" drill. The plate on the pinbox is not real thick so it is easy to drill through it.
When I got down to putting it all togeather I bought some 1" bolts. The 1½” bolts were to long for my socket set and the 1" do have enough bolt to keep it tight. If you build this I would maybe suggest a 1¼” bolt if possible.
I also used some grade 8 washers because they are zinc coated and resist rusting. I may take this apart later and paint everything black. You might notice the washers under the feet on one side. The welder did not get the feet level. One was a bit shorter than the others so I use these to steady it until I can get it corrected. The air tubing is all brass so there should be no rusting problem.
I am putting the photos in the order I put it all together. If you have any questions please let me know..
The bike rack is a Saris Model #704 that holds 2 bikes. It has a lock on the receiver and one around the outside bike. I like his rack because it has a strong base and is not held together with rivets. A bit on the expensive side to others but this one should hold up for a long time.
Again, Thanks TerryH for the idea and help locating the parts.
Hope this helps anyone wanting to use this type of bike rack.
BC
Attachments
-
![DSC_0098 [800x600].JPG](/data/attachments/5/5507-156c89cf4b97a122001b2997ebebd0ae.jpg) DSC_0098 [800x600].JPG103.6 KB · Views: 306
DSC_0098 [800x600].JPG103.6 KB · Views: 306 -
![IMG_0008 [800x600].JPG](/data/attachments/5/5516-4da58e1cbc099d1d1a6b5cd1f2f9671d.jpg) IMG_0008 [800x600].JPG102.2 KB · Views: 265
IMG_0008 [800x600].JPG102.2 KB · Views: 265 -
![IMG_0007 [800x600].JPG](/data/attachments/5/5515-e76abd2b5b60f83eef095042a0297a21.jpg) IMG_0007 [800x600].JPG102.8 KB · Views: 249
IMG_0007 [800x600].JPG102.8 KB · Views: 249 -
![IMG_0006 [800x600].JPG](/data/attachments/5/5514-abb4fa7f525d88ec69bb546dd2ad5eae.jpg) IMG_0006 [800x600].JPG97.4 KB · Views: 249
IMG_0006 [800x600].JPG97.4 KB · Views: 249 -
![IMG_0005 [800x600].JPG](/data/attachments/5/5513-83bdb2699e6e82a334080c13bc4f5947.jpg) IMG_0005 [800x600].JPG96.9 KB · Views: 259
IMG_0005 [800x600].JPG96.9 KB · Views: 259 -
![IMG_0004 [800x600].JPG](/data/attachments/5/5512-65f5fd561dca5df6bc435654669a0d96.jpg) IMG_0004 [800x600].JPG80.5 KB · Views: 262
IMG_0004 [800x600].JPG80.5 KB · Views: 262 -
![IMG_0003 [800x600].JPG](/data/attachments/5/5511-13da1d179c391f395c81bbcf61387acc.jpg) IMG_0003 [800x600].JPG100 KB · Views: 260
IMG_0003 [800x600].JPG100 KB · Views: 260 -
![IMG_0002 [800x600].JPG](/data/attachments/5/5510-b685dbe006a1d083d69f48df591a1317.jpg) IMG_0002 [800x600].JPG92.3 KB · Views: 269
IMG_0002 [800x600].JPG92.3 KB · Views: 269 -
![DSC_0099 [800x600].JPG](/data/attachments/5/5509-44575f888af859f68e1bcc6b94f82c1c.jpg) DSC_0099 [800x600].JPG69.4 KB · Views: 261
DSC_0099 [800x600].JPG69.4 KB · Views: 261 -
 Lowes Reciept for bike rack parts.JPG61.4 KB · Views: 264
 -
![DSC_0097 [800x600].JPG](/data/attachments/5/5524-de09bf44571bf2bc2243ba368c2d16a4.jpg) DSC_0097 [800x600].JPG82.6 KB · Views: 320
DSC_0097 [800x600].JPG82.6 KB · Views: 320 -
![DSC_0095 [800x600].JPG](/data/attachments/5/5523-8527a6701de039dd0526101e345e08bd.jpg) DSC_0095 [800x600].JPG87.7 KB · Views: 346
DSC_0095 [800x600].JPG87.7 KB · Views: 346 -
![DSC_0093 [800x600].JPG](/data/attachments/5/5521-4f5865813f35872bf4028a4e62910220.jpg) DSC_0093 [800x600].JPG99.5 KB · Views: 364
DSC_0093 [800x600].JPG99.5 KB · Views: 364 -
![DSC_0092 [800x600].JPG](/data/attachments/5/5520-fb711436d99d8180b58b53eef517a900.jpg) DSC_0092 [800x600].JPG99.3 KB · Views: 352
DSC_0092 [800x600].JPG99.3 KB · Views: 352 -
![DSC_0091 [800x600].JPG](/data/attachments/5/5519-7e4fd1b76e76ef828b126e84c8eb82d1.jpg) DSC_0091 [800x600].JPG113.2 KB · Views: 377
DSC_0091 [800x600].JPG113.2 KB · Views: 377 -
![DSC_0090 [800x600].JPG](/data/attachments/5/5518-41d3baa7e7c8d4b1f63076aca6744fce.jpg) DSC_0090 [800x600].JPG98 KB · Views: 361
DSC_0090 [800x600].JPG98 KB · Views: 361 -
![IMG_0009 [800x600].JPG](/data/attachments/5/5517-113aa3ddbc1c68158ed7b0ef2dd538b7.jpg) IMG_0009 [800x600].JPG80.3 KB · Views: 302
IMG_0009 [800x600].JPG80.3 KB · Views: 302


