What did you do to your camper today?

danemayer

Well-known member
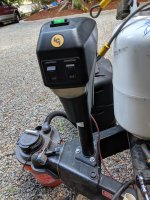
Fixed the RVLock this afternoon. Ours is 5 1/2 years old. Earlier this year the deadbolt action became unpredictable, usually when locking. Sometimes the deadbolt wouldn't move even though it acted like it was locking - beeps and tones were normal. Then at times it wouldn't operate at all by FOB or keypad.

RVLock tech support was very helpful and suggested replacing the keypad circuit board, and the long circuit board next to the battery compartment. They only charge $9.99 for each board plus a few dollars for Priority Mail shipping.

But then the lock started working reliably and did so all summer. But last week it just quit again. So I put the parts in. Nothing worked.

I called tech support and they realized that our unit was older than they thought. The new keypad circuit board required a matching change to a new level beeper circuit board. They sent that out at no charge.

Put the 3rd board in today and all works as it should.
 

jbeletti

Well-known member
We have another RV Lock expert in the group. You can help me at rallies now :)

Seriously - cool that RV Lock was right-priced and super fair in service.


Sent from my iPhone using Tapatalk
 

Sowie

Well-known member
Honestly, it wasn't today, it was last week, but what the hey! I had some parts laying around from previous trailers and after a discussion with my brother about his fresh water system, decided to do something about mine. I added an accumulator. I thought I had a variable volume pump laying around and would have installed that instead, but no such luck.
17cde7c2e51c17350c804e65a1c88b74.jpg


Sent from my SM-G900V using Tapatalk

Does the accumulator keep the pulsing sound to a more steady on off when the pump turns on?


Sent from my iPad using Tapatalk
 

mlpeloquin

Well-known member
Replaced that wonderful water heater bypass valve. Found it leaking out the front of the valve so at least it ran out of the UDC and not into the belly. As described by others, this is a one peace molded part. You have to cut the PEX lines to get it out. In my Big Horn it is in the most awkward location. Not easy to replace with bad knees, back, and foot, but it is doable.

At the front it looks easy. The back not so much.
IMG_0053.JPG IMG_0061.JPG

You have to drain the entire water system along with the water heater. I used my air compressor set at 40psi. Disconnect all the plumbing from the out door shower and what ever else is in the way. Cut the PEX plumbing from the valve, remove the old valve and install the new one after crimping the PEX onto the new valve. Reassemble everything and pressure test.

Yes, new valve is installed!
IMG_0065.JPG IMG_0067.JPG
 

travelin2

Pennsylvania Chapter Leaders-retired
Job would have been much easier by removing the basement wall attached to the left side of the UDC. Could’ve stood on the ground working from the off door side basement door instead of in there on your hands and knees
Just saying


Sent from my iPhone using Tapatalk
 

uncledon

Her chauffeur
Does the accumulator keep the pulsing sound to a more steady on off when the pump turns on?


Sent from my iPad using Tapatalk
Yes Sowie and it reduces the rate of pump cycles. With the kitchen sink faucet wide open, it now cycles every 5 seconds instead of every 2. That would most lilkey vary with pump output volume though. Quieter too, but that may have to do with my install.

Sent from my SM-G900V using Tapatalk
 

mlpeloquin

Well-known member
Job would have been much easier by removing the basement wall attached to the left side of the UDC. Could’ve stood on the ground working from the off door side basement door instead of in there on your hands and knees
Just saying


Sent from my iPhone using Tapatalk

You cannot see the water softener on that basement wall. That wall has PEX going through it so a lot of other pluming would have had to be removed. On the inside of the angled wall, which is now an access door, sits my three water filters. Otherwise you are correct.
 

Sowie

Well-known member
Yes Sowie and it reduces the rate of pump cycles. With the kitchen sink faucet wide open, it now cycles every 5 seconds instead of every 2. That would most lilkey vary with pump output volume though. Quieter too, but that may have to do with my install.

Sent from my SM-G900V using Tapatalk

Thanks I just might have to try it.


Sent from my iPad using Tapatalk
 

travelin2

Pennsylvania Chapter Leaders-retired
Thanks I just might have to try it.


Sent from my iPad using Tapatalk

Yes Sowie and it reduces the rate of pump cycles. With the kitchen sink faucet wide open, it now cycles every 5 seconds instead of every 2. That would most lilkey vary with pump output volume though. Quieter too, but that may have to do with my install.

Sent from my SM-G900V using Tapatalk

We have one. Certainly reduces the cycling time(s) of the pump.


Sent from my iPhone using Tapatalk
 

travelin2

Pennsylvania Chapter Leaders-retired
Scrubbed the BH roof yesterday. Last washed in February whilst in south Texas

86c8eaf3880abd3e13a4ca2365fe0f91.jpg


Sent from my iPhone using Tapatalk
 

Chippendale

Well-known member
Scrubbed the BH roof yesterday. Last washed in February whilst in south Texas


Lyle, the part you did looks great, what did you use, I will purchase some and have it here and the next time you are in Texas, you can do mine. I am too old to get up on top of the trailer any more and do that sort of stuff.

86c8eaf3880abd3e13a4ca2365fe0f91.jpg


Sent from my iPhone using Tapatalk[/QUOTE]
 
Last edited by a moderator:

SNOKING

Well-known member
I turned the Lippert Power Tongue Jack head 90 degrees today so the tailgate clears it better.

First off I would like to say it was more work freeing up the wire bundle that actually turning the head 90 degrees to the drivers side.
I blocked up the tongue on a stack of large boards, or you can hook up to the tow vehicle.

1. You will need a 5/16-18 tread tap. The one pictured is the first one I found and it was a bottom tap and I had to go back to the bag and find one with the starting taper.

2. After freeing up the wire bundle to allow enough slack to lift the head off, removing the two 5/16 bolts the drive head lifted right off. I removed one propane tank and the drivers side equalizer saddle to get at the wiring bundle.

3. I then turned lead screw in the post 90 degree so I would be ready to line up at the new position.

4. I pushed some paper towel pieces down below where the two existing fore and aft holes needed to be tapped with 5/16-18 threads.

5. I vacuumed out the tapping debris and remove the paper towel pieces.

6. Reinstalled the head and two 5/16 bolts

As shown in the attached pictures I gained 3 1/2" which is going to be great. Chris
 

Attachments

  • IMG_20190902_093441.jpg
    IMG_20190902_093441.jpg
    3.6 MB · Views: 50
  • IMG_20190902_094448_1.jpg
    IMG_20190902_094448_1.jpg
    3.8 MB · Views: 50
  • IMG_20190902_100951.jpg
    IMG_20190902_100951.jpg
    2.7 MB · Views: 46
  • IMG_20190902_101825.jpg
    IMG_20190902_101825.jpg
    3.3 MB · Views: 47
  • IMG_20190902_102401_1.jpg
    IMG_20190902_102401_1.jpg
    3.3 MB · Views: 46
  • IMG_20190902_102554.jpg
    IMG_20190902_102554.jpg
    4.2 MB · Views: 45
  • IMG_20190902_102803.jpg
    IMG_20190902_102803.jpg
    4 MB · Views: 40
  • IMG_20190902_103226.jpg
    IMG_20190902_103226.jpg
    4.2 MB · Views: 40

Wmnmy

Well-known member
Okay so we got the new big Country 4011 erd and I put slam latch’s on front compartment, multi colored awning light, rock lights on bottom colored of course, solar trickle charger on pin box , screen door handle,three fans inside fridge, two led fans in rear of fridge one facing up at bottom and top faced out , tpms on tires , Jerrod (jesstrucking) hazard light 7 pin connector box on pin box thanks jerrod , installed stain glass window , the dealer installed my dish satellite and furrion camera from my last trailer no charge of course and I orange glowed the wood in the entire trailer. It looks and smells great lol. I don’t think I will be doing this again it’s a lot of work and this is the 5 th time with heartland trailers . Of course 110 degree weather didn’t help much lol..
 

travelin2

Pennsylvania Chapter Leaders-retired
Okay so we got the new big Country 4011 erd and I put slam latch’s on front compartment, multi colored awning light, rock lights on bottom colored of course, solar trickle charger on pin box , screen door handle,three fans inside fridge, two led fans in rear of fridge one facing up at bottom and top faced out , tpms on tires , Jerrod (jesstrucking) hazard light 7 pin connector box on pin box thanks jerrod , installed stain glass window , the dealer installed my dish satellite and furrion camera from my last trailer no charge of course and I orange glowed the wood in the entire trailer. It looks and smells great lol. I don’t think I will be doing this again it’s a lot of work and this is the 5 th time with heartland trailers . Of course 110 degree weather didn’t help much lol..

Info on front compartment slam latches pls...
RVLock??


Sent from my iPhone using Tapatalk
 

Wmnmy

Well-known member
8502C533-4AE9-44D3-83BF-635F55A60CBD.jpgCCB0A94D-C2DB-4AA7-8578-0DBFBF77AEA1.jpg9B018DFB-EBB1-4EC4-874C-DB1CF79C628C.jpg7EAA3699-A659-4129-B8C9-6E1A736499FF.jpg

- - - Updated - - -

Aso put snap pads on lol.....

- - - Updated - - -

96DAFDC0-6E14-4692-AB98-438179489D8E.jpg

- - - Updated - - -

A fellow heartland rver put RV loc on all of his doors so I got two old slam latch’s from him as my key works with his landmark slam latch’s . I gotta say I was taken a back by cutting into a brand new trailer but this is the second time I did it , it’s really easy I used a dremel, first I put the gasket from the lock where I wanted to put latch’s and drew a outline then cut two holes . Second got a heavier drill with metal cutting wheel and cut where the receiver latch on bottom go then put latch’s in door and my objective was achieved. The little turn latch’s never would secure the front like I wanted now they do unless you have a key then we’ll you can have what’s inside.......

- - - Updated - - -

I did rivet the latch’s on the door worked out pretty good....
 

carl.swoyer

Well-known member
1 1/2" gate valve and new PVC parts.

My galley tanks cable operated gate valve broke.

Seventy five for a new or buy the one with the tee handle and swap out the fittings.

I was able to cut out the old PVC from the fittings buy cutting a couple of relief cuts and using two 1/4" chisels to pop out the old PVC.

Next step is to get the assembly reinstalled..I'm thinking now's a good opportunity to replace the other two gate valves. Seven and a half years old.

fec749f2663145135f31783c30c84fac.jpg
6117d9ceb7f5f6475f96e260b7e20f13.jpg
ef0fcedc5d8e882f2c65ba7ea8dc37e1.jpg
4bb9e448f3655caaee6ecb7aa3370912.jpg
136fee89ead59b823276b1c55c22a1e8.jpg
7826a88dbe7b43e20700292af552ad6c.jpg
f9c303dba4a76aadc8ee4a4265765042.jpg
f050954abd00aec49e6702cddf33cc13.jpg
2579b3b8e0a662a4f6026714a1bfaf47.jpg
a67d7a05317994b29968d03885a2ce49.jpg


Sent from my moto z3 using Tapatalk
 

Semi-Hex

Grand Poobah!
1 1/2" gate valve and new PVC parts.

My galley tanks cable operated gate valve broke.

Seventy five for a new or buy the one with the tee handle and swap out the fittings.

I was able to cut out the old PVC from the fittings buy cutting a couple of relief cuts and using two 1/4" chisels to pop out the old PVC.

Next step is to get the assembly reinstalled..I'm thinking now's a good opportunity to replace the other two gate valves. Seven and a half years old.


Sent from my moto z3 using Tapatalk

just for future reference, Pasco makes a abs ram bit in several sizes. They work pretty well for 4 or 5 cuts.
https://www.supplyhouse.com/Pasco-3243-PASCO-1-1-2-Ram-Bit
 

mlpeloquin

Well-known member
They sell and you can rent Pipe Reamer or sometimes call a pipe hog. Takes two minuets to ream out. Was in the same position only with the S&B and had to sawzall the pipe almost even with the wall board. Got a master plumber across the street. He just showed me his and did a free two minuet ream out. You did a great job doing it without a reamer!
 
Top