watchthebox
Well-known member
Over the past several months, I've been slowly upgrading the electrical system of our Cyclone 3010. First, I added four 6V batteries. Then I added a 2000W inverter. (See also: //heartlandowners.org/showthread.php/22253-Cyclone-3010-Battery-Upgrade?highlight= and //heartlandowners.org/showthread.php/22371-Cyclone-3010-Inverter-Installation?highlight=) Just last week I completed my project by mounting two 180W solar panels on the roof, and connecting them to a Rogue MPPT solar charge controller.
We went dry-camping last weekend, so I got to put the system to test. I'm happy with the results. Having the inverter and solar panels significantly decreased generator run time. I probably only used the generator 1/4 of what I previously would have. It was nice being able to watch a movie at night, or use the microwave in the morning without having to start up the generator.
The maximum daily harvest was 2.43kWh (178.6Ah). The maximum amp output I observed on the Rogue's display was 25A. As I had expected, the 360W total of solar panels I installed couldn't always fully keep up with usage. On heavy electricity usage days, the generator was needed to top off the batteries. Overall I'm very pleased with the results.
Here are some pictures of the installation:
Solar panels on roof:
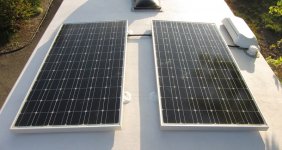
I mounted panels with simple aluminum brackets secured to the roof with 3/8 inch well nuts and stainless steel security bolts.
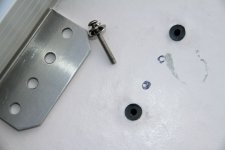
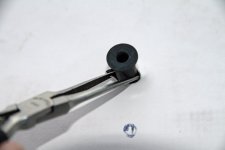
One of the trickiest parts of installing the well nuts was getting them through the EPDM rubber. It helped to spread the rubber roofing with needle nose pliers while pushing well nut in.
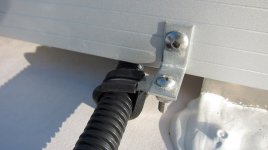
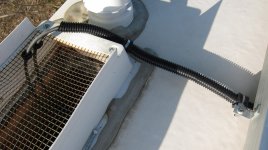
Cables between solar panels. I didn't want to make any more holes in the roof to affix the solar cables, so I screwed a couple clamps to the solar panel frames and used those to secure the short span of solar cables in split loom tubing between the two panels and from the panels to the refrigerator vent. The solar cables are rated for outdoor use, but I thought it would be good to have some extra protection, so I wrapped the cables in split loom tubing.
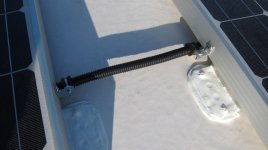
Close-up of cable cover clamp:
Cables from panels to refrigerator vent:
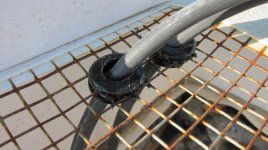
Cables through grommets in refrigerator vent screen:
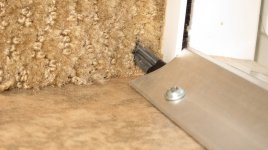
I thought awhile about how to route the solar cables from the roof to the charge controller in the pass through compartment. I decided I didn't want to bother going into the undercarriage, so I decided to run the cables from the refrigerator vent passage, behind the kitchen cabinets, under the main door threshold, and under the stairs. It worked pretty well. I'm still waiting on a longer piece of a portion of the threshold to fully cover and hide the cables, but here's what it looks like now:
Cables from kitchen cabinet to threshold:
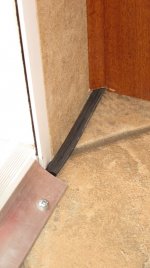
Cables from threshold to stairs:
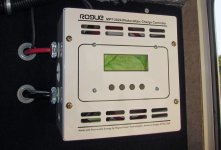
Charge controller in pass-through compartment:
It's taken awhile to complete this project, but it's been rewarding and educational.
We went dry-camping last weekend, so I got to put the system to test. I'm happy with the results. Having the inverter and solar panels significantly decreased generator run time. I probably only used the generator 1/4 of what I previously would have. It was nice being able to watch a movie at night, or use the microwave in the morning without having to start up the generator.
The maximum daily harvest was 2.43kWh (178.6Ah). The maximum amp output I observed on the Rogue's display was 25A. As I had expected, the 360W total of solar panels I installed couldn't always fully keep up with usage. On heavy electricity usage days, the generator was needed to top off the batteries. Overall I'm very pleased with the results.
Here are some pictures of the installation:
Solar panels on roof:

I mounted panels with simple aluminum brackets secured to the roof with 3/8 inch well nuts and stainless steel security bolts.

One of the trickiest parts of installing the well nuts was getting them through the EPDM rubber. It helped to spread the rubber roofing with needle nose pliers while pushing well nut in.

Cables between solar panels. I didn't want to make any more holes in the roof to affix the solar cables, so I screwed a couple clamps to the solar panel frames and used those to secure the short span of solar cables in split loom tubing between the two panels and from the panels to the refrigerator vent. The solar cables are rated for outdoor use, but I thought it would be good to have some extra protection, so I wrapped the cables in split loom tubing.

Close-up of cable cover clamp:

Cables from panels to refrigerator vent:

Cables through grommets in refrigerator vent screen:

I thought awhile about how to route the solar cables from the roof to the charge controller in the pass through compartment. I decided I didn't want to bother going into the undercarriage, so I decided to run the cables from the refrigerator vent passage, behind the kitchen cabinets, under the main door threshold, and under the stairs. It worked pretty well. I'm still waiting on a longer piece of a portion of the threshold to fully cover and hide the cables, but here's what it looks like now:
Cables from kitchen cabinet to threshold:

Cables from threshold to stairs:

Charge controller in pass-through compartment:

It's taken awhile to complete this project, but it's been rewarding and educational.
Last edited:
