I sure screwed this Valterra sewer valve T-Handle and Cable up

DuaneG

Well-known member
My sewer connection drain valve has sucked from the first day I bought my 5th wheel. The back of the T-Handle cable came out from the housing and ended up with to much play in it to open and close the valve. I thought it was like a tv cable that could be cut and screwed back in. So I tried to remove the T-Handle and I am pretty sure it was not meant to be removed and now I do not have one attached. Good thing I have vise grips. I cut a hole in the under carriage plastic and insulation to gain access to the area where the valve is (good thing I have duct tape). I was able to manually pull the cable at the valve to open and close it so that is not the problem. I checked the length of the cable and wow they did a number when it was installed. It is intertwined between cables and hoses and has some very sharp angles. I can feel the cable has kinks in it so at a minimum I want to replace the cable.


I found a cable replacement, but want to know if anyone has been able to replace it without removing the sewer valve. How does the cable attach to the sewer valve and can it be done at the angle I have to work with.
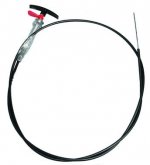
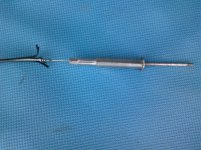
Cable only.JPG


This is what the one looks like underneath except with a 6' cable.
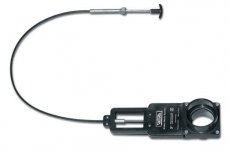
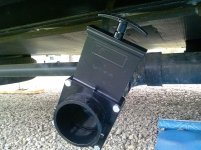
Valterra cable and valve.JPG

Just don't know if it is one unit or if I can place the cable with the proper angle and screw it into the valve. I would think they were separate parts or else I would not know how to get the cable through the hole near all my connections.

Sorry if this was already addressed. I swear I tried to search the site and I kept getting back results that have nothing to do with what I was looking for.

I did read some other good post while looking. I think I am going to get one of these just in case it breaks again and I am on the road.
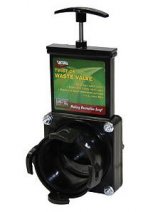
twist on.JPG
 

ucwinters

Active Member
My cable for the black tank became disconnectd soon after getting my 5th wheel. Your solution below is what has been working for me for the past 2 years. Plan to cut through the coroplast (some day)and try to fix the cable snafu.
I did read some other good post while looking. I think I am going to get one of these just in case it breaks again and I am on the road.

View attachment 28775
 

jimtoo

Moderator
If you can get to the area where the cable goes into the valve it can be replaced. The outer casing is attached to the valve by the top of the valve with screws compressing the two valve sides around the cable housing. The inner cable that operates the valve is attached to the slide by allen screw. It will be hard to get to I'm sure, but can be done. On mine the six foot cable that came with the new vavle was not near long enough, so I cleaned and lube the old cable and it works perfect.

Jim M

And I keep a valve on the end all the time also.
 

DuaneG

Well-known member
I got to the area I need to be with a box cutter. First cut was exploratory and second one I nailed it. I cut three sides and folded back to get access. I taped area afterwards but left a little bit open. There was a tad bit of water on it so thought I would leave an area open for drainage.

I was hoping I could just attach with Allen wrench. Thought about disassembling and greasing before I broke it. Now it's time for a repair. The cables are only around $30 so better than paying my $100 deductible for my extended warranty cost and not having access to my vehicle while they have it.

I would use the screw on valve long term but my drains are already lower than most and don't want it extending down that far when mobile.
 

DuaneG

Well-known member
Well I finally decided to tackle this job. Here is what the back of the pull T-handle looked like. I broke the T-Handle off when trying to take apart.


0.jpg

I did buy one of the twist on valves so I could put it on before messing with the permanent valve. Turned out to be a good idea because there was still some waste in tank and after repair it would have poured out everywhere if this was not on there.

1.jpg

I reopened the panel that I previously cut, so I could access the valve to my black tank.

2.jpg

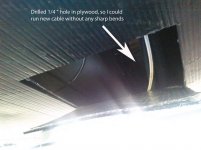
I used a 1/4" drill bit to drill a hole in plywood approximately 1' away from valve in a straight line. I ran the cable through the hole and into the valve. The original cable was 10' and the replacement was 6'. You can not have any sharp bends in the cable and this was the only way to get the six foot cable to work and have the appropriate bend in the cable.

3.jpg


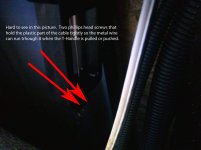
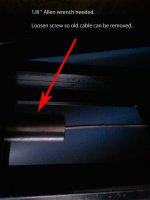
There were 2 phillip head screws at the end of the valve (held the cable housing) that needed to be loosened along with a 1/8" Allen hex screw (that held the actual cable).

4.jpg

5.jpg

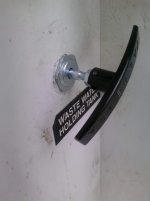
Here is the new handle after replacement.

6.jpg

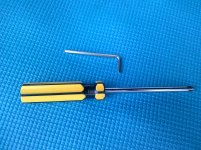
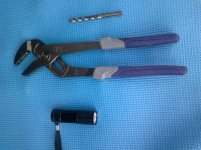
Tools needed.

7.jpg

8.jpg

This was not very hard after figuring out how to make the shorter cable work. I am going to replace the other one because the 10' cables used by manufacturer have to much slack in them and they never worked right. The new one has a perfect arch in the cable and it works so smooth I can open and close with one finger.

$35 fix.
 

DuaneG

Well-known member
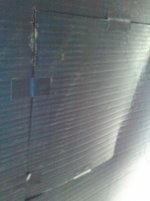
I do hope it helps someone else. I looked for pics here before starting this project but did not see any. A couple pics in the undercarriage were real dark, but you could get a better view of the parts in the pics from the first post in this thread.
 
Top