I purchased an Ultra-Fab PowerTwin II 30” Electric RV Stabilizer to stabilize the rear of the Landmark both vertically and horizontally. After it arrived I began unpacking and assembling the PowerTwin Stabilizer in my garage where it is a flat and smooth floor.
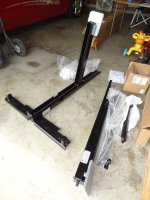
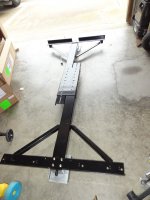
First I bolted the side angled braces to the legs of the stabilizers. Next was to measure the width of the frame from the outside edges of the flanges. I then assembled the two halves of the stabilizer frames with the supplied connector plate.
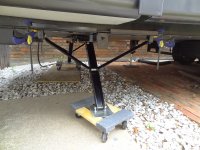
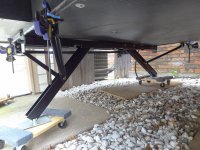
Next I placed the PowerTwin Stabilizer on two small furniture dollies and rolled them to the rear of the Landmark. I removed the screws holding the coroplast in the area of where the stabilizer would mount to the frame. Then I used the supplied manual crank to lift both side to the bottom of the frame. I adjusted the install position by rolling the dollies then finished tightening the stabilizer to the frame and clamped it to the frame. Next I used the screws that I removed from the coroplast to mount the PowerTwin Stabilizer
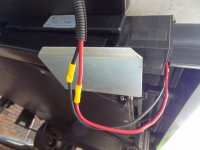
I used a single red 8 gauge wire in split tubing to power the motors and fished it to from the 12 volt converter to door side of the basement, then down into
the under belly above the coroplast
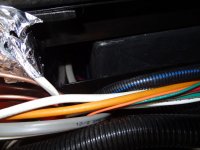
Blue striped split tubing that covers
red power wire exits into under belly.
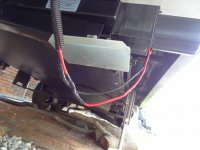
and then to the rear of the trailer and then across to the off door side of the trailer near the switch compartment of the power reel switch. I discovered that it easier to fish wires on the door side than the off door side because of the utilities, propane and sewer drains, on the off door side. Next I removed the power reel switch and switch compartment and fished the switch and motor wires though a hole in the ODS frame behind the switch compartment into the area above the coroplast. I then installed the motors onto the stabilizers.
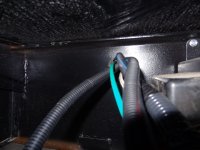
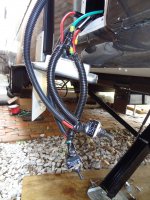
The PowerTwin Stabilizer switches are pre-wired together with soldered connections. Because of this I cut the wires to power the motors from the switches to the proper length for the door side and off door side motors. Then I fished the wires from the switches to the door side and off door side motors.
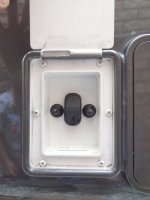
I decided to use the same switch compartment as was used for the reel motor switch so I did not have to paint and install an additional switch compartment. I drilled holes on both sides of the reel motor switch for the stabilizer motor switches.
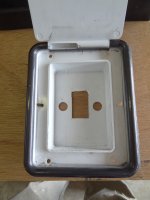
Then back to wiring, I made the following connections:
The power wire in the under belly to supply power to the switches
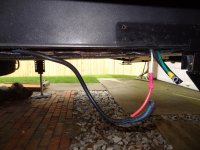
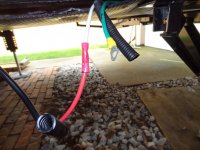
The ground wire (green wire) to the frame with a self-tapping screw
The power wire to the Converter
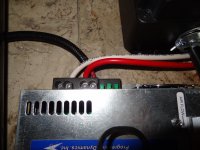
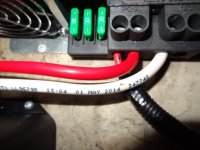
The wires from the switches to the motors
Next I mounted power reel switch and stabilizer switches in switch compartment and remounted the switch compartment to trailer.
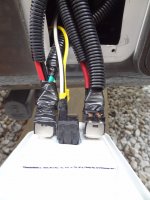
I secured the motor wires.
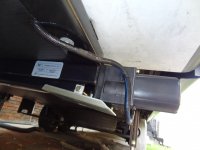
Then after I tested the operation of the stabilizer, I re-secured the coroplast to trailer frame. The total installation time of the stabilizer and the related wiring was about 20 hours.
My observations of the Ultra-Fab PowerTwin II 30” Electric RV Stabilizer are, it is made of heavier gauge steel, better powder coating, larger foot pads, and stronger motors than the competing brands of electric stabilizers.
First I bolted the side angled braces to the legs of the stabilizers. Next was to measure the width of the frame from the outside edges of the flanges. I then assembled the two halves of the stabilizer frames with the supplied connector plate.


Next I placed the PowerTwin Stabilizer on two small furniture dollies and rolled them to the rear of the Landmark. I removed the screws holding the coroplast in the area of where the stabilizer would mount to the frame. Then I used the supplied manual crank to lift both side to the bottom of the frame. I adjusted the install position by rolling the dollies then finished tightening the stabilizer to the frame and clamped it to the frame. Next I used the screws that I removed from the coroplast to mount the PowerTwin Stabilizer


I used a single red 8 gauge wire in split tubing to power the motors and fished it to from the 12 volt converter to door side of the basement, then down into
the under belly above the coroplast

Blue striped split tubing that covers
red power wire exits into under belly.
and then to the rear of the trailer and then across to the off door side of the trailer near the switch compartment of the power reel switch. I discovered that it easier to fish wires on the door side than the off door side because of the utilities, propane and sewer drains, on the off door side. Next I removed the power reel switch and switch compartment and fished the switch and motor wires though a hole in the ODS frame behind the switch compartment into the area above the coroplast. I then installed the motors onto the stabilizers.


The PowerTwin Stabilizer switches are pre-wired together with soldered connections. Because of this I cut the wires to power the motors from the switches to the proper length for the door side and off door side motors. Then I fished the wires from the switches to the door side and off door side motors.
I decided to use the same switch compartment as was used for the reel motor switch so I did not have to paint and install an additional switch compartment. I drilled holes on both sides of the reel motor switch for the stabilizer motor switches.

Then back to wiring, I made the following connections:
The power wire in the under belly to supply power to the switches


The ground wire (green wire) to the frame with a self-tapping screw
The power wire to the Converter


The wires from the switches to the motors


Next I mounted power reel switch and stabilizer switches in switch compartment and remounted the switch compartment to trailer.


I secured the motor wires.

Then after I tested the operation of the stabilizer, I re-secured the coroplast to trailer frame. The total installation time of the stabilizer and the related wiring was about 20 hours.
My observations of the Ultra-Fab PowerTwin II 30” Electric RV Stabilizer are, it is made of heavier gauge steel, better powder coating, larger foot pads, and stronger motors than the competing brands of electric stabilizers.
