ptarthur2
Member
I will upload pictures as soon as I get a chance to get over to where my MPG is stored and take some.
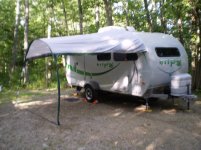
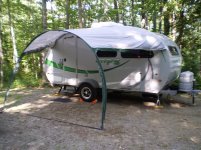
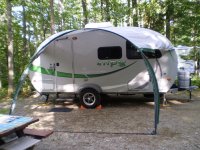
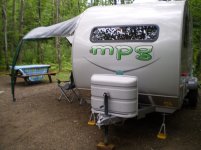
You'll have to slide the top of the dome awning into the channel that runs across the top of the MPG camper and used a marker to mark the position on the side of the trailer of eachof the snap sockets that is attached to the edge of the awning.
Make sure you use the regular type of JB Weld and not JB Quick which only has 1/2 the tensile strength. I tried JB Quick initially because it sets in only 15 minutes and fully cures in 4 hours but it didn't hold the snap studs to the side of the trailer when I tried to attach the awning.
When you mix the two parts of the JB Weld, make it very thick by using slightly more of the light colored part than the dark colored part, that will help avoid the product running down the side of your trailer before it sets up.
Only mix up enough JB Weld to do one or two of the snap studs at a time because you will need to hold the studs to the side of the trailer for several minutes until the glue sets up enough to prevent them. from slidding out of position.
One last very important tip, make sure when you glue the snap studs to the side of the trailer that the little spur on the top of the studt is pointing down as there is a notch on the bottom of each snap socket that is attached to the dome awning that this spur fits into. If you don't point the spur down when you glue it you will not be able to snap on the corresponding snap socket that is attached to the awning. I looked though the very sparse instuctions that came with the dome awning but there was no mention of this. I discovered the correct position by snapping one of the studs into one of the snap sockets before I glued it then had to pry it back appart with difficulty before gluing.
I started out by gluing one stud to the side of the trailer initially and let it set up for 24 hrs before attempting to snap on the dome awning just to make sure I had the correct technique down. Then I glued the remaining studs and let them set up another 24 hrs before attaching the rest of the awning. Since there isn't much documentation I thought it best to take it slow and easy. I'd hate to think about how difficult it would be to reposition one of these studs glued on with JB Weld if you didn't get it in the right place to start with.
I'll upload the pictures as soon as possible.