My 3800 Mods

Bksvo

Well-known member
I'll have to admit, when I bought a new trailer, I didn't imagine how much work it would be getting it ready. I should have known better, because I am always remodeling / restoring something, and why wouldn't a trailer be any different. Thanks to this forum I got lots of ideas. I've finally gotten most of the things done I wanted to before my wife and kids hit the road next week. I'll try to get them all posted up with pictures tonight.
 

Bksvo

Well-known member
100_4133.jpg100_4153.jpg100_4154.jpg100_4157.jpg
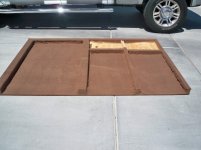
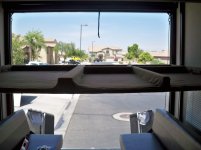
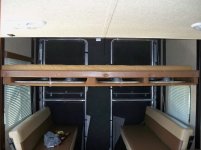
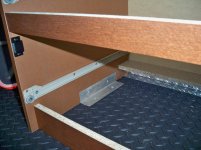
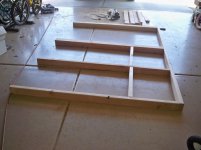
My crowning achievement was a new shelving unit to store the tables. I hated the way they were stored above the upper bunk. My son will be sleeping up there, so having to unstore all the tables every time we stop to camp would be a pain. Also, loading those tables over the vinyl covered steel edge of the table was extremely difficult for my wife, and it only took a day for us to put a crack in the vinyl.

I made the shelf to fit under the upper bunk. The sides are made of 2x4 pine, either ripped to 3" or two boards laid on their sides. The bottom is 1/2" plywood. To give the whole contraption rigidity, I used a 4x5/8" piece of oak on the leading edge, and connected it to the plywood with steel ties and pan head screws. I covered the ties with 2 layers of felt, then covered the whole thing with fleece material. The shelf sits on the rails for the bed unit, and the bed unit is screwed on top of it with 4" deck screws. I finished it off with snap straps from camping world to keep the tables stowed. I lowered the top bunk stop to the lowest setting (1" lower than delivered). There is still plenty of room to climb into the bunk and sit at the booth. Total cost was ~$100. It probably weighs 60 lbs.

The tables slide in very easily, and the fleece will keep them looking good.
 

jimtoo

Moderator
What a great idea,,, you can bet this mod will be copied by many.

Thanks for posting pictures.

Jim M
 

Bksvo

Well-known member
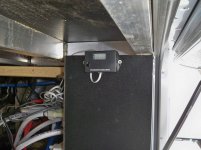
I installed the Progressive EMS after the auto switch, to protect from either the generator or shore power. I installed the display next to the UDC, so I could see it as soon as we plugged in. I'm not sure that's the final resting place, but so far I like it. The first 50A place we plugged into had an open ground, so it has already earned it's keep.
100_4139.jpg100_4137.jpg
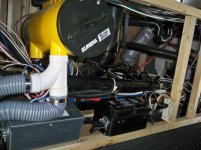
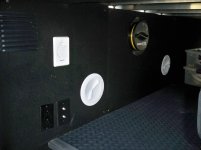
Of course, while I was in there, I couldn't resist moving the vacuum. I could move it about 18 inches closer to the door, so now you can reach it to change a bag without crawling inside. I also moved the vacuum inlet over near the electrical outlet, so I can easily use the vacuum outside. The factory installation here is horribly thought out -- actually that gives them credit for thinking, which they weren't when they designed the layout. Total cost for this was $5 for the new felt, I already had a spare piece of plywood left from the shelf project
.100_4140.jpg
 

Bksvo

Well-known member
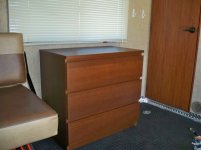
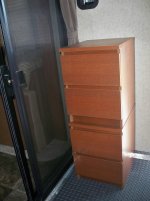
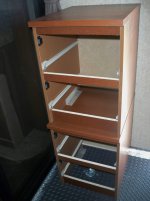
I added dresser cabinets from IKEA in the garage. They match the wood pretty well and are pretty sturdy. I added magnetic catches to help keep the drawers closed. I secured them to the floor with aluminum angle material and 1" wood screws. They are secure enough I didn't need to anchor them to the walls. The 4 drawer unit is actually two nightstands stacked on each other. Total cost ~$200.
100_4146.jpg100_4145.jpg100_4141.jpg100_4142.jpg
 

Bksvo

Well-known member
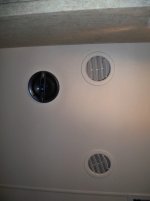
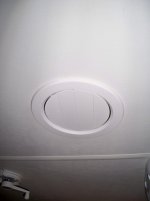
I replaced the a/c vents in the master and full bath with fully closeable vents from DWI. We added the front a/c, but the vents from the main a/c were still open in the master, and the "closeable" vent in the bath from Heartland might block 60% of the air on a good day. I didn't want to close off the duct in case we could only connect to 30A somewhere and run just 1 a/c. Of course it would seem no two vents are designed to fit in the same whole, so I had to cut the holes bigger.

I also added a second vent in the garage and replaced the heartland vent with the larger, closeable one. Total cost of this mod was $30.

A future mod will be to add another vent in the main living are, and the tent mod for the a/c.
100_4172.jpg100_4169.jpg
 

Bksvo

Well-known member
Other mods that I was either too tired or too lazy to take pictures of...

I added a black tank flush to the rear black tank. Why Heartland doesn't include this is anybody's guess. I needed to add 4 feet of hose to that supplied with the kit. I put the hose connection in the rear access area for the valves. ~$35.

I added a second type 27 battery. Pretty simple except I broke the pilot bit on my hole saw and had to make a trip to the hardware store for another. I used a 1.5" pvc T fitting (and some duct tape) to splice the vent tube into the original. I couldn't come up with a better solution, and every pipe fitting I tried was either too big or too loose for the supplied vent tube. If anyone has figured out a better solution, please let me know. This was about $200 for the battery and parts (and hole saw).

I added a TV and bracket in the Master.

I removed the gas tube from the front door, and added a conventional door latch to hold the door full open. I didn't like the door waving around in the wind, putting a lot of torque on the door frame, but I wanted the ability to keep it open and get a nice breeze through the camper. ~$7.

I didn't like having leveling boards in the garage, and they just got in the way in the basement. I mounted two steel straps to the aluminum frames on the ceiling of the garage. I can slide in my 2 8' boards (1-2x8, 1-1x8) into these and they are up and out of the way, but easy to get to when I need them.
 

Bksvo

Well-known member
Lastly (for now)...

I added the TST 507 tire monitoring system. It works great and I luckily didn't need a booster.

I installed a Spartan tuner for the F-350. I'm keeping the DPF for now and running the 150hp tune. I really like the ability to monitor all the important engine and transmission parameters while towing (and the guages make my DW feel a lot less stressed when the clutch fan comes on when towing up a mountain). I like the power and didn't have any problems with temps towing up the mountains. Eventually I'll remove the DPF and expect to see a big increase in fuel economy.
 

Vtxkid

Well-known member
BKSVO, your rear table storage set-up is the best idea I've seen in a while! I believe my year (2011) was the last year they placed the tables against the side wall which is okay, not great but okay... I also have the EMS installed with my remote also adjacent to the UDC so I can see the status once I hook up power to the RV and like it. Agree with you on the Vacuum placement too! Nice mods, thanks for the pics!
 

shane1234

Member
I love the table storage idea. I have a 2013 cyclone 3110. All of the tables are stored under the master bed. I hate moving the large table to the back every time we want to use it. My question is will it be ok to add the extra weight to the beds for the motor to pick up. By the time you add the weight of storage unit and the tables it will be around 100-150 lbs of added weight. Will this cause the electric motor to fail down the road? Thanks for any input you may have. This is my first time with a toy hauler and I didn't know how much weight the small motor can handle.


Sent from my iPad using Tapatalk HD
 

Cycloner3950

Crazy for Camping!
View attachment 19533View attachment 19534View attachment 19535View attachment 19536
My crowning achievement was a new shelving unit to store the tables. I hated the way they were stored above the upper bunk. My son will be sleeping up there, so having to unstore all the tables every time we stop to camp would be a pain. Also, loading those tables over the vinyl covered steel edge of the table was extremely difficult for my wife, and it only took a day for us to put a crack in the vinyl.

I made the shelf to fit under the upper bunk. The sides are made of 2x4 pine, either ripped to 3" or two boards laid on their sides. The bottom is 1/2" plywood. To give the whole contraption rigidity, I used a 4x5/8" piece of oak on the leading edge, and connected it to the plywood with steel ties and pan head screws. I covered the ties with 2 layers of felt, then covered the whole thing with fleece material. The shelf sits on the rails for the bed unit, and the bed unit is screwed on top of it with 4" deck screws. I finished it off with snap straps from camping world to keep the tables stowed. I lowered the top bunk stop to the lowest setting (1" lower than delivered). There is still plenty of room to climb into the bunk and sit at the booth. Total cost was ~$100. It probably weighs 60 lbs.

The tables slide in very easily, and the fleece will keep them looking good.

Great idea and I like the concept. As a suggestion, take it to a professional trim shop and have them properly cover the frame with a durable fabric to match and it will look factory.
 

Bksvo

Well-known member
Shane,

I'm glad you didn't wait to long to send me a PM, because I'm in Afghanistan and haven't checked back here in a few months!

On my trailer, Heartland stored the tables on the upper bunk already, so I was only adding the weight of the shelf unit (I'd guess 60 lbs). I doubt Happy-Jack makes more than one motor for their units, but I could be wrong. It hasn't caused us any problems, and we are a high use owner, to put it lightly. This is one of the mods I honestly couldn't imagine being without. Where on earth would I stack those tables when someone is sleeping in the beds? (of course, I did add dressers back there, too).
 
Top