Replaced LED awning strip lighting

Miltp920

Well-known member
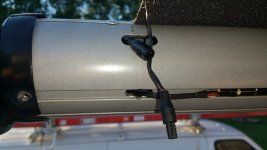
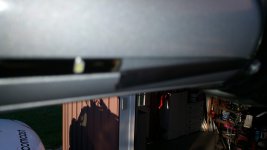
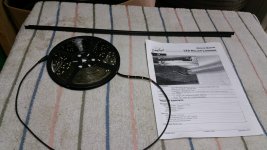
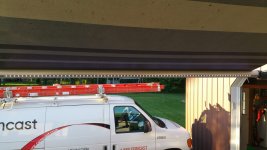
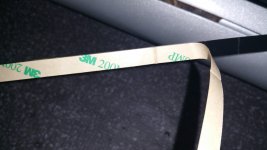
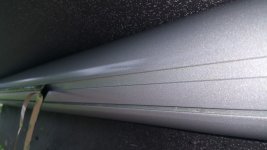
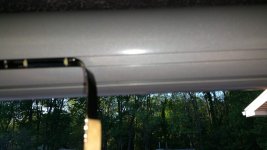
Just finished replacing LED strip lighting mounted on the awning roller. Our Cyclone is only 1.5 years old, and after about 1 year some of the LED strip lights were burnt out on both awnings, hit and miss along the entire strip. This strip of LEDs comes on a roll with adhesive on one side. I marked where the old one started with a pen. Made sure the new one started in the same place. The instructions tell you to clean the groove well after you remove the old strip. It pulled away very easily. You can see the brown tape you pull away to expose the adhesive.The quick connect power was easy to pull apart and put back together. The plug was hidden inside the awning roller. Since I called it in before my 1 year warranty expired, Heartland sent me lights for both awnings. I told the dealer, I could install the awning lights at my home. It was pretty easy, and when I turned on the lights, they worked! They supply a piece of trim, but I reused the old trim.20150527_201311.jpg20150527_201816.jpg
 

Attachments

  • 20150527_201636.jpg
    20150527_201636.jpg
    495.9 KB · Views: 153
  • 20150527_202326.jpg
    20150527_202326.jpg
    844.2 KB · Views: 152
  • 20150527_202001.jpg
    20150527_202001.jpg
    792.5 KB · Views: 141

Miltp920

Well-known member
The product that Heartland / Care Free Awnings sent me, came on a roll, as you saw in pics. One side is the lights and the other side is the adhesive covered with brown tape that you peel off to stick it to the roller. One end has a 12 V DC connector on it and the other end you cut off to fit your roller length. On my Cyclone, it sets in a groove the thickness and width of the LED strip. The directions that came with mine, said clean out the groove after removing the old strip. The black trim was held in place by one of the screws that holds the plastic cap on the roller and the other end "snaps" in, but the LED strip sticks to the roller. I reused my trim pieces. So, if you are replacing on old one, you too could reuse the trim. IF you are installing new, I do not see why the LED strip would have to go in a groove, although it does protect it and keep it in place. IF you have no groove, then you would not need the trip pieces. I think some people stick these lights up under the awning on the outside wall, just under where the awning connects to the side of camper. Looks good there too. You have to get the power to the LED strip. On my Cyclone, the power comes down the edge of the awning. Then there is a quick connect from the camper 12V DC that you plug into the LED strip. These connectors tuck away inside the roller tube of the awning. On one of my pics, You can see the hole in the roller, and the screw hole on the left side on the plastic cap that they use to secure the trim.
 

Miltp920

Well-known member
attachment.php
attachment.php

It turns out that it is 3M tape on the back side of the awning lights. I ended up cleaning the groove with WD40 and then cleaning up the WD40 with rubbing alcohol. They look new again. Aso, the new ones appear black when you look at the strip. The old ones were "white". I hope the black ones last longer. The LEDs are spread out about an inch apart, instead of 1/2 on the old lights. Not sure how these big pictures got in here...
 

Attachments

  • 3M tape20150530_133517.jpg
    3M tape20150530_133517.jpg
    497 KB · Views: 191
  • groove 20150530_133020.jpg
    groove 20150530_133020.jpg
    786.7 KB · Views: 201
Top