BigGuy82
Well-known member
I just finished up the wet bolt upgrade and am now starting the disc brake conversion on my Bighorn. If you have a Bighorn or Big Country, you might finde some of this helpful. I'll post any additional observations when I finish the job.
1. Wet bolt/bronze bushing/thick shackle conversion - pretty standard bull work - lots of hammering and jockeying with a bottle jack. Five observations - (1) if you have a Lippert Correct Track (this ONLY applies to Correct Track), DO NOT listen to Lippert when they tell you you need a 3 1/4" wet bolt for the pucks. It takes a 3 3/4" wet bolt. (2) If you do this upgrade make sure to upgrade from 1/4" shackles to 1/2" shackles - this means that those wet bolts will also be 3 3/4". (3) If your rig has a Dexter EZflex, it already has bronze bushings at all three points - the top bolt has grease fittings, the bottoms do not and so need wet bolts. (4) unless you like manual labor, use an air over hydraulic bottle jack. This upgrade requires a lot of axle jockeying. (5) Also, when you drop the axle to punch out the plastic bushings, I highly suggest that you don't drop the spring all the way out of the hanger. I suspect getting it back in there would be a chore.
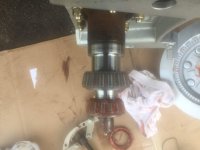
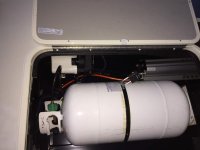
2. Brake actuator installation: A suggestion from Ron Russell was to put it in the right hand propane tank compartment. This is the PERFECT spot. Out of the way, protected from the elements, easy to run wiring to the pinbox, direct and easy access to the frame and underbelly for brake lines. (Don't know why the pix is sideways but it can't be rotated). Another tip - instead of using a flexible snake to pull the wire through the pinbox, I used a 4' Flex Drill - it's straight and pushed right in from the wiring box to the top of the generator hatch.
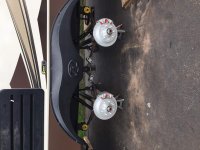
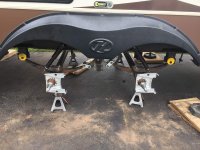
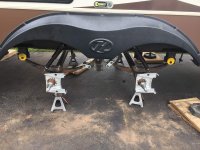
3. Removing the old stuff: Piece of cake. Bye, bye antiquated, ineffective (and I think dangerous) technology. Also, as you can see, I used the Level Up jacks to elevate the trailer.
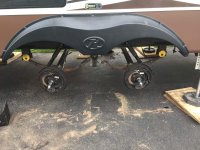
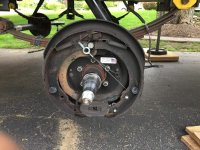
4. Tomorrow & Saturday: finish the install and road test.
1. Wet bolt/bronze bushing/thick shackle conversion - pretty standard bull work - lots of hammering and jockeying with a bottle jack. Five observations - (1) if you have a Lippert Correct Track (this ONLY applies to Correct Track), DO NOT listen to Lippert when they tell you you need a 3 1/4" wet bolt for the pucks. It takes a 3 3/4" wet bolt. (2) If you do this upgrade make sure to upgrade from 1/4" shackles to 1/2" shackles - this means that those wet bolts will also be 3 3/4". (3) If your rig has a Dexter EZflex, it already has bronze bushings at all three points - the top bolt has grease fittings, the bottoms do not and so need wet bolts. (4) unless you like manual labor, use an air over hydraulic bottle jack. This upgrade requires a lot of axle jockeying. (5) Also, when you drop the axle to punch out the plastic bushings, I highly suggest that you don't drop the spring all the way out of the hanger. I suspect getting it back in there would be a chore.

2. Brake actuator installation: A suggestion from Ron Russell was to put it in the right hand propane tank compartment. This is the PERFECT spot. Out of the way, protected from the elements, easy to run wiring to the pinbox, direct and easy access to the frame and underbelly for brake lines. (Don't know why the pix is sideways but it can't be rotated). Another tip - instead of using a flexible snake to pull the wire through the pinbox, I used a 4' Flex Drill - it's straight and pushed right in from the wiring box to the top of the generator hatch.

3. Removing the old stuff: Piece of cake. Bye, bye antiquated, ineffective (and I think dangerous) technology. Also, as you can see, I used the Level Up jacks to elevate the trailer.


4. Tomorrow & Saturday: finish the install and road test.

