And so it begins

wiredawgchief

Active Member
Mine leaked on the driver's side and it was associated w/ heavy rain. I store mine inside, so it was when we took it out and rained hard all night that I found it wet. I took it to the dealer and they removed and re-attached the slam door frame on both sides. It fixed the problem. Ron
 

porthole

Retired
I don't have slam doors but I have been thinking it is probably the frame.
Right side has no gas struts to push against lowering, so the frame seems to still be sealed well enough - and no water issue.

Left side is always working against the struts when closing and over time I have seen the frame loosen up from the body. It actually deflects down a bit when closing. So it may very well be coming through between frame and body.

But I have no more carpet in there to get all stinky.

H'mmm, maybe a Goshen touch up.
 
Last edited:

porthole

Retired
Something I've wanted to do since adding a receiver style mount for my flag pole (//heartlandowners.org/showthread.php/11365-And-so-it-begins?p=93543&viewfull=1#post93543) - a hard wired light. I have been using several varieties of solar LED lamps, but they are not bright enough nor do they last long enough.

The light is a marine grade 6 LED unit. I used a piece of 1" by 1/4" aluminun bar and angled it across the ladder supports up on the roof.

The wire feeds through a hole in the top rear corner. This goes right into the void between the ramp door frame and the frame for the HappyJac bunks.

From here straight down through a hole I previously drilled and and then forward along the frame to the front portion of the garage.

I added a switch in the frame for the holding tank door. Also added a red LED as a reminder that the light is on during the day.

I like it - nice and bright. Now just need some variable breeze to see if the lamp spreads the light around enough.
 

Attachments

  • Flag_light_1.jpg
    Flag_light_1.jpg
    504.2 KB · Views: 424
  • Flag_light_2.jpg
    Flag_light_2.jpg
    349.3 KB · Views: 392
  • Flag_light_4.jpg
    Flag_light_4.jpg
    295.2 KB · Views: 382
  • Flag_light_5.jpg
    Flag_light_5.jpg
    366.3 KB · Views: 366
  • Flag_light_6.jpg
    Flag_light_6.jpg
    352.7 KB · Views: 341
Last edited:

wiredawgchief

Active Member
Awesome! I installed mine on the pin box w/ an LED spotlight aiming down from the top front of the front cap. Nothing like Old Glory properly displayed at night with lighting. Ron
 

Attachments

  • Front Spot Light 001 (640x478).jpg
    Front Spot Light 001 (640x478).jpg
    141.8 KB · Views: 413
  • Front Spot Light 002 (640x478).jpg
    Front Spot Light 002 (640x478).jpg
    147.6 KB · Views: 386
Re: Chair rail wallpaper border trim

love the easy make it yours touches! thank you for taking the time to post these for us all...
 

porthole

Retired
MOR/ryde

Every time we are in the area I make an appointment and have my IS checked.

MOR-ryde_replace_01.jpg

The inspection this time determined that my springs were below specs again. But this time the trailer was weighed and a lengthy conversation ensued.
Fingers were pointed and in the end it was determined that we would be best off replacing my 7K suspension with an 8K kit. Not a drop in the bucket with regards to either cost or time involved.


Lot of "crunching" was done. Trying to justify the expense with several variables.

MOR-ryde_replace_02.jpg

After some negotiating we went with a complete IS replacement.
Off with the old and on with the new. 2.5 days partly due to a wicked Indiana storm that knocked out power in the area for 14 hours.

MOR-ryde_replace_02b.jpg

MOR-ryde_replace_03.jpg

MOR-ryde_replace_10.jpg

Brakes after 19+ thousand miles and I run my controller at 10

MOR-ryde_replace_13.jpg

Bearings, 4.5 years and 19+K miles, orignal grease packing from MOR/ryde

MOR-ryde_replace_07.jpg
 

porthole

Retired
On with the new. My guess is there is about 50% more steel with the 8K over the 7K

MOR-ryde_replace_19.jpg

MOR-ryde_replace_21.jpg

Brake pads used

MOR-ryde_replace_29.jpg

This is one of the employee's car. "Fart can" muffler and a "working stack". He was proud of it too.

MOR-ryde_replace_30.jpg

In the end we spent $$$ on an unplanned repair, but feel it is worth it.
And a lesson learned. Doing work like this I was inclined in the beginning to have the 8K installed and was talked out of it.

An FYI You can go with:

7K IS - 7K springs
7K IS - 8K springs
8K IS - 7K springs
8K IS - 8K springs

So if you think you might be heavy, the heaver suspension components with the lighter springs. Springs are easy to change.
 

porthole

Retired
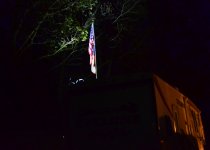
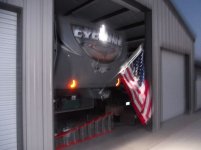
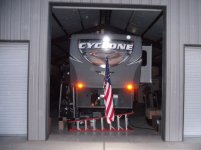
Trailer cameras I bought at Goshen. I won't bother with the side view cameras. In my opinion they are not worth the expense or time involved to install.
The rear camera shown here is a 2 camera unit, a wide angle and closeup.
I have the close up aimed to just see my rear bumper on the trailer.
The wide angle is aimed to see the ground about 20-30 feet behind the trailer. There is a dead spot between about 10-30 feet directly behind the trailer.


Cyclone_cameras_01.jpg

Cyclone_cameras_02.jpg

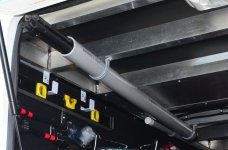
The hardest part of course is running the cables.
Difficult part #1
I went through the pin box, straight back into the genny compartment. About an hour+

Out towards the door side, back under the bedroom floor into the area behind the basement wall. From there across to the off door side, down through the floor into the underbelly. Along the frame to the rear of the trailer.

Difficult part #2
From the inner frame rail to the most rearward left side corner and up through the floor into the garage, another hour+
I used an old "S-video" cable with the pins removed. Jammed the camera video cables into the now empty end and taped it up. This was for snaking through the compartments and wall.

"If" I was to do this again, I would order an extra video cable, cut it in half and use that for snaking, since the uncut end can be securely attached to your video runs

If you have the pull down screen, just remove, not worth trying to work around.
Don't bother pulling the trim off the forward facing boxed in area. Behind mine was a solid piece of 3/4" cherry.

Pull the trim off the bottom to expose the wire cavity.
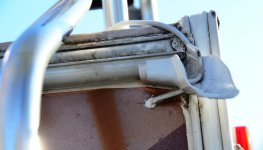

Cyclone_cameras_03.jpg

Cyclone_cameras_04.jpg

Cyclone_cameras_06.jpg

Difficult part #3
This hole in the aluminum channel was just big enough for the existing wires, plus my previously installed back up light circuit.
I had to carefully make the hole larger with the wires still in it. Enough cutting to get the new cable ends in.

Cyclone_cameras_07.jpg
 

porthole

Retired
Truck wiring was a bit easier. I installed the trucks 7 pin connector near the factory their connector. I have power coming from one of my upfitter's.

For temporary monitor mounting I used an aluminun decorative license plate I had. Bent to shape it around the mirror and held on with double stick. Only temporary, but it looks like it might stay for the long haul.

Cyclone_cameras_08.jpg

Cyclone_cameras_09.jpg

Cyclone_cameras_11.jpg

Video quality is about VCR. Little disappointed in that. Lot of work, glad I did it, doubt I would do it again.
 

porthole

Retired
As part of my drama with SAT TV I ran all new cables. New to the LR and an"initial" to the bedroom. Seems the bedroom never got wired for SAT, just an empty connector in the ceiling.

Added an outlet in the basement for the Power Inserter.

SAT_TV_02.jpg

The power inserter and the splitter are mounted behind the basement wall.

SAT_TV_01.jpg


The DirecTV HR "Genie system sits behind the TV on a 2" angle bracket, held in by a strap. As the remotes are radio frequency the receiver can be hidden. Nothing to see anyway on the front face.


SAT_TV_03.jpg

A Genie "client" sits in the bedroom closet that holds the TV. You can just see in in the lower right corner.

SAT_TV_04.jpg


SAT TV setup

//heartlandowners.org/showthread.ph...so-far-a-bit-disappointed?highlight=satellite
 
Last edited:

porthole

Retired
Trying to eliminate black streaks coming from the gutter seams. Tried some EPDM patch tape. Missed a small spot on the inner side and it still leaks a bit.

gutter.jpg
 

porthole

Retired
Had an 1800 watt inverter with built in transfer switch laying around.

Inverter_04.jpg

Wired it in and the output is used to supply:

Double duplex in the garage ODS, a single duplex on the DS
Inverter_06.jpg

Outlet in the basement for the SAT power inserter.
Inverter_07.jpg

Outlets behind the TV for the SAT receiver and TV and a duplex in the bedroom for the TV and Genie client.

Purpose is to supply constant, steady power fo rthe TV's and SAT equipment. This way we can use them without the genny.
In the garage our Dometic electric cooler/freezer and ice maker are plugged in and left on. Ice when we arrive :cool:

While I was doing this I changed all the power and supply cables for the hydraulic system. Used 2 gauge cable I had leftover from the golf cart upgrade. No more low voltage kick outs with the Level Up now. The 100 amp breaker is the LevelUp breaker and is temporary. It will be replaced with an 80 when they come in.

Inverter_05.jpg
 

porthole

Retired
My LevelUp was not installed with any type of angle, al of the jacks were done vertical, and the fronts were installed inside the frame rails.
LevelUp's answer to that is to space out the jacks with washers.
The rears were easy, the fronts were a bit of a challenge.

About an inch of washers gives about 5 degrees.

Levelup_jacks.jpg

I can tell you that angling the jacks brings about new issues - pops.
I have the popping now more then when the jacks were straight. Something to ponder.

While in the Genny compartment (from the rear, wall removed) I removed my hose reel since the Ford is equipped with air.

Hose_reel_01.jpg
 

porthole

Retired
The trailer sit DS high in my driveway, so whenever I washed it, if I wasn't careful, water was getting inside under the fridge.

I siliconed down a piece of 1" aluminum angle, seen here between the extinguisher and the fridge burner.

The extinguisher is one of the Halon units mentioned in the other thread about Halon that Bill started.

D70_5530.JPG


After gluing down the angle I sprayed it this flex seal stuff. Not real impressed with it's ability to stick But so far no leaks.
(whitish wavy looking stuff)

D70_5531.JPG
 

porthole

Retired
12 volt outlets added in the UDC (for the original SAT dish), bedroom, basement and under the the J-wrap behind the steps for 12 volt Fantastic fans I got while at Dover.

The "J-wrap" socket is to hang one of the fans on the dog's pen.


D70_5532.JPG
 
Last edited:
Top