Project LM 365

jassson007

Founding Louisiana Chapter Leaders-Retired
Jerrod just hasn't tasted your Gumbo yet. If he had, you'd be "on the list" :)

Haven't had a chance to make any lately been too warm down here. I am in Huntsville tx this weekend and it will be first time this fall we are not in the 80's today.


Sent from my iPhone using Tapatalk
 

Jesstruckn/Jesstalkn

Well-known member
I have been struggling with my smoker folding the legs up and down for a while now and have been thinking of a lift system. I was thinking of a track system that would lift it up then slide it out and lower it down. I had a few different ideas in my head and decided this one would be the easiest and most useful way to accomplish my task.

I did my measurements and put it on paper.

31b3906c3fb7bd22fb800170f664f496.jpg


Then stopped by my welding shop and told him what I wanted to do. We stated rummaging around his yard looking for the perfect pieces. The boom was easy to find but the tower and base not so much. We found the tower no problem but couldn't find anything to fit perfectly inside of it. So he decided to machine me down a shaft to fit perfectly inside the tower.
For all of that the bill for the steel and the machining came to $45.00

434ffa4e1b55071f8bf1ffc5e2be7e26.jpg


The lift actuator was about $55.00 on Amazon

9600c259a572af6691eb4123a8446d69.jpg


Then I found a cool up down switch on Amazon and ordered it
88a07604fb004e4558cb137027b81d08.jpg


The Jim B. Sent me a link to a even better one with a wireless remote.
Thanks Jim

820734af406a3c22469258a071f88a72.jpg


Now I had to make the pivot point in front of the tower so it would be able to drop down as far as possible without the boom hitting the tower. So I made a box out of 1/4 × 2 steel strip.
f7dd80453fccbdaec2d3f26507bd8574.jpg

dff8c0024ddc66170d477bb70d118953.jpg

2d1dfd103651dd090528dda8430ce955.jpg

bc18c051e94ec1635ca8fd94453a2fa9.jpg

02c8a3bf127ce0162f74f0e45869a566.jpg


Now the boom is 2- 20" pieces one inside the other so I can adjust it to the length I need it and I capped one end.

144a07cd38edb0feab1b2d484adbf075.jpg

fabd3aaf0d37fa555245e7fc4b956e56.jpg

7f53c525f7fd613a5641ecb725fcd082.jpg


Finally placed the mounts for the ram in the best place I think it should be and welded it all together.

d7697bf856913611316021a285a2beca.jpg


7efe473cac0183d948cfd9ffff59e7be.jpg


When I get it back from powder coating I'll install it and wire in the remote switch.

More pictures to come.

Sent from my XT1585 using Tapatalk
 

jbeletti

Well-known member
The grill lift project is looking great! Can't wait to see the video of it being lifted, rotated and lowered down.
 

Jesstruckn/Jesstalkn

Well-known member
The wiring diagram is correct but color chart is just for my boxes. Or if your making your own from scratch.
I found on all of the 9 boxes I've installed every RV wire colors have been a little different.
Most all of them have the (White wires as ground)
(Blue for brakes)
(The Orange with black strip wire for the brake away switch)
(And 1 big RED wire for the battery)
But after that the wires they use for left turn, right turn, and tail lights, have all been a little different.


Sent from my XT1585 using Tapatalk
 

Jesstruckn/Jesstalkn

Well-known member
Guess I won't be getting my truck next week.
Just received this email from my Ford guy....

(Hi Jerrod!*


Your truck is coming this way on the train and is showing an ETA to be here between 11/19 and 11/25.*


I will let you know as soon as I see it roll in! =)*

I can't believe how long it's been already and two more weeks is crazy.

Sent from my XT1585 using Tapatalk
 

Jesstruckn/Jesstalkn

Well-known member
For those of you receiving my boxes soon, I recommend the color coded tape to mark all of your wires before you remove them and a multi-meter to help identify each group of wires.


2c93997d5f9dee27b87d55f626e9f228.jpg

This picture is from O'Reilly auto parts
You'll want identify and mark each wire before you remove anything.

Sent from my XT1585 using Tapatalk
 
Last edited:

arby47

Member
The wiring diagram is correct but color chart is just for my boxes. Or if your making your own from scratch.
I found on all of the 9 boxes I've installed every RV wire colors have been a little different.
Most all of them have the (White wires as ground)
(Blue for brakes)
(The Orange with black strip wire for the brake away switch)
(And 1 big RED wire for the battery)
But after that the wires they use for left turn, right turn, and tail lights, have all been a little different.


Sent from my XT1585 using Tapatalk

Jess,

I have just finished installing the coiled cable and plastic box mod. All went well with the installation. All of the lights are working fine (had fun tracing the turn signal and tail light wires). Will test the brakes and breakaway cable tomorrow. I decided to keep the original cable (coiled up inside the pin box) in case my rig is ever towed by someone without an in-bed connector.

Really like the flashing lights and all lights on functions. Thanks for a great mod!
 

Jesstruckn/Jesstalkn

Well-known member
Glad you liked it.
I left the straight cord on mine at first also. I had the same thought. But the coiled cord is supposed to be 12' so I'm sure it would reach if needed. So I removed it.
There's not to many guys without the plug in the bed anyway.

Sent from my XT1585 using Tapatalk
 
Jerrod thanks for the coaching on the issues behind the Microwave.

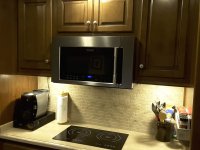
We purchased a Fridge Professional 1.8 cubic foot Convection/Microwave oven to replace the Hotpoint. Just like your framing on your Ashland ours was the same. The rear exhaust framing was out by a full inch from centre of the cabinet and an inch lower than the rear damper vent that attaches to the oven.

So my next door neighbor had some extremely sticky foil tape, we mounted the damper with the tape sealing it flush to the back wall within the off centre opening. I then went to a Fireplace woodstove dealer and picked up some soft 1/2 inch thick gasket sticky one side and placed it around the rear of the oven. Now all the cooking aromas will exhaust with no leakage and no outside drafts come into our Ashland.

Luckily all three mounting screws on the topside were identical to the Hotpoint, the only difference was the bottom bracket was lower but just above the backsplash tile opening. Again thanks for help. My better half more than happy with higher end oven.

Shawn

20161112_162808.jpg


Well the GE Advantium is in :) only had to drill 4 MORE holes in the top cabinet. WOW it looks like Swiss cheese up there, but I'm making the trailer lighter right ?
This thing is nice :) Hopefully this is the last one for a while.


f1682dc5ee511bb1bdf5b9ac26e61fab.jpg
0a4d7d5b3586f0763dc31dd272c3aa62.jpg


Sent from my XT1254 using Tapatalk
 

Jesstruckn/Jesstalkn

Well-known member
Very nice job. Sounds like you did it better than I did mine. DW will definitely be happy with the final result.

Sent from my XT1585 using Tapatalk
 
Last edited:

oldelmer1

Well-known member
Jerrod,

Just did my power cord 7.0, my wire colors were completely different than yours, but I tested each wire first and everything seems to work fine.

Haven't tested the brakes yet, i need to hookup to the truck for that. I think????

Thanks again,

Tom
 
Last edited:

Jesstruckn/Jesstalkn

Well-known member
Update on the LED light strips under my frame rails.
A while back when I did my drawer Mod I hit and broke a few of the LED lights in that 38' light strip. Since then they have been stuck on red. Well after returning from our last trip I stopped at the truck wash to get all of the salty ocean mist off of everything. I could see the light strip was still on at the truck wash (some times I forget to turn it off before traveling) well last night I noticed only about 4' of it working now and the rest is dead.
This was a cheap set up I found on Amazon. Looks like I'll need to replace it with better quality LED light strip and this time I'll do both sides.
 

Bones

Well-known member
Update on the LED light strips under my frame rails.
A while back when I did my drawer Mod I hit and broke a few of the LED lights in that 38' light strip. Since then they have been stuck on red. Well after returning from our last trip I stopped at the truck wash to get all of the salty ocean mist off of everything. I could see the light strip was still on at the truck wash (some times I forget to turn it off before traveling) well last night I noticed only about 4' of it working now and the rest is dead.
This was a cheap set up I found on Amazon. Looks like I'll need to replace it with better quality LED light strip and this time I'll do both sides.
do you remember which ones you bought?
 
Top