SeeLevel System Install

Go-Fly

Well-known member
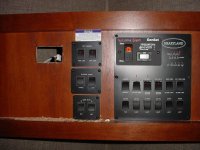
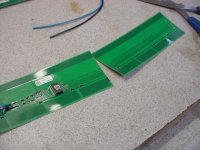
I've installed SeeLevel systems on all my trailers. A SeeLevel system reads your holding tank in a percentage 0-100%, instead of the three lights. You start by removing the Heartland panel and unplug the wires coming from the holding tanks. You have to cut off the light board connector and install the SeeLevel connector. Tie all four tank sender wires into one. The SeeLevel uses a FM signal from each tank sending unit so, all you need is one wire running to each holding tank plus a ground. There will be 12 volts on every tank wire to run the sending units on the tanks.
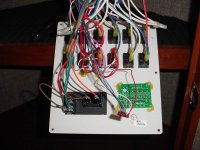
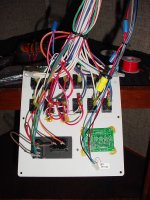
5th 2 003.jpg5th 2 004.jpg
 

Go-Fly

Well-known member
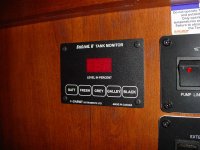
Then you need to cut a hole in the control panel mounting area for the face of the SeeLevel . I won't put power to it until I get the sender units installed.


5th 2 005.jpg5th 2 009.jpg
 

Go-Fly

Well-known member
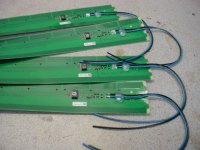
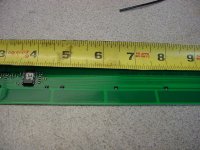
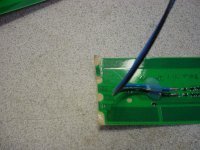
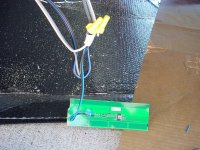
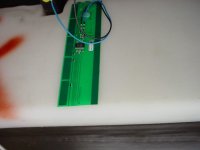
Next is to open up the bottom and put the sending units on the outside of the four tanks and tie the two wires to the new sending units. The Seelevel sending units have to be cut for the depth of the tank and calibrated for it's signal, fresh, gray, galley and black. I like to do them one at a time so they don't get mixed up.

See Level 2 001.jpgSee Level 2 005.jpgSee Level 2 006.jpgSee Level 2 003.jpg
 

Go-Fly

Well-known member
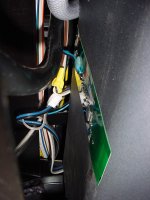
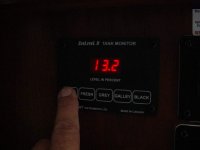
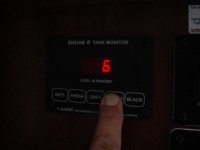
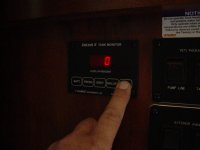
The last step is to stick the sending units to the tanks. Wipe the tank down with alcohol were you plan to mount the sending unit. Connect the two wire and stick it on. The fresh water sender looks short but the bottom of the tank is rounded and it won't work with that sharp of bend. Plug the power in and test it. The battery is charging at 13.2, the galley has 6% and the black is at 0%. I didn't get the galley emptied completely last time we used the trailer. I filled the holding tanks using a 5 gallon bucket to check the sending units and just did a slow fill on the water tank. Everything checked out. Did all this in two days. Took me longer just to get the skin off the bottom and back on.
See Level 2 007.jpgSee Level 2 009.jpgsee level 3 003.jpgsee level 4 008.jpgsee level 4 009.jpgsee level 4 012.jpg
 

cookie

Administrator
Staff member
Nice install and I really like the system.
I would like to point out that the battery is not 13.2% as indicated by the graphics on the panel but is 13.2 volts.
Nice job.

Peace
Dave
 

Rollin_Free

Well-known member
Nice Job. I have mine on order.

X2- I flushed all my tanks 2 weeks ago and all were empty when I finished. Yesterday I pushed the test switch and the black tank shows full. What???? I gonna have to have a talk with those gremlins. Anyway I wasn't aware there was a replacement option that works. I'll be checking into this for a future mod.

I have a couple of questions:
1. Do you install the sensors close to the existing OEM ones?
2. Can you leave the existing sensors in place on the tank?
3. I see that you are taking all of the Coplast (whatever it's called) off.
4. When you say 2days is that 8 hrs days or 12 hr ones? I know how these two day projects work and I've spent many nights working under my vehicle just so I could get to work the next day.

So this on may be a dumb question but are the OEM sensors inside or outside the tanks?
 

Jesstruckn/Jesstalkn

Well-known member
I treated my tanks with some stuff a friend gave me and now all of my sensors read full all the time.
I had already been planning to do this upgrade. Now it looks like I'll be doing it sooner than later.
I'm considering putting a 2nd monitor in the docking station but I don't really have a good spot for it.
It would be nice to be able to check levels and monitor it from there with out having to go inside.

Sent from my XT1254 using Tapatalk
 

jbeletti

Well-known member
Go-Fly - great job on your install and thank you for sharing the pics and install details.

I have a question for you. Recently, I exposed my forward most gray tank in the drop frame section. I looked at the discharge side of the tank and found that side to be unsuitable to place the SeeLevel sensor due to the shape of the tank side. What I do not know is what the other side (door side) of that tank looks like. Can you confirm what side of your front most gray tank, you installed the sensor on?

When I had that tank exposed, I was not considering the SeeLevel system.

Thanks!
 

Jesstruckn/Jesstalkn

Well-known member
Jim question for you .
To get to all 4 tanks would you
#1) remove the corplast to get to them all or
#2) cut a hole in it at each tank ?
#3) you have a better idea ?

Sent from my XT1254 using Tapatalk
 

Go-Fly

Well-known member
X2- I flushed all my tanks 2 weeks ago and all were empty when I finished. Yesterday I pushed the test switch and the black tank shows full. What???? I gonna have to have a talk with those gremlins. Anyway I wasn't aware there was a replacement option that works. I'll be checking into this for a future mod.

I have a couple of questions:
1. Do you install the sensors close to the existing OEM ones?
2. Can you leave the existing sensors in place on the tank?
3. I see that you are taking all of the Coplast (whatever it's called) off.
4. When you say 2days is that 8 hrs days or 12 hr ones? I know how these two day projects work and I've spent many nights working under my vehicle just so I could get to work the next day.

So this on may be a dumb question but are the OEM sensors inside or outside the tanks?

Lets see if I can answer a few questions for you.

(1) You can install the SeeLevel sender any wheres you want on the outside of the tank. Because Heartland uses and offset tank at the discharge end, I had to put my senders on the back side of the gray and black tanks. Then I ran two wires to the old probes in the tanks.

(2) The existing sensors are left in the tank. They all tie into one wire (per tank) that went up to the panel. I cut behind that junction to tie in the new SeeLevel sending unit. I left the ground wire connected to the tank and spliced into it.

(3)Yes, you have to unscrew it and drop it down. I used adjustable stands and 2x4s to put it back up.

(4) I'd say hours spent was 6. I just didn't push it that hard and I'm not happy about crawling under my trailer that much.

(5) The OEM sensors are inside the tank and work off of contact with the liquid inside. The electrical connection is outside the tank.

- - - Updated - - -

Nice install and I really like the system.
I would like to point out that the battery is not 13.2% as indicated by the graphics on the panel but is 13.2 volts.
Nice job.

Peace
Dave

This is correct. Only the tanks are in percentages. Battery is in volts and if you have switches for water pump and hot water heater it only shows you they are on. The hot water heater does have a pilot out warning light.

- - - Updated - - -

Go-Fly - great job on your install and thank you for sharing the pics and install details.

I have a question for you. Recently, I exposed my forward most gray tank in the drop frame section. I looked at the discharge side of the tank and found that side to be unsuitable to place the SeeLevel sensor due to the shape of the tank side. What I do not know is what the other side (door side) of that tank looks like. Can you confirm what side of your front most gray tank, you installed the sensor on?

When I had that tank exposed, I was not considering the SeeLevel system.

Thanks!

I installed my SeeLevel sender on the back side of the tank (door side). You can't put them on the side because of the rail mounts. The only down fall is there is a delay until you fill the slope of the tank before it starts to read the level. As long as it tells me when it is full, I'm good with that.

- - - Updated - - -

Jim question for you .
To get to all 4 tanks would you
#1) remove the corplast to get to them all or
#2) cut a hole in it at each tank ?
#3) you have a better idea ?

Sent from my XT1254 using Tapatalk

I removed the corplast, insulation and thermal blanket to do the install. That takes more time then the install. Then sealed all the edges with black spray foam.

- - - Updated - - -
 

jbeletti

Well-known member
Jim question for you .
To get to all 4 tanks would you
#1) remove the corplast to get to them all or
#2) cut a hole in it at each tank ?
#3) you have a better idea ?

Sent from my XT1254 using Tapatalk

For the front most gray tank, as it's in the drop frame area, I just dropped the coroplast to completely expose the tank.

For the freshwater tank, I cut the coroplast from frame rail to frame rail and peeled it back towards the back of the coach, then spliced it back together with short screws into a piece of southern yellow pine that I layed on top of the frame rails.

For the black tank and other fray tank - they are stacked. I never exposed them, but since they are immediately rear of the drop frame section, I'd likely elect to drop the coroplast starting at the edge of it at the drop frame and peel it back.

So there you have it - in all cases, I'd elect to drop the coroplast rather than cutting a hole in the coroplast to do the work.
 

jbeletti

Well-known member
...I installed my SeeLevel sender on the back side of the tank (door side). You can't put them on the side because of the rail mounts. The only down fall is there is a delay until you fill the slope of the tank before it starts to read the level. As long as it tells me when it is full, I'm good with that.

I believe I understand. If we agree the tank has 4 sides, when installed, I am calling the ends of the tank that is parallel to the frame rails, the sides. So, two sides. I am calling the other two ends the front and the back. In my case, the back of the tanks were stepped so as to provide a ledge for the tank to rest on a crossbeam for support.

That all said, my discharge valves are on the off-door side of the tanks. I believe then that you installed your See Level sensors on the door side of the tanks. I only wish I had See Level in mind when I had my gray tank exposed :)

I temporarily taped the sensor onto the the freshwater tank and will be connecting that to the See Level monitor during this trip. Later, I may add a sensor to the front most gray tank. Thanks for the feedback!
 

Go-Fly

Well-known member
I believe I understand. If we agree the tank has 4 sides, when installed, I am calling the ends of the tank that is parallel to the frame rails, the sides. So, two sides. I am calling the other two ends the front and the back. In my case, the back of the tanks were stepped so as to provide a ledge for the tank to rest on a crossbeam for support.

That all said, my discharge valves are on the off-door side of the tanks. I believe then that you installed your See Level sensors on the door side of the tanks. I only wish I had See Level in mind when I had my gray tank exposed :)

I temporarily taped the sensor onto the the freshwater tank and will be connecting that to the See Level monitor during this trip. Later, I may add a sensor to the front most gray tank. Thanks for the feedback!

You'll enjoy it when you get it all installed.
 
Top