Bogie
Well-known member
I’ll apologize in advance for the length of this post, but this turned into quite a project.
I have wanted to add Ground Control to my coach for some time, but there were a number of issues I had to deal with. Some were known in advance, some were a surprise.
The biggest obstacle was that my Sundance 245RL is equipped with a rear slide out tray. This meant that track for the tray (which sits 1.25 inches below and parallel to the I-beam) would interfere with the installation of the mounting brackets for the rear jacks. I didn’t want to loose the tray, so I had to find a way around the problem. In addition, I couldn’t even begin to design around the problem until I had the actual attachment brackets in hand.
Once I received the kit I found I had two problems.
1. I had to get around the slide out tray track.
2. I had to determine where to place the brackets.
The instructions call for the rear jacks to be placed approximately 12 inches behind rear tires. Well, on the curb side, there is only 10 inches (total) between the tire and the stairs. On the street side, the slide mechanism prohibits placing the brackets any closer then 16 inches behind the tire. After a couple of calls to Lippert, I had no choice but to keep the jack on the curb side right against the stair box. (Hope I never have a blow out!) Also they said it was okay to put the street side jack farther back than the curb side (even thought the instructions state otherwise.)
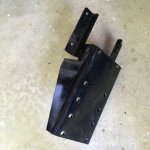
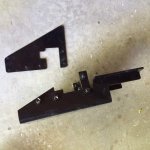
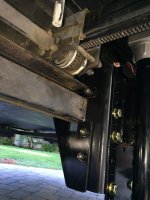
So on to the engineering. I re-designed the bracket for the street side (see the pics below) to get around the track for the tray and to maintain the lateral stability of the bracket. To do this, I had to mill the bracket and mill two new quarter inch steel gusset plates to sister on to each side of the milled bracket. On the curb side I determined that I could cut 8 inches off the end of the track for the rear tray and use the curb side bracket as is. Only problem was I had to design a new attachment point for the track , since I was cutting off the front most attachment point as well. Frankly that was easy. Just cut it off and weld on a new bracket. Fortunately I didn’t have to weld on the frame as I was able to utilize part of the existing bracket for the stairs.
So, with all that, all it took was the Labor Day Weekend plus one day (mostly on my back) and I figured I would have it in.
The front jacks were piece of cake. Old ones out, new ones in.
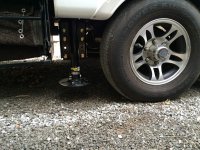
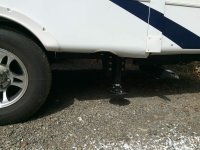
The rear jacks were a different issue. All went exactly as planned, until I bolted the rear jacks onto the rear brackets and discovered that with them pushed all the way up to the bottom of the coach floor, I only had about 4 inches clearance from the ground. That was a bit skinny, especially on the street side where the jack was 16 inches behind the tire. Now what?? Could I modify the jacks?? I called Lippert again. Well…no help on this issue. The only make one size jack.
With the weekend over, I had to take the coach back to storage. Yikes… one of the jacks only cleared my slightly sloped driveway by one half inch. So now what???
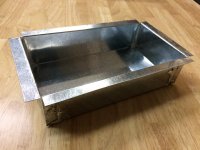
I came up with the idea that maybe I could cut a small pocket in the floor on each side and gain an additional two inches for each rear jack. Well, that’s exactly what I did this weekend. I made a sheet metal box for each side (the pic is a little more simplified than what actually installed) and then carefully cut a pocket on each side so as not to pierce the floor inside. ( I LOVE my Fein Multi Master!) I installed each box with a generous amount of 3M Strip Caulk to keep any water out.
And voilà ….. , Ground Control 3.0 (with ample clearance.) We will be trying it out for the first time in two weeks. One thing I have say though, I burned a lot of brain time on this before and during each phase, but it was worth it and I was happy with the final result.


