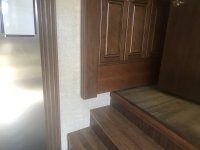
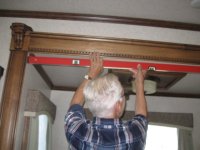
In my case, I didn't worry about removing the "V" dip out of the facia, I only wanted to raise the ceiling to avoid the dip. My 2017 looked a lot like yours as far as the facia. By the way, I know of several people that have had to perform this process. I would consider flipping the header to assure the crown is oriented in the up position. The header will come off easily, once you get started from the end. When jacking up the ceiling, you will need to go a bit beyond what you think is adequate as there will be some residual sagging as you relieve the upward expansion.
HERE is the link to pics of my lifting process. You will have to scroll down to find my post.
This is an email I received from H regarding the process:
Cody Hockenberry <
Cody.Hockenberry@heartlandrvs.com>
You
Good Morning,
I have just herd back from our engineering depart on a repair solution for your sagging roof. I will copy and paste their response in yellow. I hope this information helps aid you in your repair.
Remove top facia and backer board, place a “T” stick in the middle of the room pushing ceiling up to where it is past level. Leave “T” stand in and replace backer board screwing board every 8”-10”. This should lock roof in.
Thank you,
Cody Hockenberry
Heartland RV
P: 844.915.7950
F: 574.206.0910