Matt750
Well-known member
Thought I would start a list of things I have done to our 2019 CY 4007. So far we love it, but there is always something to do on these things! Currently we are redoing our house, so any free time or any time I need a break from the house, I'll find something to do to the camper. Just like the house, it seems the list of things to do never really gets shorter!
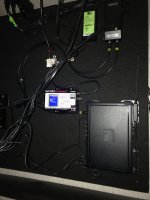
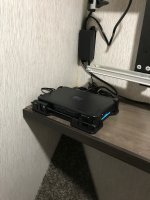
1. Added Winegard Trav’ler
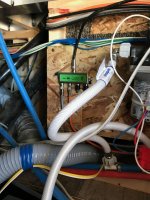
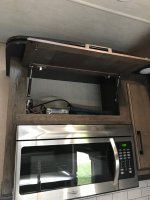
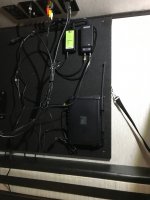
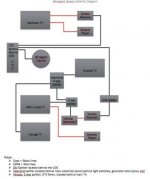
We’ve had the Winegard Trav’ler in our last two trailers and really like it for when we’re “glamping”. Wife really likes to watch college football (Go Red Raiders!). I bypassed the 4 cable connection points at the UDC and hooked the cable up to a Directv splitter. This time around, I installed two Directv receivers (H25 model). I took our old one from the last trailer and installed it behind the main TV in the living room and the second receiver is for the bedroom TV. The receiver in the bedroom is dedicated to just that TV. I may (at some point down the list) see about adding another TV to the front storage area and tie it into this receiver. The other receiver is mounted behind the main living room TV and feeds the garage and outdoor TV via a device that takes the HDMI cable and sends a 1080p signal to the other TV’s through a splitter. This is made by VeCoax and is the Mini Mod 2. It takes a little bit to set it up (it’s more tech-savvy than me!), but seems to work flawlessly. I’ve had the wireless HDMI systems before, and really didn’t want to mess with it this time. Seems like, when they worked, they worked well, but I was always having to fiddle around with it. I did go through just about every coax fitting I could find and either fix or tighten them up (mainly, they needed to be tighter).
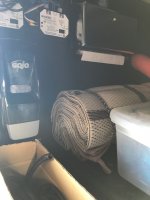
2. Soap dispenser and paper towel holder
Ordered off of Amazon. Mounted to the front wall of the baggage compartment. I keep a little container beneath the soap dispenser so if/when it leaks, it won’t make a mess.
3. Added a door latch
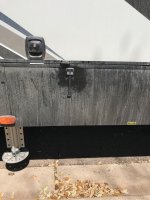
Really, I think this is an oversight from Heartland. I called and they sent me the door latch that holds the front door open against the sidewall. Yes, it’s plastic and will break eventually, but works for now. With the West Texas wind, it was a two-person job getting the Morryde steps down! One person to hold the door open while the other person put the steps down!
4. Electric reel latch
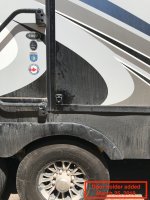
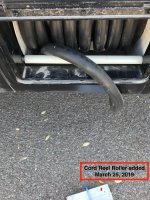
Another oversight from Heartland. This was yet again another two-person job. Now I can do it by myself (and not use tape to hold the door open). Speaking of the electric reel, when I would pull it out or wind it in, I noticed it would always catch on the door panel trim. After looking at some other installations, it looked as if mine was missing a roller for the cord to roll on as it was winding up. So…roller added!
5. Installed RVlocks
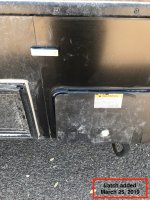
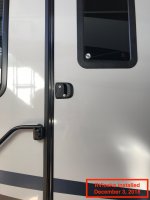
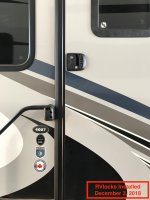
Convenience really. That’s all this mod is for. Original locks were separate keys. Now they are keyed alike and we have multiple ways of getting into the camper.
6. Wires in baggage compartment tidy up
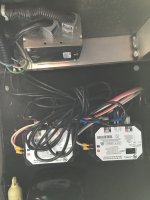
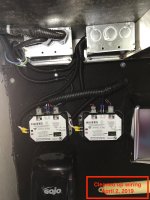
The wires are for the Shwintek slides in the bedroom. The 4007 has a slide within a slide. You can see the before and after pictures. I would like to ask whoever installed that system and ran the wires they way they did (and left them in a bundled mess) if they were proud of the job they did. I added a junction box and put some plastic wrap on them. At some point I tackle the rats nest of wires in the battery/ generator compartment. At least I don’t see those as often!
7. Progressive 50-amp surge protector hard wired
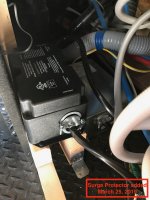
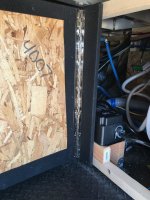
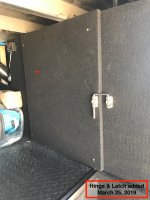
We also had this on our last camper. Wouldn’t be without one. I like the hard-wired version as its one less thing to forget or do. On our last camper, I wired it in where it would catch generator and shore power. This time, just shore power. When I put the surge protector in, I went ahead and added a hinge and latch to the panel that Heartland had screwed in. This way I can check for water leaks, etc. easier.
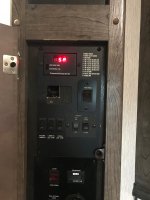
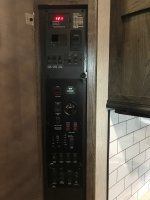
8. Control panel addition
Well, when I went to put the Progressive surge protector LED indicator light into place, guess what? It would fit where the rest of the switches were! It stuck out too far to close the door. So, I made a custom panel that also includes the codes for the surge protector, along with some other switches that weren’t labeled. I left the Yeti pack, and Vent Fan switches in their original mount, but made a place for them on the panel. Also, you can see an opening for another accessory. That will either be the Mopeka propane monitoring system (if I decide to by it, still on the fence) or an “access panel”. I must admit that I did sort of copy this idea from the rv-project.com guy, but took it to another level for my needs.
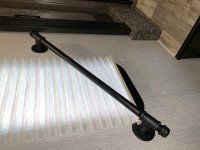
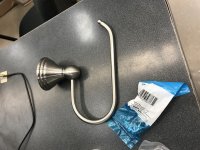
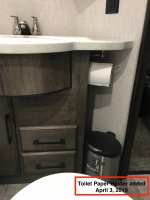
9. Toilet paper holder
Why? Because. Well, just because.
10. MCD Shades
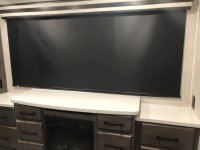
Our CY 4007 has MCD shades everywhere except the bedroom and one window in the hall. These have the accordion style shades. After a couple of trips, the wife asked if we could install MCD shades in the bedroom. I said, sure why not?! On our third trip, after the first night, I was told to order shades; too bright in the bedroom for the wife to sleep in. Message received—installed MCD shades in the bedroom.
11. Dometic A/C silencer kit
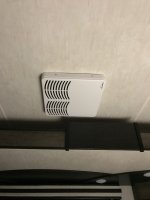
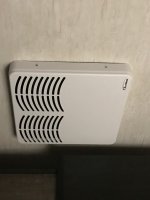
I recently saw a devise made by WackOProducts. It basically replaces the stock Dometic air intake and filter. The kit consists of a filter, base plate, and a cover plate. The base plate has some sound-deadening material applied to it. Only downfall I saw was that you lose the quick cool feature. I must admit, I was a bit skeptical on this devise. I took a chance and ordered it anyway. Before and after installation I took some decibel readings with an app on my phone (don’t know how accurate it is, but seemed to work). Before I was getting a consistent 67 decibels. This was with slides in, 80 degrees out and running the generator. A/C was set to High Cool, 70 degrees. Same settings after the silencer kit were 56-57 decibels. A notable difference on the meter and to the ears. It was a bit pricey at $190, but it does state Made in the USA. Plus, anything to shut up the noisy Dometic is worth it in my opinion. Before installation I looked at the existing ductwork and tape job. Everything seemed to be in place. I will probably be ordering one for the bedroom in the near future. I can’t really put install one in the garage because, while it is ducted, the ducts are over the happy-jack bed system. We use the quick cool feature back there.
12. Rear patio step storage
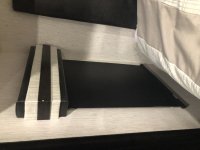
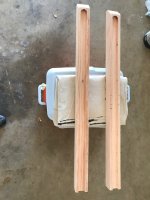
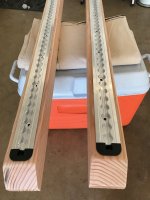
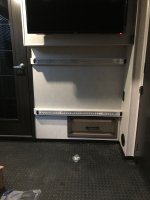
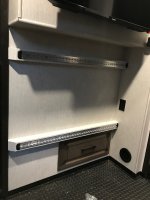
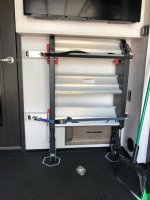
Every time I go to load the garage I have to unstrap the patio stairs from the floor, then take it out and put it on the ground, then strap it to the back of the golf cart after everything is loaded. Our garage is pretty well loaded when we pack and space is a premium. Yes, I could throw the stairs in the back of the truck. And no, I don't want to mess with that. So, I fabricated some tie down points that go underneath garage TV area of the 4007. The space under the TV is almost like it is made for the rear patio steps! They fit perfectly underneath the TV. I started out by ripping two sides of a 4x4, then routed them out for some airline tie down track. I covered the wood with the same wall paper as the walls. I wanted the tie down points to sit out far enough so when the stairs are up against the tie down points it doesn't interfere with the pull out drawer (as seen in the pictures).
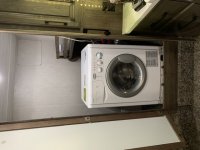
13. New Fridge and added Pantry
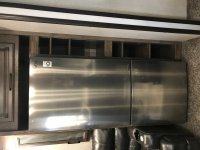
We had problems with our original fridge (Hisense--they were great with helping every step of the way) and when looking at new ones, I had a thought. What if we went with a little bit smaller fridge and added a small pantry? So that's what we did! The new LG fridge isn't that much smaller, but allowed me just enough space to build a small pantry to the side. I estimate that with the pantry and new fridge it actually weighs a little bit less than the original Hisense fridge. The pantry is made up of oak and a high quality oak plywood with four adjustable shelves. I took a trim piece with the stain color from Heartland into Sherwin Williams and they mixed up a stain to match. (Don't know why the picture turned sideways--Help?)
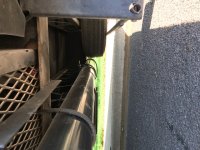
14. Sewer Hose Storage
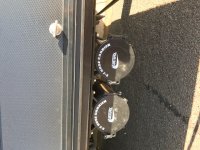
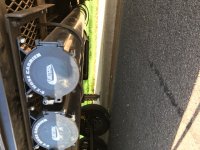
I've had this done for a while now, but forgot to add it to the list! I will add better pictures if I think about it (or if someone else wants them). I needed these storage tubes to extend longer than the frame of the RV so that I could fit the Rhino Flex 20ft. kit (with the sewer 4 in one connection point) and a short transparent fitting. These tubes sit right behind the fuel tanks. On the right side of the RV (passenger side) I attached the bracket for the sewer hoses to the frame. On the left side (drivers side) I fabricated a bracket that attaches to the frame of the RV and extends past it to allow the storage tube to extend long enough to hold everything. I also made a bracket that attaches to the frame in the middle of the RV to help support the tubes. The tubes are bolted to everything, but the supplied brackets that came with the tubes are plastic. I'm sure it will hold up fine, but I went ahead and installed a "back-up" just in case the plastic support brackets break. The "back-up" (that can be seen in the pictures) consist of fuel tubing that has aircraft safety wire ran through it and attaches at a different point on the RV.
1. Added Winegard Trav’ler
We’ve had the Winegard Trav’ler in our last two trailers and really like it for when we’re “glamping”. Wife really likes to watch college football (Go Red Raiders!). I bypassed the 4 cable connection points at the UDC and hooked the cable up to a Directv splitter. This time around, I installed two Directv receivers (H25 model). I took our old one from the last trailer and installed it behind the main TV in the living room and the second receiver is for the bedroom TV. The receiver in the bedroom is dedicated to just that TV. I may (at some point down the list) see about adding another TV to the front storage area and tie it into this receiver. The other receiver is mounted behind the main living room TV and feeds the garage and outdoor TV via a device that takes the HDMI cable and sends a 1080p signal to the other TV’s through a splitter. This is made by VeCoax and is the Mini Mod 2. It takes a little bit to set it up (it’s more tech-savvy than me!), but seems to work flawlessly. I’ve had the wireless HDMI systems before, and really didn’t want to mess with it this time. Seems like, when they worked, they worked well, but I was always having to fiddle around with it. I did go through just about every coax fitting I could find and either fix or tighten them up (mainly, they needed to be tighter).


2. Soap dispenser and paper towel holder
Ordered off of Amazon. Mounted to the front wall of the baggage compartment. I keep a little container beneath the soap dispenser so if/when it leaks, it won’t make a mess.

3. Added a door latch
Really, I think this is an oversight from Heartland. I called and they sent me the door latch that holds the front door open against the sidewall. Yes, it’s plastic and will break eventually, but works for now. With the West Texas wind, it was a two-person job getting the Morryde steps down! One person to hold the door open while the other person put the steps down!


4. Electric reel latch
Another oversight from Heartland. This was yet again another two-person job. Now I can do it by myself (and not use tape to hold the door open). Speaking of the electric reel, when I would pull it out or wind it in, I noticed it would always catch on the door panel trim. After looking at some other installations, it looked as if mine was missing a roller for the cord to roll on as it was winding up. So…roller added!


5. Installed RVlocks
Convenience really. That’s all this mod is for. Original locks were separate keys. Now they are keyed alike and we have multiple ways of getting into the camper.


6. Wires in baggage compartment tidy up
The wires are for the Shwintek slides in the bedroom. The 4007 has a slide within a slide. You can see the before and after pictures. I would like to ask whoever installed that system and ran the wires they way they did (and left them in a bundled mess) if they were proud of the job they did. I added a junction box and put some plastic wrap on them. At some point I tackle the rats nest of wires in the battery/ generator compartment. At least I don’t see those as often!


7. Progressive 50-amp surge protector hard wired
We also had this on our last camper. Wouldn’t be without one. I like the hard-wired version as its one less thing to forget or do. On our last camper, I wired it in where it would catch generator and shore power. This time, just shore power. When I put the surge protector in, I went ahead and added a hinge and latch to the panel that Heartland had screwed in. This way I can check for water leaks, etc. easier.


8. Control panel addition
Well, when I went to put the Progressive surge protector LED indicator light into place, guess what? It would fit where the rest of the switches were! It stuck out too far to close the door. So, I made a custom panel that also includes the codes for the surge protector, along with some other switches that weren’t labeled. I left the Yeti pack, and Vent Fan switches in their original mount, but made a place for them on the panel. Also, you can see an opening for another accessory. That will either be the Mopeka propane monitoring system (if I decide to by it, still on the fence) or an “access panel”. I must admit that I did sort of copy this idea from the rv-project.com guy, but took it to another level for my needs.


9. Toilet paper holder
Why? Because. Well, just because.


10. MCD Shades
Our CY 4007 has MCD shades everywhere except the bedroom and one window in the hall. These have the accordion style shades. After a couple of trips, the wife asked if we could install MCD shades in the bedroom. I said, sure why not?! On our third trip, after the first night, I was told to order shades; too bright in the bedroom for the wife to sleep in. Message received—installed MCD shades in the bedroom.


11. Dometic A/C silencer kit
I recently saw a devise made by WackOProducts. It basically replaces the stock Dometic air intake and filter. The kit consists of a filter, base plate, and a cover plate. The base plate has some sound-deadening material applied to it. Only downfall I saw was that you lose the quick cool feature. I must admit, I was a bit skeptical on this devise. I took a chance and ordered it anyway. Before and after installation I took some decibel readings with an app on my phone (don’t know how accurate it is, but seemed to work). Before I was getting a consistent 67 decibels. This was with slides in, 80 degrees out and running the generator. A/C was set to High Cool, 70 degrees. Same settings after the silencer kit were 56-57 decibels. A notable difference on the meter and to the ears. It was a bit pricey at $190, but it does state Made in the USA. Plus, anything to shut up the noisy Dometic is worth it in my opinion. Before installation I looked at the existing ductwork and tape job. Everything seemed to be in place. I will probably be ordering one for the bedroom in the near future. I can’t really put install one in the garage because, while it is ducted, the ducts are over the happy-jack bed system. We use the quick cool feature back there.


12. Rear patio step storage
Every time I go to load the garage I have to unstrap the patio stairs from the floor, then take it out and put it on the ground, then strap it to the back of the golf cart after everything is loaded. Our garage is pretty well loaded when we pack and space is a premium. Yes, I could throw the stairs in the back of the truck. And no, I don't want to mess with that. So, I fabricated some tie down points that go underneath garage TV area of the 4007. The space under the TV is almost like it is made for the rear patio steps! They fit perfectly underneath the TV. I started out by ripping two sides of a 4x4, then routed them out for some airline tie down track. I covered the wood with the same wall paper as the walls. I wanted the tie down points to sit out far enough so when the stairs are up against the tie down points it doesn't interfere with the pull out drawer (as seen in the pictures).


13. New Fridge and added Pantry
We had problems with our original fridge (Hisense--they were great with helping every step of the way) and when looking at new ones, I had a thought. What if we went with a little bit smaller fridge and added a small pantry? So that's what we did! The new LG fridge isn't that much smaller, but allowed me just enough space to build a small pantry to the side. I estimate that with the pantry and new fridge it actually weighs a little bit less than the original Hisense fridge. The pantry is made up of oak and a high quality oak plywood with four adjustable shelves. I took a trim piece with the stain color from Heartland into Sherwin Williams and they mixed up a stain to match. (Don't know why the picture turned sideways--Help?)

14. Sewer Hose Storage
I've had this done for a while now, but forgot to add it to the list! I will add better pictures if I think about it (or if someone else wants them). I needed these storage tubes to extend longer than the frame of the RV so that I could fit the Rhino Flex 20ft. kit (with the sewer 4 in one connection point) and a short transparent fitting. These tubes sit right behind the fuel tanks. On the right side of the RV (passenger side) I attached the bracket for the sewer hoses to the frame. On the left side (drivers side) I fabricated a bracket that attaches to the frame of the RV and extends past it to allow the storage tube to extend long enough to hold everything. I also made a bracket that attaches to the frame in the middle of the RV to help support the tubes. The tubes are bolted to everything, but the supplied brackets that came with the tubes are plastic. I'm sure it will hold up fine, but I went ahead and installed a "back-up" just in case the plastic support brackets break. The "back-up" (that can be seen in the pictures) consist of fuel tubing that has aircraft safety wire ran through it and attaches at a different point on the RV.


Attachments
Last edited:

