I started my Cyclone disk brake upgrade...

dougw

Well-known member
Like a few others here in the forum I'm starting my disk brake upgrade on my 2010 cyclone 3010. First off I'd like to thank "Cookie" for the inspiration I got from his disk brake upgrade. His video and web page has made this possible. Well, that and the local shop wants way to much $ to do it for me.

So the plan is to post as much as I can and at the end try to give a decent account of the final parts and cost involved. Here is what I'm starting with. I have Lippert 7k axles on the trailer.

Parts ordered.


Kodiak Brake kit ordered from "e-trailer" (has not arrived yet)
2-hrcm-133-7-9-e (8k brakes 7k plates)
Dexter 1600 psi electric hydraulic controller ordered from "e-trailer" (delivered)


Timken bearings ordered from summit racing
02475 outer bearing - back ordered
25580 inner bearing - delivered

CR 22558 seals ordered from "rocket seals" has not yet arrived
(cr is initials for manufacturing) –Chicago rawhide

18" rubber flexible brake lines from "bludot" 18018-sf $50.60
25x15 hose clamps $1.88
hose clips 1457 $0.80
2 ex 1/4" x 25' hydraulic brake lines $29.66 (month likely 1 would be enough)
3/16 x 25' hydraulic brake line $11.63
Other parts like "tee's" however they were 3/16" tee's with 1/4" adapters and since I ordered these I was able to find 1/4" " tee's" at the local "Napa" auto parts store.

I also purchased a 1/4" fitting to replace the 3/16" fitting on the dexter adapter. However, after
I thought about removing the mfg one I think it might be best to just use an adapter to 1/4" brake line.

1 double flaring hydraulic line flaring tool from Sears (craftsman) $70
(I purchased a kit from Napa and it needs to be returned since it doesn't seem
to work very well)

And some other stuff as well.
2 tubes of mobile 1 grease
Bearing grease packing tool (vs hand packing)
2 bottles of valve line dot 3 - 4 brake fluid
2ea 10' 10gage wire to connect the dexter unit to the hitch connection box brake-a-way switch and
brake controller line from the truck.

I think that is about it for parts. While they are all arriving, I have been planning the install. One thing I did was draw out the way I wanted to connect the hydraulic lines. This helps with purchasing the small brake line parts.

The plan for me is to start with the harder stuff. I started with trying to run the electrical wires to the controller. Thanks to "Cookies" suggestion, I was able to use a wire puller rod to pull a string from the hitch thru the bottom of the overhang into the front compartment. The I pulled the wires thru. I will hook them up later.

Then I dropped part of the lower undercover to figure out how I want to route the hydraulic lines. After removing the batteries, I figured out where I want to mount the dexter and route the lines. Well for now anyways.

Tonight I've been practicing making double flare hydraulic lines. Not too hard with the proper tools.
So tomorrow I will start the install. I will hopefully get the brake lines mostly installed as well as the controller. I figure that the actual kodiak brakes will be the easier parts to install. Once the brakes come in, I wil install them and the last of the hydraulic lines. This way the trailer for the most part will still be operable if I need to use it since the drum brakes will still be working. I won't disconnect anything till the brakes go on.

Good luck to me(g)
Doug
 

jnbhobe

Well-known member
Doug, the lines are the hardest part the rest just falls into place. Don't forget to switch your truck brake controller over to electric over hydraulic.
 

cookie

Administrator
Staff member
Good luck with your project, sounds like you have a good plan.
Running the brake line is the hardest part.
The only thing I question is the adapter at the actuator.
Do you plan on stepping up from 3/16 to 1/4? I would used the 1/4 adapter.

Peace
Dave

Sent from my DROID RAZR using Tapatalk 4
 

wdk450

Well-known member
There is a truck brake controller compatibility list for the trailer brake actuator. When I had my disk brakes added at Mor Ryde, we went out on a check ride afterward, and it seemed to work O.K.; but then I found that my controller was not on the approved list. I got a new controller, just because braking function should not have any compromises.
Good luck with this big job, the most important safety upgrade you can make to your big 5th wheel.
 
Last edited:

dougw

Well-known member
I checked with dexter that the unit will work with my '11 f350' brake controller. My local trailer place recommended it as well and liked it over the carlisle so I went with it.

The dexter unit came with a 3/16" fitting and the original plan was to use and adapter to 1/4" to match the main line. Well after thinking about it I changed out the fitting so I wouldn't have to use the adapter.

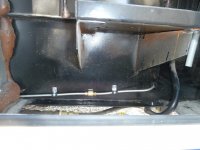
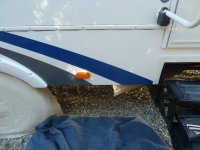
Day 1 took much longer then I had expected. I got as far as the line from the pump to the first tee in front of the rt tires. I could have taken the easier way and run the line down the bottom of the "I" beam next to the gas line to the tires then up and around. However, I wanted the lines out of sight and protected as much as possible. I ran the tubing down the outside of the "I" beam. While this sounds just as easy, the rt side of the lower trailer is protected buy a sheet of thin white aluminum. Thankfully it is just siliconed to the I beam and the section behind the step is pretty accessible. So 1 hole in the frame at the front of the trailer so the line from the pump can exit out to an inline splice then down just behind the step. There is already a hole in the frame for the side marker light so now I can run the line from that tee to the left side and out. I will have to drill another hole out to the outside of the left frame.

So day 2 will bring running the line to the left side ending at the last tee and the line from the first tee to to the tee at the rt tires. Bolt down the pump, tighten fittings up and add clamps to the lines In place. (And hope when the time comes they don't leak)

Anyone know now how fickle brake line double flare fittings are? Mine looked pretty round and flat so....

ill post some photos tomorrow hopefully then wait for the kodiak brakes to arrive.
 

jnbhobe

Well-known member
They can be a pain when useing steel line, I had to redo a couple. NAPA has a nickel-steel line that is a lot easier to work with that cane out after I installed mine. Good Luck.
 

porthole

Retired
The tubing that is flexible enough to not require a tubing bender is the easiest to make double flares on. You are making double flares - right?

Double flares end up bing "fickle" if you do not have a square end to start with, you make it too big and stress the the metal till it starts to crack or you make it too small and the "double" is not deep enough.
Most tools set the depth with the adapters and your micrometer eye.
 

dougw

Well-known member
Day 2 is now complete. I didn't work on the trailer as long today but finished up what I could till the brakes come in. I learned or should say remembered on valuable thing. Cutting oil on drill bits is your friend. I ended up drilling 2ea 3/8" holes for the brake lines to go thru the trailer and that frame steel is hard. Also, that 12ton jack makes a great tool to bend lines with. I also found out that a second helping hand is nice to have once in a while. Thanks wife'y!

I was able to get the larger 1/4" main brake lines all in. I still have the 2 "tee's" above each wheel set to install but I will do that when the rest of the parts come in. Here are some photo's of my install so far.

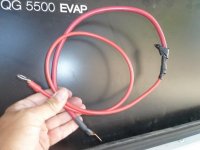
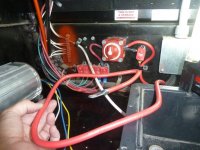
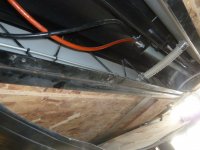
First I found this lovey sight. This is the original main battery line from the power switch in the battery compartment. It goes from 6ga to 10ga. Nice! Well worth the asking price of a new trailer.
P1030847.jpg

So I replaced it with a pre made battery cable.
P1030848.jpg

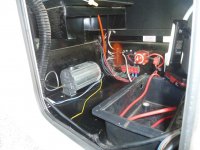
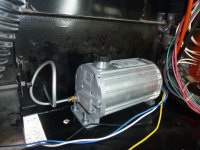
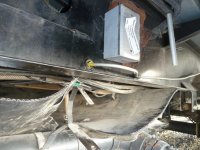
Here is the Dexter 1600psi pump installed in the battery compartment. I have one of the battery trays removed. You can see my custom spiral stress relief off the pump.
P1030850.jpg

Yes the loop is bigger then it looks and is farther way from that bolt for the landing gear. The line goes out into the right hand Propane tank compartment.
P1030849.jpg

This is the outside of the main frame in the propane compartment.
P1030851.jpg
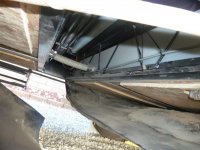
Then it passes behind the front steps. The line runs in the corner of the lower portion of the "I" beam.
P1030852.jpg

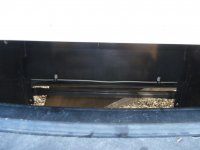
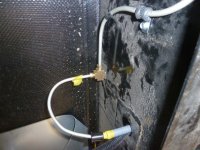
Then the line runs to the first "tee" in this area. This cover is only silicone to the frame so it was easy to cut loose then gently get my hand up behind it. I Went to this spot for the tee because they already had a hole cut for the marker light in the frame.
P1030853.jpg

This is behind that panel looking up. This is still the outside of the main frame. You can see the wire for the marker light. I used that hole to route to the left side of the trailer. On that tube I have a plastic sleeve to protect the line from chaffing. Since this area is protected by that outside panel I was able to loop the cross over line to the left side.
P1030854.jpg

This is the cross member that holds the aft water tank up. I ran the line to the left side of the trailer here. I just Zipped tied the line to that brace.
P1030855.jpg

This is looking back at the right side of the trailer. That marker light hole is perfectly places for this run. I used 1 zip ti around the cross over tube to make sure the line stayed up off the bottom channel. Since I had already been into the lower cover here to fix my water tanks this worked out good for a cross over place. You can seem my designed water tank platform . It really keeps the tanks from bulging. I kept the line up because I had installed some new screws from the bottom up to hold the cover back up. I didn't want the screws to cut into the brake line so that is why it is up out of the way.
P1030857.jpg

This is the second hole I had to drill. This is the left frame under the slide out. Then the line heads back to the left side "tee" which is not installed at the moment. You can see another spacer I installed into the hole. I figured it would help to prevent any chaffing.
P1030856.jpg

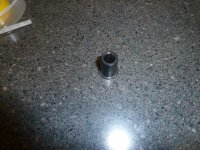
I'm not sure where I got these from. I had them in a parts draw. They fit perfectly into 3/8" holes.
P1030859.jpg

So that is basically it for now. I should have the brakes in a week or 2 (hopefully) Come on E-trailer. Apparently Kodiak won't drop ship for them and E-trailer has to make the order big enough so I had to wait. Oh well.
 

dougw

Well-known member
Well I finished the kodiak brake install tonight. It's been a long couple of weeks. To much to do at work and the home front has made my install a take bit longer.

There was a few time I had wondered what I got myself into but now it's done I'm glad I did it as well as I'm glad I did it myself and was able to use good quality parts and supplies. I did run into 1 hydraulic line with a bad flare and it leaked. I was able to cut it off and redo. If you plan it out and install the lines where your able to redo if needed, it really helps. I also had no idea how tight to tighten the fittings and a few of them leaked at first but after a re-tight they were good to go. The brake lines are the most intimidating part of the install. If you really wanted ti I think you could piece together pre-made lines. The rotors and pump are pretty straight forward as well as jacking the trailer. I kept the trailer attached to the truck and only lifted one side of it at a time. Just to be safe I only removed one wheel at a time also. I could have pulled both wheels on one side without any issues but since it was just me I figured I better not.

The dexter pump works well but it sure loud, especially when the generator door is open. When we took the trailer for a test drive tonight we could hear it when we stopped on a slight incline. I think there is a some stuff I don't understand that happens between the pump and the ford built in controller. There are times when I was stopped and the pump wasn't on.
During driving we couldn't hear the pump which is a good thing.

One thing I don't know yet about the dexter pump is if it will drain the battery when it's just sitting. When I connected the power leads to the battery the leads sparked a bit which tells me there is a small load. I don't know if the pump will automatically turn itself off after a few minutes. So I will watch the voltage drop at the battery for the next few days.

"The drive".... The brakes work great. I set the controller at 5 and set off for a brief drive. At 15mph and activating the slider the wheels will lock up. On the road 5 was a bit lite so I reset to 6. During a normal stop you can't feel the trailer trying to stop the truck but but you can tell your stopping distance is way shorter. If you step harder on the brakes then the trailer will start to to pull on the truck to stop. I think that is the ford setup again sensing more of a panic stop.

I have some more photos to post as well as a list of parts used. I will get them up ASAP.

In the end so far I'm glad I made the switch. My next trailer will come with disk brakes that's for sure.
Sorry the for long winded posts.
Doug
 

DesertThumper

Well-known member
Hey Doug,

Nice write up. Glad to hear your project is finally done! We got back from Dove Springs this afternoon for a few days. We had a great riding trip.

Have a great week.
 

wdk450

Well-known member
Great Job!!! I have the Carlysle controller, and haven't noticed noise or current drain, but will watch for it.

For any prospective new buyers (or those considering ordering an Upgrade fifth wheel), you can order disk brakes and independent suspension from MorRyde to be installed on your new rig in Elkhart before your rig is towed out to your dealer by the haulers. When I was staying at at MorRyde (they have 10 RV spaces), I saw new rigs from the manufacturers being dropped there every day by the haulers, for upgrades.
 

murry135

New York Chapter Leaders - retired
Doug,

Thanks for the project updates and photo's. I am thinking of doing this next spring myself instead of paying for it. So, one of my questions is do you recommend it as a DIY job or pay for the job? Next question I have is, I see particle board on the underside of your unit, did you install these or did it come that way and are they there to support the waste holding tanks?

Jim
 

dougw

Well-known member
I've changed brakes before and I'm pretty mechanically inclined. I have never flared brake line material before. I watched a lot of internet video's on the subject and they really helped but I found that everyone has there own way of doing the job but they really didn't show the end results or what exactly to look for as far as flaring tubes. So I guess I had a 50/50 chance that they would not leak or would. That was the biggest fear I had. My only fall back was if it didn't work I could or would either use pre-made lines or hire someone to do the brake line. In the end if it holds up and doesn't spring a leak<G> then I guess it really wasn't as hard as I thought. Adding the pump and changing out the disks were pretty much easy. That only ended up being about 1.5 hour per tire once the bearings were all greased up. I did them all at once and put them in a zip lock to keep till it was time to install. The only other thing is "moral" support from a second set of eyes. That really goes far. I guess it worked out for me since I wasn't in a hurry to move the trailer. I have the space and time to do it. I'm hoping after I add up my cost I saved over a $1k for doing the job myself. If that is worth not having to do it or not I guess that is up to you. I do know that I used the best parts and grease I could find and I'm not sure what what the local installer would have used. Now, there is the piece of mind of having someone else to blame if something down the road goes wrong (literately).

As for the boards, that was a previous project. The thin boards that Heartland installed had cracked on me from the weight of the water. I did a complete fresh water tank over haul and installed both the boards and fixed the tanks with other fittings. FYI, my understanding is the water tanks have been fixed but I'm not sure about the supports. I have a complete thread on my fix in the forum. I did not do anything with the waste tanks. I did have to cut the undercover for that fix. That helped with the disk brake upgrade.

Doug
 

porthole

Retired
Doug - your 2011 F-350 has a really great trailer brake controller/programming.

The system uses a hydraulic line pressure sensor instead of a typical inertia type controller. The harder you step on the pedal, the higher the voltage to the pump.

Below about 20 MPH the output voltage is reduced approximately 20%. This makes for less of a tugging of the truck by the trailer in stop and go type traffic.

There is also a hill hold feature. On a steep enough hill (5-6 degrees +), after stepping on your brakes the system will hold the line pressure for 2 seconds, allowing for a smooth brake to go pedal transition.

The noise from your hydraulic pump is normal, and once you have it for a bit you won't notice it anymore.
There should be no current draw when the brakes are not applied.

Interesting operation - with the cruise control on and set, you can give the truck's manual actuator lever two quick squeezes to "flash" your brakes to the trucker that just "flashed" you to pull in front of him.
The manual lever activation does not disengage the cruise control. And since you are doing this quickly, the brakes never build up enough pressure to apply.

An FYI if your instructions didn't note it, If you will be stopped for any length of time, such as at a rail crossing, it is recommended to put the truck in park. Otherwise you are running the pump while you sit the train out with your foot on the brake pedal.
 

dougw

Well-known member
So here is the list I made of the parts I used on my upgrade. Hopefully I got them all. I also left off the stuff I need to return (g). Most include any shipping or taxes. I rounded prices up as well. Double check part numbers as I can't guarantee them or typo's. Check your axle types, bearing and seals since yours might be different. Your design would change the items I used.

E-trailer
Kodiak brakes 2-hrcm-133-7-9-e $850
Dexter Electric Over Hydraulic Brake Actuator (1,600 psi) K71-651-000 $725


Summit racing $152
Timken 02475 bearings
Timken 25580


Rocket seals $134
5 ea cr22558 seals (sk seals) (1- spare)


Bludot brake parts
4- 18018sf flex brake hoses $51
4- 25x15 hose brackets $2
4- 1457 hose clips $1
2- ag-25294-cnf 1/4" x 25' brake lines $30
2- 7812 3/16" tees w bracket $5
2- 7828 1/4" x 3/16" adapter $
8- 105x4al 1/4" tube nuts $6


Napa auto parts
20 - 3/8"-24 x 1.5" hardened socket head bolts $26 (paid way to much)
1- 1/4" tee $23 (paid to much)
1- 1/4" pipe fitting to change out the 3/16" fitting in dexter actuator.
1- 1/4 straight adapter for 1st pipe to 2nd segment
4- cotter pins for tires $1
4- 20" 3/16" flared hard tubing $15
Variety of 1/4" and 3/16" cushioned tube clamps $5
10' yellow & 10' blue 10 gage wire $15 to wire actuator to trailer

auto parts store $40
3- 32 oz bottles of dot 4 brake fluid (only needed 2 but used 1 to flush lines)
2- tubes of mobile-1 grease


Sears $60
Double flaring tool


Total $2141 give or take a few $
Quoted $3300
 

wdk450

Well-known member
FYI: The regular MorRyde disk brake upgrade price for 2 axles when I got it this summer was $3000. The Heartland Rally price was $2366. The work was done essentially in 1 day and 1 morning. I was allowed to stay at their free RV spaces before and after the upgrade, and stayed overnight in the rig in their repair bay.
 

dougw

Well-known member
FYI: The regular MorRyde disk brake upgrade price for 2 axles when I got it this summer was $3000. The Heartland Rally price was $2366. The work was done essentially in 1 day and 1 morning. I was allowed to stay at their free RV spaces before and after the upgrade, and stayed overnight in the rig in their repair bay.


That at is a deal for sure. Unfortunately for me I'm on the other 1/2 of the country.
 
Top