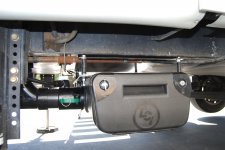
Installation of Drainmaster Electric Gate Valve

nander

Texas North Chapter Leaders-retired
Has anyone installed these valves on their Bighorn? We bought one to install on the black tank. The original valve is at 3 oclock. There is not much room to install this valve in the 10-2 position. It hits the tank overhang.

If anyone has pics, please let me know.
 

jbeletti

Well-known member
I've never installed one but I know that Doug Swarts at Drainmaster prefers a straight up and down orientation but as you're finding, 5th wheels generally lack that sort of clearance due to the frames being much shorter (height) than say a motorhome - where these valves are most often used.

I'd say, just do your best to get the valve as vertical as you can.

Another thought that likely isn't doable, but just thinking out loud... Wondering if you could put a 15 degree (or more) ABS fitting into the tank and have the valve further out and tipped down a bit to give you a more vertical orientation of the blade??

Looks like a 9-3 position is also allowable, just not as desirable.

Here's an self-install in a Keystone RV: https://www.youtube.com/watch?v=_G61xCEsJtU
And part 2: https://www.youtube.com/watch?v=bUGWyyxnTww
 
Last edited:

nander

Texas North Chapter Leaders-retired
Thanks, Jim.

Dave was thinking about extending the pipe in order to have the valve more upright.
 
Thanks, Jim.

Dave was thinking about extending the pipe in order to have the valve more upright.
Hi Nancy, Dave and Jim,
While we recommend positioning the valves as upright or over the pipe, as opposed to beside or under the piping, it can be placed anywhere above the 3 and 9 O'clock position. We have installed our complete system on many Heartland owners coaches which includes the valves, but we usually remove ALL the plumbing from the tanks outward. We do this because Heartland still plumbs the Gray waster using 1.5" pipe making your time dumping much longer as well as being ineffective in removing all the scum, food particles, oil, soap, shampoo etc.. By simply using 3" pipe after the water exits the tank, it creates a vortex or whirlpool effect in the water draining in the tank, pulling the scum out of the tank instead of leaving it on the sidewalls and bottom. In addition it flushes out the 3" sewer hose.
If any of you are interested in knowing more about our products and services please go to our web site Drain Master .com. or contact our team at 877 787 8833 Toll free. We have lots of photos of Heartland installs and are happy to share them with you.
You can also contact me personally Doug Swarts 831 801 4827 with questions.
 

nander

Texas North Chapter Leaders-retired
Hi Nancy, Dave and Jim,
While we recommend positioning the valves as upright or over the pipe, as opposed to beside or under the piping, it can be placed anywhere above the 3 and 9 O'clock position. We have installed our complete system on many Heartland owners coaches which includes the valves, but we usually remove ALL the plumbing from the tanks outward. We do this because Heartland still plumbs the Gray waster using 1.5" pipe making your time dumping much longer as well as being ineffective in removing all the scum, food particles, oil, soap, shampoo etc.. By simply using 3" pipe after the water exits the tank, it creates a vortex or whirlpool effect in the water draining in the tank, pulling the scum out of the tank instead of leaving it on the sidewalls and bottom. In addition it flushes out the 3" sewer hose.
If any of you are interested in knowing more about our products and services please go to our web site Drain Master .com. or contact our team at 877 787 8833 Toll free. We have lots of photos of Heartland installs and are happy to share them with you.
You can also contact me personally Doug Swarts 831 801 4827 with questions.

Thank you, Doug! Dave was relieved when I told him what you said.
Right now we are doing only the black tank, so we'll see how it goes. :cool:
 
Thank you, Doug! Dave was relieved when I told him what you said.
Right now we are doing only the black tank, so we'll see how it goes. :cool:

I was told Dave is pretty handy so all should go well. You have my cell and I believe there are no dumb questions when installing something so please reach out if needed. We have lots of tech information on our web site under Documents as well.
 

nander

Texas North Chapter Leaders-retired
Dave got the electric gate valve installed without a hitch! Works great!

Maybe sometime down the road we'll install the gray tank valves, but right now they work fine.
 

RoadJunkie

Well-known member
I recently installed a Valetta electric valve on my black water tank and it was an easy install. Before I installed the new valve I did a pressure washer back flush to ensure a "super clean" experience. Well, as clean as this process can get. Anyway, you may want to slightly adjust levelers away from the tank opening to keep any residual fluids in the tank. One bolt was an absolute b@$* to reach on the new valve, but patience prevailed.

As a side note, I did try several times to get the cable system to where it would reliability fully close; New seals, shortened the cable, lubed, etc. I just couldn't get it to work correctly.
 
No, he did it by himself. :rolleyes:
He still has the bottom open, I'll see if I can get in there before the rain and get some finished shots.
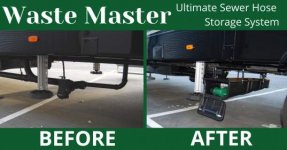
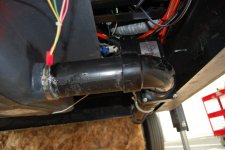
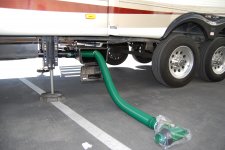
Here a a couple of Heartland installs of both Drain Master Valves and Waste Master always attached hose Nozzle systemJ Chavez WM DM Instl Hrtlnd Lndmark 5er (6).JPGJ Chavez WM DM Instl Hrtlnd Lndmark 5er (23).JPGJ Chavez WM DM Instl Hrtlnd Lndmark 5er (34).JPGBefore After K Smith.jpg
 

nander

Texas North Chapter Leaders-retired
Thanks for the pics! The sewer hose looks interesting. I’ll have to look into it.

Nancy


Sent from my iPhone using Tapatalk
 

jbeletti

Well-known member
Doug from Drainmaster asked me to post some comments from customers of the Drainmaster system.

See attached PDF.
 

Attachments

  • Drainmaster System Customer Comment - 22-MAR-2021 - Sheet1.pdf
    60.3 KB · Views: 26
Top