Garypowell
Well-known member
We decided to remove our gas cooktop/oven and install an Induction cooktop (www.trueinduction.com). Even in 1996 with our first unit we hardly ever used the oven. Now with our 2012 3010RE, since we have a convection microwave, there was no longer any reason to keep the gas unit.
In fairness we did a “cook off” of sorts to see if we could see any difference in the quality of baked goods coming out from either unit. We saw no difference but we did discover that both appliances were running about 50 degrees cooler than we had “dialed in”. But both performed great once we adjusted the temperature….we wanted to try an Induction cooktop so we saw no reason not to proceed.
First we purchased a small portable induction cooktop to test the concept….and we liked the fact we could boil water quickly…small quantities come up to a rolling boil in about 30 seconds. Granted if you are cooking corn that volume of water takes a little longer to boil….but it is a very responsive cooking method. Once we knew we liked the idea we proceeded. The temperature was also very uniform. We have come to expect to turn the gas (both at home and RV) up and down to keep cooking properly…with this induction unit once you “find” the correct number (like 5 for eggs) you just set it and cook.
You can see in the pictures below:
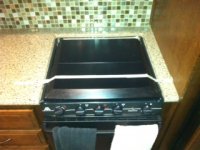
1. The standard look we have gotten used to over our 5 RV’s. You can see the tape as I lay out how big the new unit is going to be in the space.
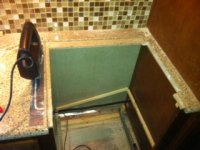
2. After the stove was removed (six screws) I put down tape and used a scroll saw to cut the hole bigger. You can see the remnants of the shelf that was the resting place of the stove….or the top of the drawer below…whichever way you want to look at it.
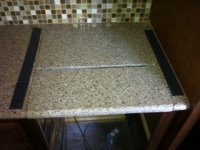
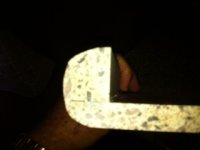
3. I had purchased a piece of the material for my countertop from Heartland. I think it was $35.00 plus shipping. Since there was a lip where the stove had sat it made it easier to do trial fittings. This fitting was after I had cut the sheet in half and with scrap pieces fashioned a bull nose to have the front piece look like the rest of the countertop. Once Linda decided exactly the front to back spacing I was able to cut these insert pieces to allow the cooktop to fit in.
4. This is a shot of the bull nose I fashioned with a drill and several #60 pieces of sand paper. I kept all of the dust for use in the splicing
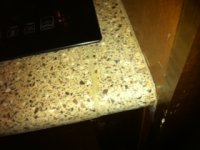
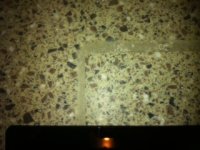
5. Shows the front splice. It turns out that this solid surface material glues really well with super glue. I used that between the two pieces (new piece and original countertop). I then mixed 2 part epoxy and filled in the remaining crack. Once I had the epoxy mixed I stirred in some sawdust from my cutting and sanding. Once the epoxy was in place I poured extra sawdust on top and forced it into the crack.
6. This shows the back crack. Up close you can see it….but from a few feet away it disappears. I worked down the seam with 80, 150, 220, 400 grit sand paper. I have not gotten the “shine” back but just purchased some polish today that is supposed to do the trick.
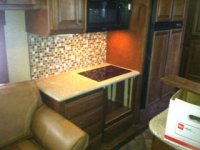
7. This is a far look at the cook top in place. The extra bracing below is to help support the new countertop pieces and the cooktop itself.
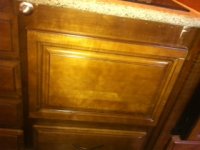
8. This is the door that covers the hole where the oven was at. I had a door “go bad” on one end and Heartland replaced it. I simply turned the old one sideways and cut off the damaged half and hooked it a Rev-a-Shelf 17.5” wide rolling shelf
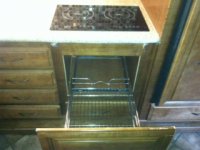
9. This is a shot with the shelf pulled out. I don’t have the handle yet but will order that from Heartland soon. I know the modified door looks a little funky but it matches.
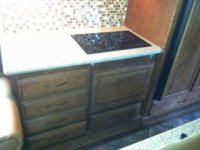
10. This is a distant shot of the whole assembly.
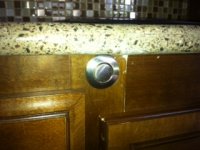
11. The directions for the cook top say that it should be turned off after each use. While we were testing it in our home we noticed that sometimes it got turned on when we were just cleaning it. So we felt having an off/on button would be a good idea. You probably recognize the button. It is simply a pneumatic garbage disposal button. Very expensive ($60) but works nice…plus if there was an emergency it is away from the countertop.
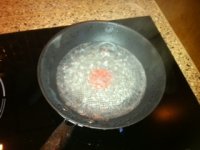
12. The unit in operation. Got this boil after 30 second of cook time. Really nice. The power I took from the dryer power up in the bedroom closet. We have a washer/dryer combo so only needed one circuit. Found the dryer circuit in the basement and spliced it (the dryer plug in the bedroom still works) and then ran the wire out the sewer opening (haven’t foamed that yet) into a piece of plastic conduit that runs back to the wire loom on the kitchen slide. Brought it in behind the couch and into the cabinet.
13. I think this is going to do it for a while!


