JohnU
Member
Hello! While the Oakmont may no longer be in production by Heartland RV's, there are still a ton of them out there, and have really awesome features. We picked up this really nice 2016 375QB bunkhouse model back in December of 2020, as it has four bunks in the back which was PERFECT for our four kiddos!
As with anything, a little modification, organization, and customization can provide a TON of efficiency and improve our camping experiences. I'm starting this thread to show our modifications along with some of the tips and tricks we've figured out along the way. The previous owners threw in several of their accessories which they had no use for (power cords, water hose, tripod, and a few other things), so we were kind of ready to go right from the start.
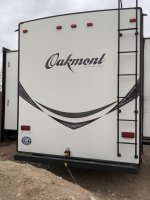
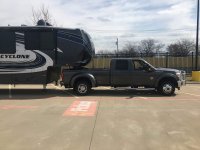
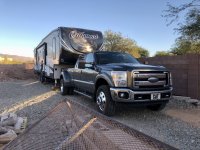
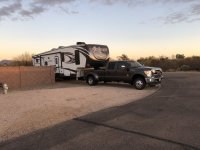
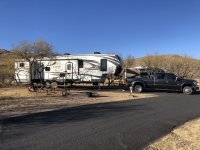
I'll start with a picture of the day I drug it home. It was my first time hauling anything quite this big, through Phoenix rush-hour traffic no less, talk about trial by fire !
!
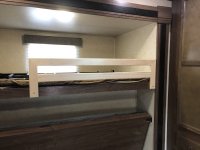
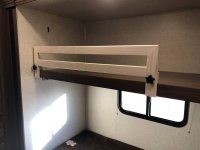
After giving everything a thorough and deep cleaning, we set to work on our first real "modification". Our kids are pretty young, and still move around a bit when they sleep, so we were concerned about the one in the top bunks rolling out of bed. I built these rudimentary "rails" out of pine. I used my handy Kreg pocket jig to conceal the fasteners; I mitered all the corners to prevent any open loops or loose clothing from getting caught and presenting a hazard to the kiddos. The passenger side rail is fixed and screwed using existing fasteners in the bunk, however the driver-side bunk folds up for transport and needed to be easily removed. I came up with this little "clamp" so we could quickly install and remove it. The exposed knobs are a concern for snags or whatever, but at least they're low and on the outside away from clothing and bedding.
After our first weekend (shakedown run), we made a list of everything we needed, must -haves, want-to-haves, sure-would-be-neat-to-haves, and so on. First on the list was new mattress or mattress toppers for the crappy mattresses in these RV's. We opted for the Zinus memory foam toppers. Trimmed some off for the master, and replaced all of the bunk mattresses. The kids are much happier sleepers now...
The second thing on the list was additional blocking for the leveling jacks for when we are on sloped sites and to help improve the trailer stability by not extending the jacks out so far. These are 15 1/2" x 15 1/2" 3/4" pressure treated plywood, 4pcs glued and screwed together with a piece of 3/4" rubber stall mat from TSC glued and screwed on top and bottom. These are 4 1/2" tall and spread the weight out nicely.

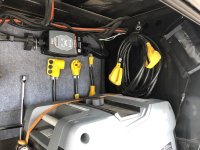
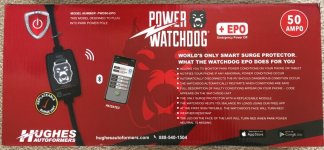
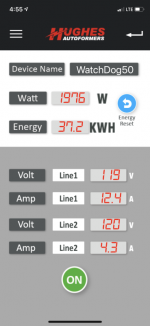
Power Management/Surge Protection: After a bunch of research and discussions with several RV-ing friends, we decided on the Hughes Power Watchdog 50A. It had a bluetooth app which monitors and tracks your usage, as well as sends you alerts if something is not right.
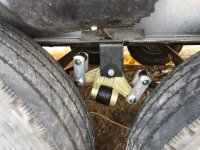
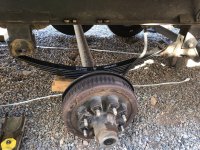
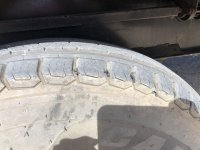
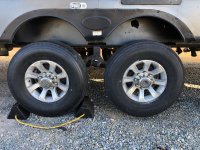
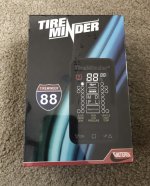
Up next was tires. The tires on this rig were about 2 yrs old when we bought it, and I was hoping to get this season out of them (a third year), after our second trip out, we discovered the left rear tire was beginning to separate right as we pulled into the driveway - disaster narrowly averted! We purchased a set of Sailun S637 ST235/85/16 Load range G tires, and a TireMinder TM-88C - peace of mind restored!
As with anything, a little modification, organization, and customization can provide a TON of efficiency and improve our camping experiences. I'm starting this thread to show our modifications along with some of the tips and tricks we've figured out along the way. The previous owners threw in several of their accessories which they had no use for (power cords, water hose, tripod, and a few other things), so we were kind of ready to go right from the start.
I'll start with a picture of the day I drug it home. It was my first time hauling anything quite this big, through Phoenix rush-hour traffic no less, talk about trial by fire

After giving everything a thorough and deep cleaning, we set to work on our first real "modification". Our kids are pretty young, and still move around a bit when they sleep, so we were concerned about the one in the top bunks rolling out of bed. I built these rudimentary "rails" out of pine. I used my handy Kreg pocket jig to conceal the fasteners; I mitered all the corners to prevent any open loops or loose clothing from getting caught and presenting a hazard to the kiddos. The passenger side rail is fixed and screwed using existing fasteners in the bunk, however the driver-side bunk folds up for transport and needed to be easily removed. I came up with this little "clamp" so we could quickly install and remove it. The exposed knobs are a concern for snags or whatever, but at least they're low and on the outside away from clothing and bedding.


After our first weekend (shakedown run), we made a list of everything we needed, must -haves, want-to-haves, sure-would-be-neat-to-haves, and so on. First on the list was new mattress or mattress toppers for the crappy mattresses in these RV's. We opted for the Zinus memory foam toppers. Trimmed some off for the master, and replaced all of the bunk mattresses. The kids are much happier sleepers now...

The second thing on the list was additional blocking for the leveling jacks for when we are on sloped sites and to help improve the trailer stability by not extending the jacks out so far. These are 15 1/2" x 15 1/2" 3/4" pressure treated plywood, 4pcs glued and screwed together with a piece of 3/4" rubber stall mat from TSC glued and screwed on top and bottom. These are 4 1/2" tall and spread the weight out nicely.
Power Management/Surge Protection: After a bunch of research and discussions with several RV-ing friends, we decided on the Hughes Power Watchdog 50A. It had a bluetooth app which monitors and tracks your usage, as well as sends you alerts if something is not right.


Up next was tires. The tires on this rig were about 2 yrs old when we bought it, and I was hoping to get this season out of them (a third year), after our second trip out, we discovered the left rear tire was beginning to separate right as we pulled into the driveway - disaster narrowly averted! We purchased a set of Sailun S637 ST235/85/16 Load range G tires, and a TireMinder TM-88C - peace of mind restored!


Last edited:

