Rear Camera - Factory Installed Wiring question

TikiDawg

Well-known member
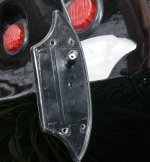
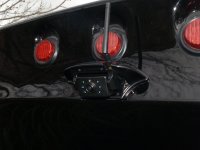
Tonight I took off the cover plate to the Factory Installed (Furrion Camera) Mount. Then plugged in the new Furrion FOS48TAPK-BL Observation Camera. Our 2016 LM 365 Key West is plugged into shore power at the moment. The camera power light came on immediately. Does anyone know if this circuit is switched? I had read in other posts that most people get power from the tail marker light circuit. I don't think I want the camera "On" when I not actually going down the road or backing up. But before I change any wiring, I thought I'd ask the question.

As for the install, I got to say it was the easiest thing I've ever done. 4 screws out, take off the flat plate, plug in the camera to the power in the coach, 4 screws back in. Go to truck (which is about 12 feet away), plug in the 12v power source, and bingo the camera works right away with great picture. Soon will be the road test to see how it performs while moving.
 

'Lil Guy'

Well-known member
Just installed mine yesterday. Yep, 4 screws, plug and play. Good thing since I forgot to pair my camera with the monitor.lol Not on shore power but will come on with battery hooked up on rig. Would have been nice to be hooked to running lights but I don't see a big issue with it being on. I can't believe they mounted it and didn't pre wire Jerrod's. If you pull the cover plate, there should be a small female receptacle packed in there on the left side. With the high speed camera, it should be nice to see the traffic behind you when on the road.
Be nice to find where and when they tapped into the power. If later, maybe the wiring is accessible from the inside and a switch could be installed. I'm OK with the way it is but in the future, would be nice to have it switchable.
Can't complain about a free add on I wasn't expecting.
 

jbeletti

Well-known member
Frank - I've asked the factory to consider switching this circuit - even if it's a simple switch on the bottom of the cabinets in the rear cap.

As for why Jerrod's wasn't wired but he had a mount for it - his coach was likely built in the beginning of this feature being added to all Landmarks. It's an evolution I guess.

Personally, I tapped the clearance light circuit for my camera and one I assisted Lou Dick in installing. In this manner, our cameras aren't powered 24-7 and we are forced to pull the RV with our clearance lights on if we wish to see the camera image in the cab. I see no downside to this method.
 

jbeletti

Well-known member
Jim, Thanks that gives me a great starting point to search the wire path.

Steve - if you have sconce lights, pull them both off the wall and see if the camera wire is spliced in behind either. If so, it would be easy to interrupt the hot lead with a wall switch next to the light.

If not, while more difficult, you could interrupt the hot lead behind the camera and fish a wire-pair over to one of the side markers at the top, then down to the tail light, then into the rear cap and onto the wall.
 

TikiDawg

Well-known member
Jim,
Excellent! Our 2016 Key West does have the two sconce lights at the rear of the coach. I will start the project as you have suggested.
 

TikiDawg

Well-known member
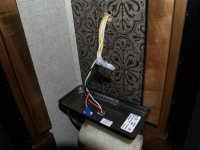
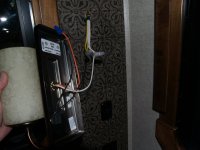
I took the sconce lights off the wall and could notdetermine if the factory camera wiring was part of this circuit. So Ichanged direction of the project. I wanted the option to use the camerawithout having it tied to the marker lights. The factory wiring wassupplying power all the time and I did not want the camera powered on24/7.

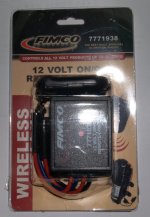
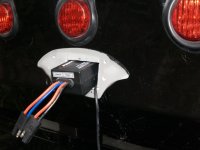
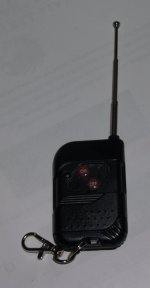
1.) I purchased a 12v wireless switch with a on/off key fob from Amazon.
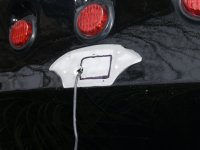
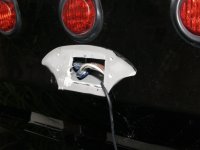
2.) Removed the camera, cover and gasket from the rear of the coach.
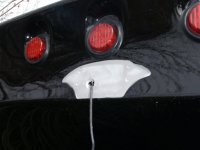
3.) Traced and cut a new opening to fit the wireless switch into the rear cap.
4.) Spliced in the switch to the existing factory installed Furrion power lead.
5.) Reinstalled the gasket, cover and camera.
6.) It works great! Standing at the rear of the coach I just press the"on" button the key fob and the camera turns on. Pressing the"off" button turns the camera off.
 

Attachments

  • 1 Left Sconce Light e.jpg
    1 Left Sconce Light e.jpg
    143.5 KB · Views: 207
  • 2 Right Sconce Light e.jpg
    2 Right Sconce Light e.jpg
    120.8 KB · Views: 188
  • 3 Amazon package e.jpg
    3 Amazon package e.jpg
    126.1 KB · Views: 191
  • 4 Cover Removed e.jpg
    4 Cover Removed e.jpg
    96.7 KB · Views: 191
  • 5 Camera Connector e.jpg
    5 Camera Connector e.jpg
    170.3 KB · Views: 199
  • 6 Opening Trace e.jpg
    6 Opening Trace e.jpg
    106.1 KB · Views: 188
  • 7 New Opening e.jpg
    7 New Opening e.jpg
    101.4 KB · Views: 191
  • 8 Switch placement e.jpg
    8 Switch placement e.jpg
    111.7 KB · Views: 190
  • 9 Furrion Camera e.jpg
    9 Furrion Camera e.jpg
    107.6 KB · Views: 195
  • 99 Wireless Key Fob e.jpg
    99 Wireless Key Fob e.jpg
    43.1 KB · Views: 185

TravelTiger

Founding Texas-West Chapter Leaders-Retired
I took the sconce lights off the wall and could notdetermine if the factory camera wiring was part of this circuit. So Ichanged direction of the project. I wanted the option to use the camerawithout having it tied to the marker lights. The factory wiring wassupplying power all the time and I did not want the camera powered on24/7.

1.) I purchased a 12v wireless switch with a on/off key fob from Amazon.
2.) Removed the camera, cover and gasket from the rear of the coach.
3.) Traced and cut a new opening to fit the wireless switch into the rear cap.
4.) Spliced in the switch to the existing factory installed Furrion power lead.
5.) Reinstalled the gasket, cover and camera.
6.) It works great! Standing at the rear of the coach I just press the"on" button the key fob and the camera turns on. Pressing the"off" button turns the camera off.


Looks like a great mod! Thanks for sharing with great pics!
 

Jesstruckn/Jesstalkn

Well-known member
Steve
Very nice clean job. I like the wireless switch. I'll have to get one and try it out. Thanks for sharing.

Sent from my XT1254 using Tapatalk
 

'Lil Guy'

Well-known member
Like the way you did it. Looks great and now I've got to do it too. Thanks for the write up and pics.
 

Aandaar

Well-known member
Can provide a link to what you used from amazon.

Thanks


Sent from my iPhone using Tapatalk
Chuck, Victoria, and Miss Callie
 

Bohemian

Well-known member
One would thimk that when the remote camera controller, display is turned off, then the camera unit on the back is internally turned off and in standby mode consuming only enough power to receive the remote signal and turn on. I would think . This needs to be confirmed and standby current measured.

With this mode there is a switch which turns power off to the camera, and sits innstandby mode waiting for a remote signal. Does it actually consumer less power than the original setup?
 

TikiDawg

Well-known member
Aandaar, Here is the Amazon link
http://www.amazon.com/gp/product/B00FGYK50A?psc=1&redirect=true&ref_=oh_aui_detailpage_o02_s00

20 Amp Heavy Duty 12 Volt On/off Wireless Remote Control Switch
<style>#energyEfficiencyTitleInformation { font-size: 19px !important;}</style> <!-- Fix for tt- 0059914573 (Not a good practice. Added to accommodate for Pantry brandbyline viewdapter) --> by Fimco

<style type="text/css"> /* * Fix for UDP-1061. Average customer reviews has a small extra line on hover * https://omni-grok.amazon.com/xref/s.../src/legacy.css?indexName=WebsiteTemplates#40 */ .noUnderline a:hover { text-decoration: none; }</style> <a class="a-popover-trigger a-declarative" href="javascript:void(0)"> 3.9 out of 5 stars 24 customer reviews

<style type="text/css"> #averageCustomerReviews, #averageCustomerReviews_feature_div, #ask_feature_div { display: inline-block; *display: inline; }</style> | 15 answered questions <style type="text/css"> .askPipe { color: #666666; padding: 0 5px 0 5px; } </style>


List Price:$49.99
Price:$26.94 <!-- ms3: DETAIL_PAGE_Price_Prime --> Free Shipping for Prime Members
You Save:$23.05 (46%)

<tbody>
</tbody>


In Stock.


<input id="ftSelectAsin" type="hidden" value="B00FGYK50A"> <input id="ftSelectMerchant" type="hidden" value="AV3940V2LZRQ1">

- - - Updated - - -

Bohemian, you could be correct. I don't know the electrical technical part as far as the draw, but the blue LED on the face of the camera was "on" 24/7. Now with the wireless switch in "off" there is absolutely no power to the camera. But now that makes me wonder if the switch it self would be drawing any power since it's always waiting for an on/off signal from the remote?
 
I didn't like that the camera stayed on all the time I found good information here and found the power wire to the camera under the scone light on the right side looking at the rear window. I installed switches for a 12 V USB charger along with a switch for the camera.
 

danemayer

Well-known member
I didn't like that the camera stayed on all the time I found good information here and found the power wire to the camera under the scone light on the right side looking at the rear window. I installed switches for a 12 V USB charger along with a switch for the camera.
Hi svanhoutan,

Welcome to the Heartland Owners Forum and thanks for sharing.
 
Top