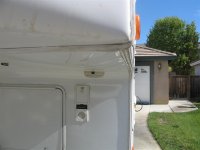
Separation of front compartment area from frame

RVFun4Us

Well-known member
Not sure if this is the right area for this but here goes.

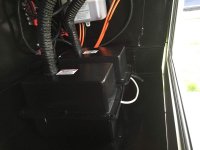
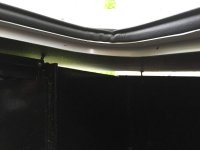
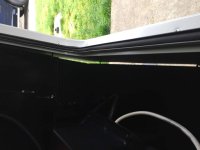
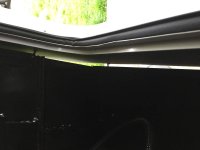
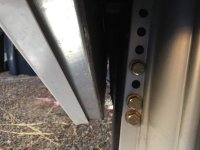
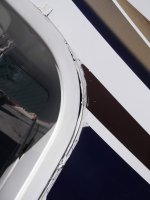
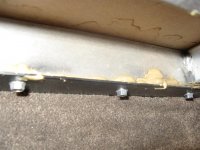
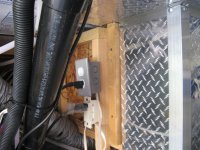
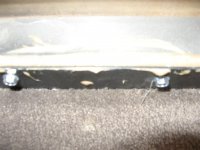
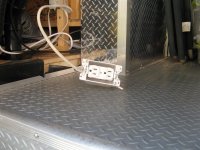
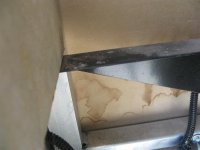
I am a little concerned about the separation of the front compartment and the frame on my new 3270RS that I picked up over a week ago. As you are looking at the door, on right side in front of batteries. I cannot pull the two together with the screws because of separation. In fact one screw is completely broken. When I mentioned this to the dealership, the service guy indicated they might have to fill the gap with foam. I am concerned that might be only masking a problem and not fixing it. Is this a structural issue or something not to worry about? Concerned about structural integrity. The lock on the door is very hard to turn because of the separation. Attaching photos for you to look at.

Bob
 

Attachments

  • IMG_0445.jpg
    IMG_0445.jpg
    67.1 KB · Views: 242
  • IMG_0443.jpg
    IMG_0443.jpg
    48.5 KB · Views: 238
  • IMG_0442.jpg
    IMG_0442.jpg
    54.6 KB · Views: 225
  • IMG_0440.jpg
    IMG_0440.jpg
    43.3 KB · Views: 221

RVFun4Us

Well-known member
Ok Jim. I just sent the info to Heartland at the email address you provided along with photos. Looking forward to hearing from them. Sorry the last three photos were loaded sideways.

Bob
 

mlpeloquin

Well-known member
This is the way my Bighorn was when delivered. If I knew then what I know now I would have done exactly what Jim is telling you. This needs to be addressed properly and is not a fill in with foam problem.
 

Roller4tan

Well-known member
Mine was similar but not as open. I found some of the screw heads broken and only a few screws total. I added as many screws as there were holes in the framing and it pulled up tight. drilled thru next to the broken screws and added screws there. Good Luck with yours.
 

Westwind

Well-known member
The design of that area of the Landmark, Bighorn, and Big Country FW's needs to be reworked, it allows weather into the compartment, siding ( which ripples after timer ) and worst of all Rodents.
 

mlpeloquin

Well-known member
Not owning a fifth wheel before I thought it was just an open compartment since the bottom where the generator would be installed has open slots in the bottom. So I wasn't worried about the 3/8" space at the bottom. 12K miles later, which included the 2015 Goshen rally (9K plus miles), I noticed that the left side opened up from the bottom 1.5 inches to 1/2 inches at the top. The side trim was ripping out in the corner of the overhang when I hitched up and I noticed movement in the left overhang when I hitched it up as well vs unhitched. When I unhitched the trim moved almost back to the proper position. One of the reasons I almost didn't notice it. The problem in the end turned out was internal fasteners. Heartland was contacted and so was Lippart. Needless to say I was well beyond my warranty. At this point pictures went back to Heartland and Lippart. Nether would authorize labor for taking it apart to see inside. I did. The frames were fine so Lippart dropped out. Yes frames. There are two. The main frame and a sub frame that supports the bedroom which is bolted to the main frame. Lippart apparently purchased the other company. So Heartland was consulted on how to put this back together properly. Even though the warranty was out by several months, they kicked in almost 50% to fix it. Cannot ask for more and I know it is fixed properly. Everything is rock solid tight and I have taken several trips. To lessen the stress on the 5er I installed a Trail Air Flexair king pin. What a difference pulling. I found myself holding the steering wheel with one hand. Not a good thing, but the is just how comfortable it is to pull with this king pin. When I do upgrade in the future it will be a Heartland and I know what to look for. You learn a lot with your first one. We were at Quartzite rally this year and had an opportunity to see several other manufactures fifth wheels including Redwood Estates Luxury Fifth Wheels. I will take my Big Horn, a Big Country, or Landmark over any that we saw.
 

RVFun4Us

Well-known member
Marc and Carol,

Wow, quite a story. Since I just picked mine up on the 24th of February, mine is obviously still under warranty. You did not say what they did to fix it. Would be interested to hear that story. My separation as I stated starts at the lower right corner as you are looking at the front cargo door (about 9/16" break there). The separation goes across the front about three-fourths of the way gradually tapering down to zero. It also goes up to the top of the cargo door. Several screws sheared off or not making contact with the outer layer. Also noticed on the left side that there is only one screw holding that side. It appears they left out many screws in the construction. Attaching one more photo to illustrate the separation from the right outside corner.IMG_0451.jpg
 

mlpeloquin

Well-known member
Mine was inside the front hatch where my gap was. I didn't take pictures of the inside of the front hatch. Then it progress and became visible at the trim. Internal fasteners that held the two frames together on the left/drivers side snapped. It only takes a couple then shake and vibe works on the others. Perhaps over torqued or a defective lot of screws? You can only get to them by removing the side trim around the front of the fifth wheel. Then the fasteners that hold the skin on can be removed. Once this is done it exposes the frames and the fasteners that hold them together. This may not be your problem though. But if it is, it won't take long to get it fixed.
DSCF1442.jpg
 

Bob&Patty

Founders of SoCal Chapter
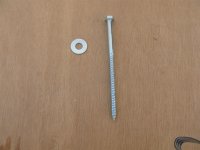
Bob, mine did the same thing but was not new. I fixed mine with a lot more and bigger screws and construction adhesive. The small sheet metal screws (not enough) are either stripped or have been over tightened and have broken heads. I also put bigger and more sheet metal screws across the bottom and construction adhesive. The problem is the thin aluminum frame for the front covering being attached to the steel angle iron of the frame. You can have your dealer do it or do it yourself. After 6 years my repair is still holding.
 

RVFun4Us

Well-known member
Bob,

My separation seems to be pulled apart to the point where there is no give between the frame and outside covering. When pushing the outside in, it just does not give. Maybe longer screws would be the answer and more of them too. But if I cannot even get the outside to move in when pushing, it seems that screws would not do any good. In communication with Heartland and we will see what they say. Only had the rig for less than two weeks. I won't fix it - should be made good by Heartland and they have indicated they will fix it.

Bob
 

Bob&Patty

Founders of SoCal Chapter
Bob, probably some of the screws wont let you push it in. There should be a metal molding (verticle one) that has a plastic insert in it that you can remove/pull out that the screws are behind. Pull off the insert and you should see the screw heads. I understand that you want HL to pay for it...but....how long do you want to be without your BH? I bet you could have it repaired in 30-45 minutes...tops. Well maybe more with a trip to Lowes or HD. If you decide to do it....use SS # 10 self tapping sheet metal screws. Good luck with what ever you decide. OH YEA...put some caulking on the screws. If you lived closer I would do it for you.
 

Attachments

  • wall repair on the Horn 013 (Large).jpg
    wall repair on the Horn 013 (Large).jpg
    103.3 KB · Views: 58
  • wall repair on the Horn 017 (Large).jpg
    wall repair on the Horn 017 (Large).jpg
    113.7 KB · Views: 55
  • wall repair on the Horn 012 (Large).jpg
    wall repair on the Horn 012 (Large).jpg
    68.9 KB · Views: 55
  • wall repair on the Horn 018 (Large).jpg
    wall repair on the Horn 018 (Large).jpg
    98.6 KB · Views: 55
  • wall repair on the Horn 016 (Large).jpg
    wall repair on the Horn 016 (Large).jpg
    110 KB · Views: 56
  • wall repair on the Horn 011 (Large).jpg
    wall repair on the Horn 011 (Large).jpg
    66.3 KB · Views: 55
  • wall repair on the Horn 004 (Large).jpg
    wall repair on the Horn 004 (Large).jpg
    74.8 KB · Views: 55
  • wall repair on the Horn 007 (Large).jpg
    wall repair on the Horn 007 (Large).jpg
    37.5 KB · Views: 49
Last edited:

mlpeloquin

Well-known member
Bob, what you did is exactly what was done to mine except mine progressed to have all the fasteners snap on the left/drivers side. Iron and aluminum have very different CTE, (coefficient of thermal expansion), and will try to pry the fasteners apart where joined. If a fastener has a contaminate in it, the contaminate can cause embrilttlement and failure through stress cracking. Need to do an analysis with an electron microscope to determine the exact metal composition to find out. Very expensive. Heartland design maybe quite adequate. But a couple of over torqued, under torqued, or defective fasteners will put much more stress on the remaining fasteners. The remaining fasteners most likely are not sufficient to carry the stress loads leading to progressive failures.

Larger gauge screws buy more margin and more of them will too. Larger gauge and doubling up was done on mine. My working life was in electrical/RF and process engineering. We had fun with MIL SPEC hardware failing in stress. The fasteners came with certifications that were worthless. Turns out the certs were from the fastener manufacture and the supplier of the steal was a foundry in China. The fastener composition was correct except for the contaminate thus the metal did not meet spec. Our M&P, material and processing, group did an electron microscope analysis and found the contaminate that caused embrilttlement. Under stress small fractures formed and progressed until the fasteners snapped in half. All lots of fasteners now have to be analyzed by the M&P department. I assume it is still being done. I am retired!
 

RVFun4Us

Well-known member
Bob and Patty: I also need a top left freezer door for my Norcold. Has a dent in the side so need to go to the dealer anyway. And thanks for the offer.

Marc and Carol: Interesting info. Certainly see why more fasteners would break if a few are not there, causing stress on the rest. Will have the dealer put in plenty and longer self-tapping screws when they fix this.
 

mlpeloquin

Well-known member
Since this is under warrantee, Heartland will have to approve the repair. You can request through your repair/dealer's shop to Heartland that you want larger gauge stainless steel screws and to doubling up on the fasteners. I would also think about not having so much pounding on your rig and truck by installing a Trail Air Flexair hitch. What a difference!
 

caissiel

Senior Member
Our unit iw 7 years old. This was a problem from day one. If the crews were not broken they were stripped. Everything was loose.
I installed #14 selftapping screws, some in original position and added much more. Now I noticed the front panels buckling but the frame is well supported.
It was one of the many things I had to repair on our unit to make it last the 7 years.

Sent from my B1-710 using Tapatalk
 

donr827

Well-known member
I would call HL and let them handle the problem. I would not want to make changes that could cause damage on something else.
Don
 

Lou_and_Bette

Well-known member
Bob, probably some of the screws wont let you push it in. There should be a metal molding (verticle one) that has a plastic insert in it that you can remove/pull out that the screws are behind. Pull off the insert and you should see the screw heads. I understand that you want HL to pay for it...but....how long do you want to be without your BH? I bet you could have it repaired in 30-45 minutes...tops. Well maybe more with a trip to Lowes or HD. If you decide to do it....use SS # 10 self tapping sheet metal screws. Good luck with what ever you decide. OH YEA...put some caulking on the screws. If you lived closer I would do it for you.

Bob, just so my non-mechanical mind can understand what you did...Do you mean you removed the plastic insert and replaced the existing screws in the underlying metal track with longer screws, going through the metal track? Not, pulling metal track up, placing screws and then replacing track and plastic insert.
 

Bob&Patty

Founders of SoCal Chapter
Lou, yes you can remove the metal track and replace the screws and then reinstall the track. On my BH I found that all the screws were either broken off, rusted off or stripped. I went farther than I stated and installed some long lag bolts after I reinstalled the metal track. That's a whole nuther story. It's in a post from many years ago.....maybe I can find it.

I added some pix to my post #12 on this thread. Maybe they will help. This repair was done in 2010 and is still holding up.
 

Lou_and_Bette

Well-known member
Thanks for the explanation Bob. My separation looks like OP's but is between inner compartment not outer rim where the track you mention is. That area is tight but the inner "generator" box has screws that are inserted from inside the compartment into the outer shell. Some of these screws have sneered the heads off, some have vibrated out, and some are still holding tight. However, doesn't seem to be a problem since everything seems snug.
 
Top