Partsbob
Member
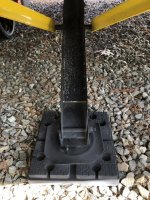
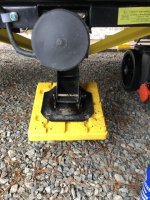
Perhaps others have come up with ideas to make their plastic or rubber stabilizer “pads” work like the costly “snap-pads” that are preferred by many, but with all the other accessories we’d like to add to our North Trail TT, it’s just not in the cards for us in our retirement years, but continuing to place or grab them under each foot is a major pain. So, after watching some YouTube videos of others’ upgrades, including SnapPads, I got the idea of using some of our extra plastic leveling-blocks by attaching them to the feet of our Lippert power-stabilizers using 1/4”x1” self-drilling screws.
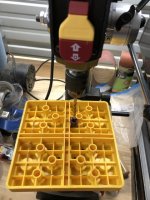
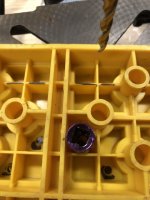
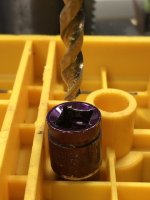
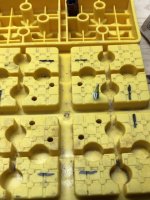
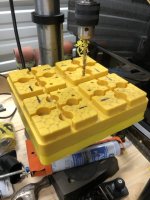
From the various campers we’ve owned over recent years, we have plenty of those yellow plastic blocks, so I measured the feet of the stabilizers (6”x6”), centered the size on one of the blocks and, since our blocks are “waffled” on the bottom, I located 8 spots where I could drill 1/4” holes 2” from the center of the block that would end up flat against the stabilizer feet. Though I only planned to use 4 of them for sufficient strength of the plastic and, to make sure the holes were centered in the “waffle”, I used a 10mm socket to guide the drill-press, so the screws could be fully tightened with a thin socket from the backside. It’s important to attach the screws from the bottom of the block, so you’re screwing the plastic block into the steel of the stabilizer feet, not the other way around! Once I had one of the blocks drilled and tested against one of the feet, I was able to use that block as a template to drill the other 3 blocks in the drill-press, since they’re stackable. TIP: mark a corner of each block and place it at the same corner of the drilled block before drilling! Then have that corner at the same location when you install on the stabilizer feet.
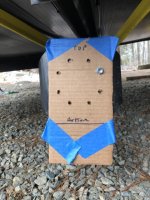
After all 4 blocks were drilled, I then used a piece of cardboard to make a template to pre-drill the stabilizer feet, making a mark on the cardboard to match the mark you made on the corner of the block itself. I discovered you should make sure you mark the side of the cardboard that’s against the block when you mark the holes, to face out when you drill the feet, as all the screw holes in the block might not be exactly the same distance apart. Then it’s time to move to your rig.
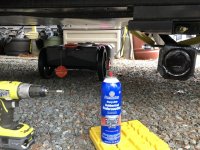
Raising the feet of the stabilizers (assuming they’re not in-use at a campsite), you may be able to flip the foot vertical to make drilling easier, like I was able to do. Using the photos attached, you’ll see how taping the cardboard template against the foot will help pre-drill the foot, just make sure it’s level, so the finished product will be square to the camper. I pre-drilled using a 1/8” drill to allow the screws to self-drill, so the blocks would be very secure. Of course, you need to make sure the screw holes you plan to drill aren't going to hit anything behind them that might compromise the feet of the stabilizers! Now, after running a self-drilling screw into each of the pre-drilled holes, I brushed away all metal shavings and sprayed each stabilizer foot with rubberized undercoating where it will meet the block, to keep the feet from rusting where they were drilled and, once the blocks are screwed to the feet, I sprayed the topside where the screws came through. It’s important you don’t get undercoating or paint on the bottoms of the blocks for campsites that have concrete pads, so you don’t leave marks when you camp!
For us, it was okay to leave the blocks yellow, so the camp owners can easily see we’re using blocks to protect their investment. I apologize if the photos come across turned or out of order, I’m having a little trouble with attachments and may try to correct them in another post.
Attachments
-
 09C6C247-0C4E-44CF-B421-BE8A7EDABDFF.jpeg108.5 KB · Views: 210
 -
 561FA8D3-87B7-4097-BABF-FE8CD9281ECB.jpeg81 KB · Views: 199
 -
 5967C80B-4890-4740-B5F2-AC2A3A1B522A.jpeg67.3 KB · Views: 195
 -
 A60BA815-9A9B-44F0-8074-C027FCB76016.jpeg103.6 KB · Views: 194
 -
 23552DD8-7481-45EE-B210-1A631C24D42F.jpeg104.3 KB · Views: 203
 -
 CEC53052-5E27-4CFF-82CF-7E07AAD95A03.jpeg142.4 KB · Views: 212
 -
 295AADC9-D329-4083-9D1B-D2BC3B64C4FE.jpeg125.1 KB · Views: 212
 -
 37499AC8-2097-4B7F-910E-7A362F4DE014.jpeg158.1 KB · Views: 227

