Underbelly Overhaul

adam

Well-known member
Good Evening;

Perhaps some of you were following one of my other threads in the AC electrical forum - this thread is a continuation of that project.

https://heartlandowners.org/showthread.php/47811-Landmark-GFI


If you looked at the other thread you will see I was troubleshooting 2 bothersome electrical issues with my new Landmark. Obviously to facilitate fixing those issues I dropped both the smaller forward belly panel and the larger rear panel. In doing so I discovered that there were a variety of housekeeping items that I could address while the panels were on the ground.
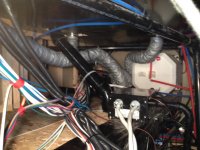
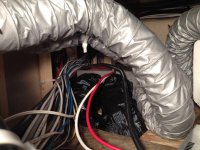
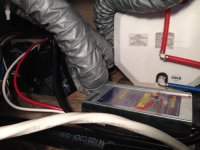
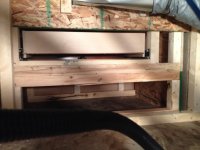
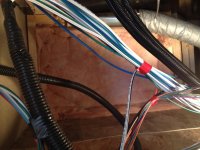
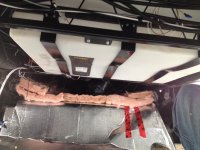
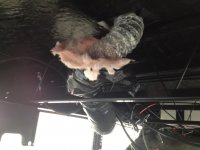
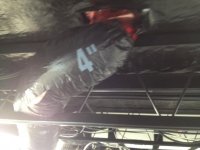
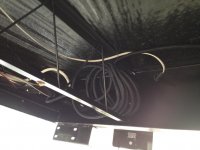
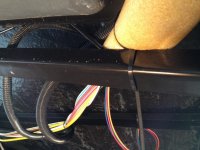
It appears that most of the wiring and plumbing is installed by the manufacturer after the panels and insulation are installed before the flooring goes on the frame. Most items were just laying along their runs. I understand that everything is hidden and somewhat protected by the insulation, but it just didn't seem right to put it back together in the same manner. More importantly I discovered faults that would have eventually reared there ugly heads down the line as we continued to use the coach. Its not my intention to be critical of the build process but I hope that other members can benefit from some of these items that I addressed in the underbelly/basement of our Landmark. These first round of pictures show some of the things that I addressed in the enclosed area behind the basement under the bathroom:

1. I discovered 1 of the hot air feeds to the kitchen from the furnace was not hooked up to the furnace discharge port. I connected this to the furnace.
2. The smaller 2" heat line that goes from the furnace to the underbelly was jammed into the insulation next to the forward grey tank, there was no way it would have provided any heat to the underbelly. I rerouted this small hose to blow clear into the belly.
3. All of the main DC wiring was running along the upper edge of the furnace where I discovered some chaffing on the wire insulation. i reparied the wires and carefully routed the wiring bundle away from the furnace.
4. The hot air supply duct to the bedroom was blocking the cooling fan on the converter. The hose was rerouted.
5. The transfer switch for the generator/shore power had not been screwed to the floor.
6. My wife complained that there was a draft from the stair area, so I insulated this area to stop the draft coming around the stair drawer inside the coach.
7. Other housekeeping items in this area included wire tieing all loose wires and giving the complete area a thorough vacuum.


Thats a start. The underbelly area came next.....
 

Attachments

  • unnamed.jpg
    unnamed.jpg
    75.5 KB · Views: 472
  • unnamed.jpg
    unnamed.jpg
    84.3 KB · Views: 432
  • unnamed.jpg
    unnamed.jpg
    63.2 KB · Views: 428
  • unnamed.jpg
    unnamed.jpg
    56.6 KB · Views: 427
  • unnamed.jpg
    unnamed.jpg
    82.1 KB · Views: 418
Last edited:

adam

Well-known member
Regarding the underbelly;

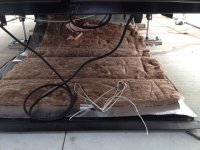
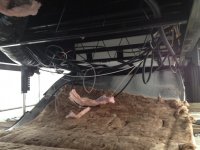
1. This is what the wiring looked like when I dropped the panels.
2. I moved the 120 VAC tank heat pad on the fresh water tank because a portion of it was being damaged by the support for the tank.
3. I protected the main feed for the 50 amp shore power where it came through the frame.
4. I repaired the furnace duct that ran to the living room. While it was connected to the vent, the insulation was pulled back.
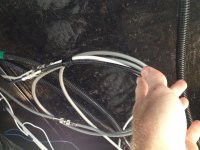
5. I tied up all loose wires, dividing items into hydraulic, 120 VAC, 12 VDC, plumbing and heating runs where I was able.
6. In the forward belly area I secured the wiring looms running to the cold storage under the gooseneck, and wrapped the wiring in a protective liner where it headed up through the floor.
7. I seperated the cable/satellite feeds away from the electrical wire, plus tightened all of the connections as they were all loose.
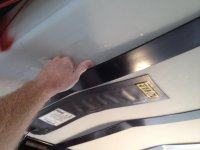
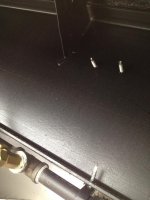
8. Another item that was really bothering me cosmetically was the self taping screws (6) that you could see on both sides of the main frame at the front of the coach. These screws hold supports for the black and grey tanks. I simply turned them end for end and that gives a neat finished appearance.


The final stage came next.....
 

Attachments

  • unnamed.jpg
    unnamed.jpg
    81.3 KB · Views: 447
  • unnamed.jpg
    unnamed.jpg
    65.8 KB · Views: 448
  • unnamed.jpg
    unnamed.jpg
    42.8 KB · Views: 438
  • unnamed.jpg
    unnamed.jpg
    94.4 KB · Views: 448
  • unnamed.jpg
    unnamed.jpg
    47.3 KB · Views: 438
  • unnamed.jpg
    unnamed.jpg
    43.9 KB · Views: 432
  • unnamed.jpg
    unnamed.jpg
    56.7 KB · Views: 427
  • unnamed.jpg
    unnamed.jpg
    69.4 KB · Views: 425
  • unnamed.jpg
    unnamed.jpg
    83.2 KB · Views: 427
  • unnamed.jpg
    unnamed.jpg
    38.8 KB · Views: 435
  • unnamed.jpg
    unnamed.jpg
    80.6 KB · Views: 367

adam

Well-known member
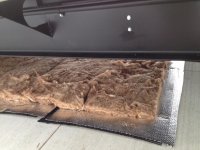
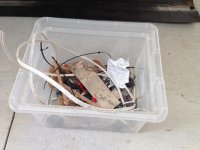
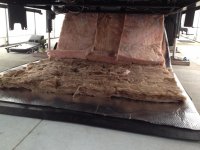
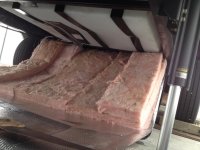
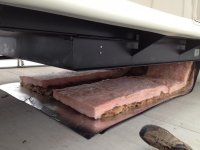
In the final stages of my housekeeping project I vacuumed all of the underbelly panels and picked up a container full of leftover build material. I then chose to add a additional layer of R-12 insulation to the underbelly area, concentrating it toward the edges of the underbelly panels. I secured the panels back in place, installed the spare tire carrier and the rear hitch receiver. Finally I used rodent and insect resistant expanding foam to seal all remaining openings.

While this project took a novice like myself the better part of 3 days to do, it was very rewarding and I learned alot about all of the utility routings for our coach!


Adam
 

Attachments

  • unnamed.jpg
    unnamed.jpg
    78.5 KB · Views: 425
  • unnamed.jpg
    unnamed.jpg
    73.7 KB · Views: 395
  • unnamed.jpg
    unnamed.jpg
    68 KB · Views: 386
  • unnamed.jpg
    unnamed.jpg
    53.3 KB · Views: 389

rxbristol

Well-known member
Awesome. Thank you so much for the pictures and information. How did you hold up the chloroplast and installation to screw back into place?
 

adam

Well-known member
It wasn't easy. On my creeper I used both legs and arms plus a octopus to get it installed! The insulation actually behaves quite well as you tuck the plastic bubble wrap insulation over the frame rail before you screw up the panels.

I would be all for (even for a upcharge) to have a option where the belly material could be done in more ridgid/manageable panel sizes. There are so many utilites in that area it would be great to have the ability to remove select panels to troubleshoot a certain fault.

Thanks
Adam
 

rxbristol

Well-known member
I've read in other posts that some have cut the "plast" in sections and used a wooden cross member to secure it back into place and then used scrim tape to secure the seam.
 

Jim.Allison

Well-known member
Great Job, I got behind the basement wall and discovered there are no ghost back there, now I know there are no ghost under the rig either. These rigs are completely fixable, if you can do the trailer yoga it takes to get around under them, and in them. Im not scared anymore, and do not need a dealer or repair shop to handle 99.9% of the maintenance required. Thanks for the pics.
 

adam

Well-known member
Thanks for your input, again anything I did on this project was not earth shattering - I just enjoy tinkering and I get piece of mind out of knowing that I do everything I can to keep our coach "in shape".

I believe in having a good relationship with the selling dealer but I agree with Jim, alot of the "small" items can be handled by the owner. If I had to run my unit over to the dealer for every little thing it would drive me nuts. If it was a repair/service beyond my skillset or any high priced warranty items then its all theirs! I have owned RV's from 4 different manufacturers from the cheapest through to some of the nicest, Newmar, Holiday Rambler and our Landmark. Some of the smallest little problems could be eliminated during production and many others that are missed could be dealt with by the selling dealer........I'm just more fussy with the work I do myself - but all of that is a discussion for another thread. I will finish with 2 thoughts;

1. Heartland has a excellent support team over the phone and I have much praise for every call that I have made to their parts department and technical support. They are leagues ahead of other companies.
2. Yes Brian, You can bring your coach over - the wheels are still warm on the creeper, but I think I will hold the light for you while you crawl around in what I now refer to as the "bat cave"!


Adam
 

murry135

New York Chapter Leaders - retired
Adam,

My question to you is how did the choroplast lie after the re-install, flat, tight, saggy and/or rolling hills? I need to get into mine but I can't just get it to look good when I am done. This has made me a bit gun shy to get back under there. The dealer was last under there and he did about as good as I did. I have the Yeti package so I know the fiberglass can make for a bit of a difficult time. Also knowing that when they start production the trailer is upside down and the choroplast is installed then everything is added step by step until it is time to right the ship, so it may never be a smooth re-install. Mine bulges severely when tanks reach full mark and then they don't empty all the way. I know the LED are not that accurate but you know when your dropping 50 gals or just 20-30.
 

adam

Well-known member
The short answer is that the panels easiest "install" was the first time in my opinion. The product seems to develope a memory and if things are not perfectly aligned then it doesn't go well.

In my case I feel the product would be easier to handle if it was warm versus cool. The smaller piece at the front of the coach on the drop frame section was the easiest. Even though I added extra insulation the silver bubble wrap sheeting helped hold the insulation in place when you tuck it above the I-beam frame rail. I had 1 area at the rear of the coach that wasn't perfect but I worked with it and seemed to get most of the rolls out of it. As I mentioned I used a foam that is paintable after it cures so cosmetically it will be fine. For whatever its worth it appeared that if I worked from left to right with the large panel it went back into place. I didn't fully tighten all the screws until I had the best fit possible.

I would drop the panel as required until such point that it was no longer durable. Once it hits the end of its useful life I guess you could cut the product into shorter pieces and then use aluminum strapping to mate the seams - just a thought.

I will probably regret saying this, as something will likely break next time I go out with my luck......but I feel the benefit of inspecting, securing and cleaning the underbelly outweighs the hassel of working with the panel. In my case I had a tank pad issue that needed to be rectified and I know for sure the dealer would do no better and they certainly would not have taken the time to go through the area as thoroughly like I did.


Adam
 

TravelTiger

Founding Texas-West Chapter Leaders-Retired
We've been in "the belly of the beast" as well, installing heating pads and wrapping water lines with heat tape and removed the low-point drains, so I feel your pain. It is nice to know what you're dealing with under there and it's no longer a mystery. At the RV show, I saw SOB touting their underbelly accessibility. Here's a pic of their "zippered access":

2cca739e6d65ca97b469741a8648c8d3.jpg


Sent from my iPhone using Tapatalk
 

danemayer

Well-known member
I'd find it very useful to have a 1' wide access panel along the off-door-side on both sections of the underbelly. On most floor plans that would give you easy access to all the gate valves, the underbelly heat duct, and most of the water lines.
 

wdk450

Well-known member
Gang:
Right now I am sitting at my space at Thousand Trails Russian River in Northern California (the vineyards are heavy with grapes) with the bottom Coroplast (?) removed from the back 2/3 of my rig for my pending frame repair. As others have posted, wires and cables are hanging down to the ground, I have a big bag of long cable ties, but I am waiting until my welder does the preliminary patch-up welding to get me to his shop before tying the cables up thinking I may tie them up in the way of his work if I do it before hand. I had to cut the Corplast across the rig at the axles to get it off. I may or may not reuse the old stuff. I would like to take the opportunity to add some more insulation underneath, and will think hard about vapor barriers to keep the insulation dry, although my driving in the rain is very minimal out here in arid California.

I went internet searching for zippers for the underbelly and came up with a pretty comprehensive mobile home/rv supplies website, Mobile Home Depot. Their prices seemed reasonable, too. Here is the link to their underbelly section with the zippers, but you can choose any one of the other parts departments from the menu bar at the top of the page: http://mobilehomedepotmi.com/mh_catalog1/underbellyvapor.html
 

danemayer

Well-known member
I would like to take the opportunity to add some more insulation underneath
Bill,

Consider adding 4x8' sheets of rigid foam insulation. Cut it to length so it fits on the inside of the frame members. Slide one end into the frame, flex it a little and slide the other end into the other frame member. The frame will hold it in place. You may not have enough room under gray #1, but there should be plenty of space under the bedroom and under gray #2. You may also want to tape attic insulation batting to the top of the foam board for additional R value.
 

adam

Well-known member
Not only can batten insulation act like a mop when it comes to water, rodents love to make it home too.....can you just imagine if one found its way through one of the gaps of the coroplast!!??
I keep rodent poison in pet friendly dispensers in our storage building - the last thing you want is a pack of marauding vermin making a condo down there.

I like the ideas for the zippered access, and the rigid insulation board. I need to get a bit longer out of the factory set up before I redo it all - plus one of you fine folks need to come up with the ultimate soloution that we can all copy!


Bill, tell us what happened to your frame please?

Adam
 

donr827

Well-known member
My old Carriage had the zippered openings on the under belly. Don't know the cost but might be worth it for HL to look into them with at least their higher end trailers.
Don
 
A lot of good ideas and very interesting reading. The pictures helped to visualize what you went through. If my garage was longer I would love to tear into my BH 3600 RL through the winter.

Ron
 
Top