You are using an out of date browser. It may not display this or other websites correctly.
You should upgrade or use an alternative browser.
You should upgrade or use an alternative browser.
Our 3010 Modifications
- Thread starter Sniper
- Start date
Sniper
Well-known member
Same thing I said to the freight company.pretty hard to loose a pin box
Jesstruckn/Jesstalkn
Well-known member
Sounds like my luck
 and my next one would damaged. That's stuff drives me nuts
Sorry to hear you have the same luck.
Sent from my XT1254 using Tapatalk
Sorry to hear you have the same luck.
Sent from my XT1254 using Tapatalk
Sniper
Well-known member
They say they did, and it's supposed to be here this Wednesday between noon and 4. We shall see.well. Did they fine a couple hundred pound pin box yet?
Bones
Well-known member
Don't sign if anything looks too damaged and make sure to note any damage visible on the BOL when deliveredThey say they did, and it's supposed to be here this Wednesday between noon and 4. We shall see.
Sniper
Well-known member
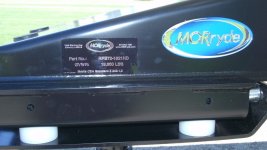
Well the Mor/ryde pin box finally arrived, I was very impressed with the packaging. Didn't have a scratch on it. 3 Hours after it got here I had it on, and I installed it by myself. 
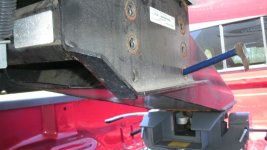
The first picture shows all the bolts removed with the old pin box held with the 5th wheel, and an 12" round pry bar. I simply pulled the bar and pulled forward a few feet. Pulled the old pin box off the 5th wheel, and put the new pin box in the 5th wheel, and backed up under the toy hauler, raised the back of the new pin box, put the pry bar in a bolt hole and started putting in bolts.
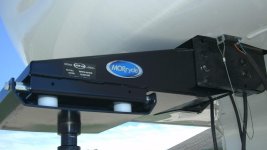
This picture shows the Mor/ryde pin box installed. The torque specs given where somewhat confusing, because it gave 3 different specifications for the exact same bolt. So I used my Father's torque method used a 3 foot breaker bar and tightened them "until they squealed" (them bolts ain't going nowhere now boy). I couldn't bring myself to drill into the new box so I mounted the break away switch using one the old pin box cover mounting holes.
What do ya think?
We will be trying it out here in ten days, and I'll give a full report upon our return. I can't wait to try it out!
On edit: I will also be repainting the frame mount to tidy it up after we return from our 1600 mile trip. I'll be checking those mounting bolts at every stop.
Safe travels everyone.
The first picture shows all the bolts removed with the old pin box held with the 5th wheel, and an 12" round pry bar. I simply pulled the bar and pulled forward a few feet. Pulled the old pin box off the 5th wheel, and put the new pin box in the 5th wheel, and backed up under the toy hauler, raised the back of the new pin box, put the pry bar in a bolt hole and started putting in bolts.

This picture shows the Mor/ryde pin box installed. The torque specs given where somewhat confusing, because it gave 3 different specifications for the exact same bolt. So I used my Father's torque method used a 3 foot breaker bar and tightened them "until they squealed" (them bolts ain't going nowhere now boy). I couldn't bring myself to drill into the new box so I mounted the break away switch using one the old pin box cover mounting holes.

What do ya think?

We will be trying it out here in ten days, and I'll give a full report upon our return. I can't wait to try it out!
On edit: I will also be repainting the frame mount to tidy it up after we return from our 1600 mile trip. I'll be checking those mounting bolts at every stop.
Safe travels everyone.
Last edited:
Jesstruckn/Jesstalkn
Well-known member
Very nice I think you'll like it
Sent from my XT1254 using Tapatalk
Sent from my XT1254 using Tapatalk
avvidclif
Well-known member
So I used my Father's torque method used a 3 foot breaker bar and tightened them "until they squealed" (them bolts ain't going nowhere now boy).

That's called "Farmer Tight" and responsible for more broken/stretched bolts than anything else in the world. Torque specs are available on the web for whatever size bolt you have and the grade.
Sniper
Well-known member
I don't know nothing about farming, and neither did my Father. Appreciate your input. If I managed to stretch one of those 5/8-11 grade 8 bolts I'll be sure to post a picture of it. Now my back lifting that 141lb MOR/ryde up into the companion 5th wheel on the other hand, yea probably should have waited for help.That's called "Farmer Tight" and responsible for more broken/stretched bolts than anything else in the world. Torque specs are available on the web for whatever size bolt you have and the grade.
Sniper
Well-known member
Thanks Jerrod. I sure hope we do.Very nice I think you'll like it
Sent from my XT1254 using Tapatalk
- - - Updated - - -
Thanks Bones.That new pin box looks great.
avvidclif
Well-known member
I don't know nothing about farming, and neither did my Father. Appreciate your input. If I managed to stretch one of those 5/8-11 grade 8 bolts I'll be sure to post a picture of it. Now my back lifting that 141lb MOR/ryde up into the companion 5th wheel on the other hand, yea probably should have waited for help.
I re-read my original post and it came across as critical but was meant to be tongue-in-cheek. My apologies.....
Sniper
Well-known member
No offense was taken Cliff. It's all good.I re-read my original post and it came across as critical but was meant to be tongue-in-cheek. My apologies.....
travelin2
Pennsylvania Chapter Leaders-retired
Well the Mor/ryde pin box finally arrived, I was very impressed with the packaging. Didn't have a scratch on it. 3 Hours after it got here I had it on, and I installed it by myself.
The first picture shows all the bolts removed with the old pin box held with the 5th wheel, and an 12" round pry bar. I simply pulled the bar and pulled forward a few feet. Pulled the old pin box off the 5th wheel, and put the new pin box in the 5th wheel, and backed up under the toy hauler, raised the back of the new pin box, put the pry bar in a bolt hole and started putting in bolts.
View attachment 44316
This picture shows the Mor/ryde pin box installed. The torque specs given where somewhat confusing, because it gave 3 different specifications for the exact same bolt. So I used my Father's torque method used a 3 foot breaker bar and tightened them "until they squealed" (them bolts ain't going nowhere now boy). I couldn't bring myself to drill into the new box so I mounted the break away switch using one the old pin box cover mounting holes.
View attachment 44317
What do ya think?
View attachment 44318
We will be trying it out here in ten days, and I'll give a full report upon our return. I can't wait to try it out!
Safe travels everyone.
You'll like your new pinbox.
I like the ride we get from ours!
Let us know what you think
Sniper
Well-known member
Sniper
Well-known member
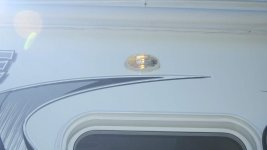
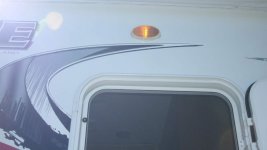
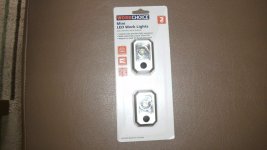
The Commander has been on me for two years now to put a light inside the control panel door. As usual I was over thinking about what, and how I wanted to do this, and today a ran across these at Advance Auto Parts for 6 bucks ($6.00)...
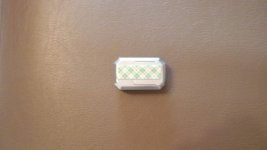
Added a piece of 3M mounting tape:
Before (with the outside door open for camera light):
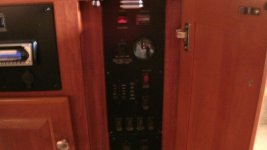
After (with the outside door closed. Sorry so blurry):
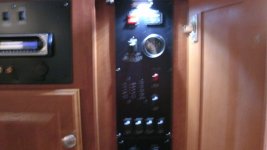
You never have to tell me for over two years to get something done...I'm on it!

Added a piece of 3M mounting tape:

Before (with the outside door open for camera light):

After (with the outside door closed. Sorry so blurry):

You never have to tell me for over two years to get something done...I'm on it!
Sniper
Well-known member
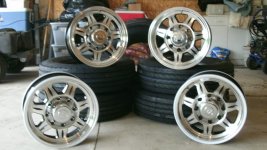
I probably did more research on this purchase than anything ever! Wore me out. 5 Sailun S637's from simple tire, and 5 100# plus valve stems from Shadow Industries. While on their website the Commander seen these wheels as well, and said "they're so shiny", so we got those as well from Shadow. They are 3750# load rated @ 110 psi. Now to get them all mounted, and swap em' all out.

Last edited:
Jesstruckn/Jesstalkn
Well-known member
Nice looking wheels. Thay will look sweet on your rig.
Sent from my XT1254 using Tapatalk
Sent from my XT1254 using Tapatalk
Similar threads
- Replies
- 8
- Views
- 750
- Replies
- 1
- Views
- 1K

