Residential Refrigerator Installation - My Experience

boatto5er

Founding VA Chap Ldr (Ret)
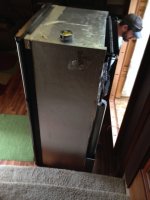
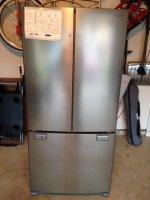
Phase one - acquiring the refrigerator, is complete today. The Samsung 17.5 cubic foot model was delivered this afternoon. It came with one very tiny dent (barely visible) in the left side door. Samsung gave me three options: return the refrigerator and get a replacement in a week or two; wait several days to get a technician out to replace the door (2-3 weeks to get a door ordered); or take a $175 rebate. I took the money and ran. Will start actual removal of our Dometic RM1350 (will be for sale at a very reasonable price soon - still works) on Saturday and hope to have this baby in by the end of the day. Will not have inverter power for a couple of more weeks, but first trip is just a couple of hours away so think we'll make it there and the fridge will still be cold. I'll be posting pictures and updates on the installation this weekend, so stay tuned.

fridge.JPG
 

57chevyconvt

Well-known member
I will be anxious to see the picture as well as some dialog as to method of installation and all the goodies that you have to purchase to complete the installation. Thanks for thinking about the rest of us folks that are considering the same modification.
 

DaveTyler

Well-known member
Gus, Dave here. One thing I did was use the braided stainless ice maker lines. Mine went through cabinet and out at bottom of slide out. The factory plastic line kinked and leaked. Sounds good what you are doing.
 

Brazos

Active Member
Great advice don't use that plastic ice maker supply line. Mine was kinked at the connection to the frig and leaked. Do it right from the beginning. I think you will like the residential frig.
 

farside291

Well-known member
Yea, I flooded mine when the icemaker line broke. Now I am afraid to use the ice maker/water through the door. Bottle water and a table top ice maker for us!
 

DaveTyler

Well-known member
Yea, I flooded mine when the icemaker line broke. Now I am afraid to use the ice maker/water through the door. Bottle water and a table top ice maker for us!

The water supply comes from under the island in kitchen, should be water cut off for water line.(Good place to put another water filter). Come off there with braided hose. Goes underneath and comes out under slide, you can tie onto like pull string to pull new water line. This goes to water cut off, plastic, then go from this water valve with 10 foot braided hose to fridge. Line goes up through slide behind drawer of kitchen the follow to fridge. Not much room behind fridge but doeable. The line comes through with propane line to the stove. After doing this can seal with foam.
The braided hose should not crimp and leak like the 10 cent plastic line. Since fixing, we use the ice maker and water in door. Not bad. Good luck. Dave Fridge is fastened to slide in front at bottom. Have to undo, remember to put back.
 

boatto5er

Founding VA Chap Ldr (Ret)
My supply line comes up from the basement directly into the slide and the cut-off valve is behind the UDC and basement wall. Makes it easier to replace, but I don't have the new line yet. I haven't had a leak in 5 years, so I'm going to re-hook the existing line this Saturday and switch to the braided line when I install the inverter later. I'll post pictures Saturday.
 

boatto5er

Founding VA Chap Ldr (Ret)
Fridge is in! I'll post pictures when I get back on my PC. Only took 3 1/2 hours from the time I pulled up in front of the house until it was running. Goes pretty quickly with good help (two of my sons). Still have to do some trim work, but that's part of the round toit stage. Also have to install the inverter, but I also expect that to go pretty quickly. It's back ordered and not due in until late next week. Since our next outing is only 90 minutes away I can get the fridge cold before we leave and it will be good til we arrive and plug in.


Sent from my iPhone using Tapatalk
 

boatto5er

Founding VA Chap Ldr (Ret)
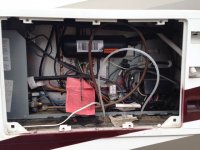
I started the switch out of the fridges this morning around 9:30 and had the new Samsung RF18 in and running by 1:00. Got a lot of help from two of my sons. First step was to disconnect water, power (12v and 120V), and propane. All were easily accessible from the exterior lower vent cover.
IMG_0918.JPG

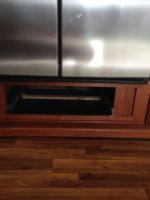
Next was the removal of the drawer under the old RM1350. The drawer came out easily enough but the glides and framing was a little tough. More on that later.
IMG_0919.JPG

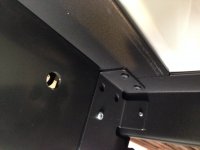
There were four screws holding the fridge in, 2 at the top and two at the bottom. All were easy to get to and came out easily. They are inside the hole in the picture.
IMG_0920.JPG

We were then able to slide the 1350 right out. It weighs around 185 pounds so at least two people are needed. It went out the RV door without any mods (no door removal, etc).
IMG_0922.JPG
(To be continued in next thread)
 
Last edited by a moderator:

boatto5er

Founding VA Chap Ldr (Ret)
Set of ramps came in handy for getting the 1350 out of the RV. Turned a rug upside down, set the fridge on it and slid it right down to the ground.
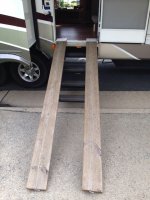
IMG_0926.JPG

Getting the framing for the drawer out was a time consuming exercise. There were a ton of screws holding pieces together, along with a bunch of staples. My son had fun with this step.
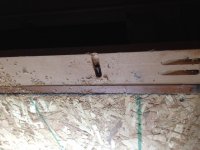
IMG_0923.JPG
IMG_0927.JPG

Getting the refrigerator base out out lengthy also. There were at least 50 staples holding it in.
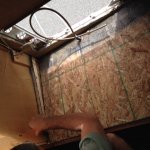
IMG_0928.JPG

Once all the wood from the base and the drawer was out the area looked pretty clean and clear.
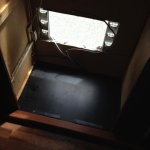
IMG_0930.JPG

We got busy at this point and I missed several shots I should have taken, including having to take the mounting post for the door handles of the new Samsung off in order to get it through the RV door. Could have been worse, at least we didn't have to take the doors off. The handle mounting posts screwed right out with a phillips screwdriver. We did not use the ramps to bring the new fridge in. Although it weighs approximately 225 pounds, the three of us were able to lift it in through the RV door pretty easily. I think the operative term here is "Three of Us", one inside the RV and two lifting pushing from outside. We took much of the existing trim off the fridge enclosure because it just wasn't needed. The RF18 fit right in the enclosure tightly and perfectly. The front wheels dropped just in behind the big wooden edge of the slide and the back butted right up to an existing small stud at the rear of the enclosure. She isn't moving anywhere the way she's in there. Still has airflow room though. This last shot is the RF18 in place before I added some trim (that I also forgot to take pictures of - will do so later this week.
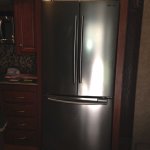
IMG_0936.JPG

We are leaving on a short trip Thursday evening or Friday morning and my inverter isn't due in until then so I won't get it in before Aug 22. I'll post post pictures of that process then.

All in all the removal of the Dometic RM1350 was easy, reconfiguring the cabinet was moderate difficulty (hammer, chisel, and screwdrivers [manual and electric] required), and getting the Samsung in was easy. I used some existing framing materials from the RM1350 and picked up some trim in a pre-stained Cherry that matched perfectly to finish it off. Can't wait to reconfigure the wiring for the inverter and transfer switch.

- - - Updated - - -

I forgot to mention the most important thing. The wife is happy with the new fridge (it is cold enough in the fridge and freezer for food in about an hour) and even complimented my cabinet work so I feel pretty good so far.
 
Last edited by a moderator:

murry135

New York Chapter Leaders - retired
She looks really nice Gus. It Really does not sound like a bad project at all, you just need manpower to lift the units in and out and the rest is labor to prep as I understand it. How do you plan on securing the refer for travel? Some post on the forum talk about refer's bouncing free and out of there space. Keep the photo documentation coming for it makes it much easier for me to understand the process when I can see it when reading your narrative. Enjoy your trip and looking forward to the finish product.
 

boatto5er

Founding VA Chap Ldr (Ret)
Hi Jim, the front wheels drop down behind my slide frame perfectly to form a tight fit. The adjusting screws are sitting on the frame adding even mor security. I have wood framing across the top also. She's not moving anywhere.


Sent from my iPhone using Tapatalk
 

murry135

New York Chapter Leaders - retired
Ok. You should know if it is secure plenty of experience and knowledge trust your word here. Enjoy, all I have to do is convince Col to give up the bottom draw.
 

boatto5er

Founding VA Chap Ldr (Ret)
Ok. You should know if it is secure plenty of experience and knowledge trust your word here. Enjoy, all I have to do is convince Col to give up the bottom draw.

We kept a couple of tablecloths, the rack for the microwave/convection oven, a couple of plate covers (the kind to keep the flies off), and some placemats in the drawer. Found other space for all of them. I think the increased fridge and freezer space, consistent temperature, better look, and Deb's appreciation more than make up for the lost drawer.
 

boatto5er

Founding VA Chap Ldr (Ret)
What did you do with the propane line going into that space?

Temporarily capped if off with a compression plug. We were working in front of my house with the slide out in the street on that side. Did not want to crawl under the slide with traffic going by periodically. Will later remove and cap that line below the slide.
 

kakampers

Past Heartland Ambassador
Did you add any insulation to the compartment, or do anything to close off the vent openings?
 

boatto5er

Founding VA Chap Ldr (Ret)
I did not put any insulation in. Since it's a residential model, it requires air circulation around it. I decided to leave the two sides vents on the RV open for the same reason although some folks have sealed those up. I'll re-evaluate that periodically.


Sent from my iPhone using Tapatalk
 
Top