And so it begins

porthole

Retired
In the picture below you can see my rear flood lights are on. And if you look closely you can see the truck's reverse lights are also on.

I ran a 10 gauge wire from the pin box wire harness all the way to the rear flood lights.
These work pretty good as back up lights.
 

Attachments

  • D30_7319.JPG
    D30_7319.JPG
    475.9 KB · Views: 691
Last edited:

camr

Well-known member
The "Look what modifications I made to the RV" thread will soon be followed by the "Why is the empty weight of my RV 1700 lbs. heavier than when I took delivery thread".!!!!!!!!! ;)
 

gpshemi

Well-known member
Super bright in fact. They would ease backing up alot! Soon as I get my fish tape back I'm going to have to figure out how to string that line. Where did you pick up the tail lights in the spoiler? Down at the bottom somewhere?
 

porthole

Retired
Super bright in fact. They would ease backing up alto! Soon as I get my fish tape back I'm going to have to figure out how to string that line. Where did you pick up the tail lights in the spoiler? Down at the bottom somewhere?

First thing I can tell you is - "patience grasshopper".

Best I can tell the floodlights get their feed from across the roof and down to the switch.

I didn't use a fish tape, too big on the end. Unless you have an old one laying around (flat style) and you want to cut the end off. I used a automotive speedometer cable. Got one years ago when when working in the dealers (and I worked on Hemi GTS's), universal version is like 12 feet long.

The backup light feed is in the harness up to the junction box on the pin box (yellow) I used about 50' of 10 gauge yellow from West Marine.

I removed the 2 screws under the bedroom overhang and then from the propane compartment I started "fishing" Once through I ran two wires. 2nd one was just from the pin box to the propane compartment - a spare just in case.

This was the hardest part of the job.

From there through the wall between the battery and propane compartments, following the harness down and under. I already had the underbelly off. If not I probably would have run it along the outside for now.

I snaked the wire through whatever conduit was under the trailer to the left rear corner.
This was difficult part number two, getting up into the channel in the garage.

From there I pulled the one floodlight and left side marker light and then just did some more fishing, this was difficult part number 3. May be a lot easier for you. I don't have the cap that you do.

Keep in mind when done, when hooked to the truck and if you turn the flood lights on from inside the garage your truck's backup lights will come on. No big deal - how often you going to do that?

It was well worth the effort though.
 

porthole

Retired
Moved my Toy Lock from the factory installed position under the right rear end of the trailer to under the front overhang. Much more useful for me here.
 

Attachments

  • Toy_lock.jpg
    Toy_lock.jpg
    386.4 KB · Views: 625

ChopperBill

Well-known member
Close to where mine is but on the side just behind the jack. 6'3" and I dont like ducking under the over hang if I dont have too.
 

JohnDar

Prolifically Gabby Member
I was looking at that ToyLock, myself, rather than the anaconda bike lock cables they sell. Looks like you've just bolted it to the floor of the front garage. How would you rate it in terms of security (compared to standard bike lock cables)?
 

porthole

Retired
Had my Level Up installed this week - and my Toy Lock was removed 'cause it was in the way - guess I'll find another new location ......
 
Last edited:

porthole

Retired
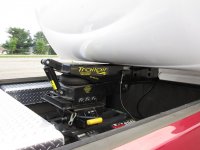
After leaving Mor/ryde for a service inspection I went to Lippert for a TrailAir pin box.
This was to replace a Mor/ryde pin box.

I had a Mor/ryde pin box installed when my trailer was new, so no "before" comparison.
With the Mor/ryde - I was happy with the performance from the time I drove the trailer home (750 mile from Elkhart). But what I noticed was that "chucking seemed to be more noticeable as of late.

I'm figuring when my trailer was new and empty it worked fine. But as I loaded it up and added some weight it seemed as though the Mor/ryde was working a lot harder. Plus it does nothing for the up & down.

When new I could see the rub marks (dirt wiped clean) left on the plates from the designed movement, these marks were about ¾” fore and aft. As of late they are about 2”. It seems as though I am hitting the stops a lot more now.

I think for a 16K and under trailer GVW the Mor/ryde is probably a great pin box.
I have a PullRite SuperGlide hitch and at the time last year PullRite did not make an adapter plate for the TrailAir, so I got the Mor/ryde.

Currently, myself and another forum member have the first two prototype plates from PullRite to use with the TrailAir Tri-Glide, for evaluation

A 750 mile road test home with the TrailAir: there is still some chucking, but it is at a much reduced feel, sort of a gentle bounce instead of a jolt. The pin box just floats around like it is on air. That feature seems very effective
 

Attachments

  • TrailAir_pinbox.jpg
    TrailAir_pinbox.jpg
    169.2 KB · Views: 648

porthole

Retired
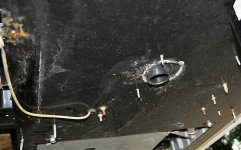
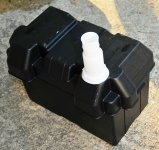
I replaced the factory installed battery box because i did not like the original.
Any acid that made it's way out the battery ended up splashing on the bottom of the trailer. The new box is solid on the bottom. Added my own top mounted vent.
 

Attachments

  • Battery_box_01.jpg
    Battery_box_01.jpg
    275 KB · Views: 519
  • Battery_box_02.jpg
    Battery_box_02.jpg
    295.5 KB · Views: 518
  • Battery_box_03.jpg
    Battery_box_03.jpg
    266.8 KB · Views: 493
  • Battery_box_04.jpg
    Battery_box_04.jpg
    264.2 KB · Views: 503

porthole

Retired
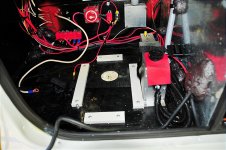
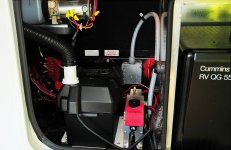
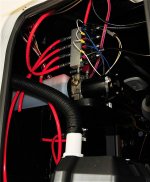
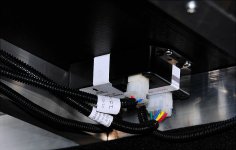
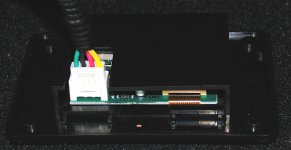
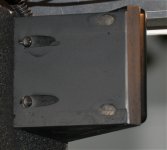
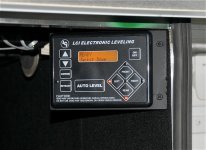
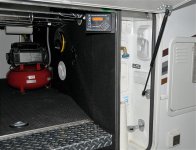
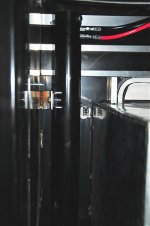
August 10th found the trailer at TrailAir for a Auto LevelUp installation. The shop started at 7 and finished at 3:30. I helped a little by having the basement empty and the forward wall removed.

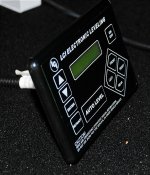
I had them leave the control pad loose. I didn't particularly care for the way I had seen other pads installed and will make my own design.
As you can see form the first two pics, not much to it and it is not waterproof.

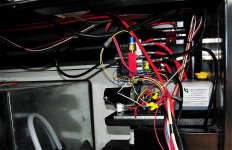
3rd picture is the "brain" and mounted to the underside (basement) of the front bedroom.

4th and 5th picture is the new pump, hoses and wiring.

Update:
The last three pictures are of the box I made for the controller. Nothing fancy and it got painted Rustoleum "rust reformer" black - 'cause I was using that on the frame ;)
 

Attachments

  • LevelUp_install_04.jpg
    LevelUp_install_04.jpg
    293.4 KB · Views: 520
  • LevelUp_install_03.jpg
    LevelUp_install_03.jpg
    170.5 KB · Views: 516
  • LevelUp_install_02.jpg
    LevelUp_install_02.jpg
    217.7 KB · Views: 523
  • LevelUp_install_01.jpg
    LevelUp_install_01.jpg
    153.5 KB · Views: 526
  • LevelUp_install_00.jpg
    LevelUp_install_00.jpg
    232.8 KB · Views: 559
  • LevelUp_install_13.jpg
    LevelUp_install_13.jpg
    189.7 KB · Views: 465
  • LevelUp_install_12.jpg
    LevelUp_install_12.jpg
    291.3 KB · Views: 495
  • LevelUp_install_11.jpg
    LevelUp_install_11.jpg
    289.1 KB · Views: 495
Last edited:

porthole

Retired
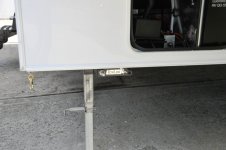
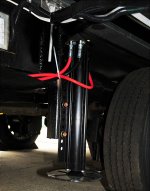
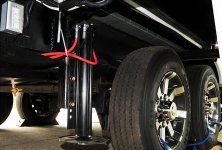
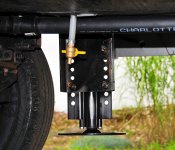
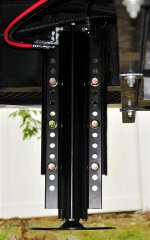
Jack locations.
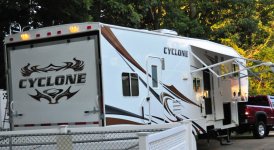
On Cyclones the rear most jacks mounted on the inside frame rail because of the fuel tank.
 

Attachments

  • LevelUp_install_10.jpg
    LevelUp_install_10.jpg
    111.2 KB · Views: 465
  • LevelUp_install_09.jpg
    LevelUp_install_09.jpg
    183.7 KB · Views: 471
  • LevelUp_install_08.jpg
    LevelUp_install_08.jpg
    312.3 KB · Views: 497
  • LevelUp_install_07.jpg
    LevelUp_install_07.jpg
    265.5 KB · Views: 486
  • LevelUp_install_06.jpg
    LevelUp_install_06.jpg
    133.7 KB · Views: 488
  • LevelUp_install_05.jpg
    LevelUp_install_05.jpg
    295 KB · Views: 532

porthole

Retired
  1. Trailer unhooked
  2. Trailer Leveled
  3. Trailer - Indy car style
 

Attachments

  • LevelUp_install_14.jpg
    LevelUp_install_14.jpg
    185.6 KB · Views: 590
  • LevelUp_install_13.jpg
    LevelUp_install_13.jpg
    190 KB · Views: 550
  • LevelUp_install_12.jpg
    LevelUp_install_12.jpg
    191.4 KB · Views: 551
  • LevelUp_install_15.jpg
    LevelUp_install_15.jpg
    256.4 KB · Views: 793

porthole

Retired
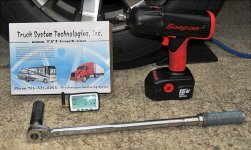
What does a LevelUp Auto Level, a TPMS, Snap-On 1/2" electric impact gun and a 1/2" drive ratchet have in common?

All good things to have when you have a tire failing.

My TPMS started alerting me to an air pressure drop with the right rear tire.
I had enough time to find a safe spot to pull over.
Used the LevelUp to raise the trailer then did a quick tire change

I got the "Truck System Technologies" at the Nashville Rally.
For personal reasons I prefer this unit over the other one frequently mentioned on this site.


Attachments

  • Tire_tools.jpg
    Tire_tools.jpg
    344.1 KB · Views: 547

porthole

Retired
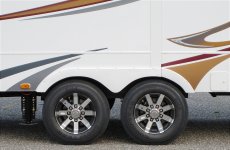
New tires. Due to a tire failure I ended up replacing tires a bit sooner then anticipated.
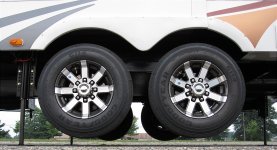
The original 16" Towmasters were replaced with 17.5" Goodyear G114. "H" rated tires when filled to 125 psi. I don't need the 4805 pound capacity so going by Goodyear's chart I will be running 110 psi for a 4340 pound load rating. 215/75R17.5

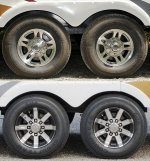
New wheels were required to match the higher pressure tires. Mounted balanced and installed after 8pm on a Tuesday night at Trailer Tire & Wheels (Scott) in Edon, Ohio. Great customer service.

The wheels are aluminum, polished and painted or powder coated, not sure and clear coated. The painted area is a dark graphite color and nearly matches the Cyclone's stripes above the tires. "Equal" balancing system was used.

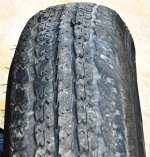
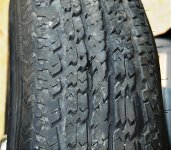
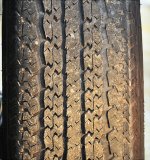
1st picture shows the chunk of rubber missing and the belts are visible.
2nd shows obvious belt shifting
3rd shows a good tire. The tire that failed appears to have twice the wear as the other three.
 

Attachments

  • Bad_tire_03.jpg
    Bad_tire_03.jpg
    275.1 KB · Views: 340
  • Bad_tire_00.jpg
    Bad_tire_00.jpg
    327.9 KB · Views: 361
  • Good_tire.jpg
    Good_tire.jpg
    370.2 KB · Views: 341
  • IMG_0117.JPG
    IMG_0117.JPG
    280.5 KB · Views: 358
Last edited:

porthole

Retired
These are fresh tires, dated the 13th week of 2010.

The country of origin code was real tough to figure out too.
 

Attachments

  • Goodyear_G114_05.jpg
    Goodyear_G114_05.jpg
    74 KB · Views: 406

kakampers

Past Heartland Ambassador
Hey Duane...ain't the Level-Up NICE??? You just got the tires and rims we want to change to, and from the same place we want to buy them...not to be nosey, but could you give a ball park on what 4 rims and the G114's cost you?
 
Top