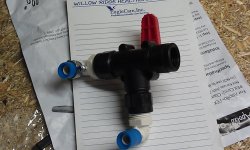
Leak at 3 way behind hot water bypass

simsfmly

Ohio Chapter Leaders-retired
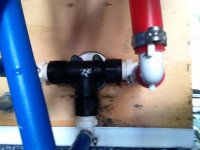
IMG_0192.jpg
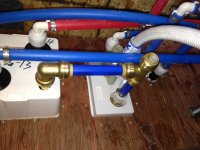
Plumbing hater, here. Found water in the basement this afternoon and ID'd the leak to be the black nut on the hot water side of the bypass valve. I'm in a sticky here, because it will only go so far on and only so far off.

I can't tell if those are nuts that can be replaced (its got a crack in it and hence the leak) or if the whole unit has to be replaced (sigh).

I think if I could undo the clamp on the short hot water line, I can undo the 90 angle piece going into the nut. However, I don't know how to undo that clamp, nor do I know how to put a new one on.

Any help would be appreciated.
 

danemayer

Well-known member
Hi Bob,

The metal ring holding the Pex line to the fitting is a Pex Clamp. New ones are slipped over the pex line, the fitting is pushed into the pex line, and using a specialized Pex Crimping Tool, the ring is crimped to make a tight fit, clamping the Pex line and fitting together.

The good news is that all of the parts and the Pex tool are available at Home Depot and Lowes. There is also a tool to cut off old crimp rings without damaging the fitting or hose. But you can probably cut the ring with a good pair of cutting pliers.

The 3 way valve is probably a special order from Heartland or elsewhere, but in the short term you could use a straight-thru connector to join the two pex lines that feed water, and cap the third. Come back later when you get the new valve.
 

simsfmly

Ohio Chapter Leaders-retired
The 3 way valve is probably a special order from Heartland or elsewhere, but in the short term you could use a straight-thru connector to join the two pex lines that feed water, and cap the third. Come back later when you get the new valve.

Thanks, Dan. Got the clamps figured out with the help of a buddy. Found the new ones (and the current ones) on our trip to Lowe's and Home Depot.

No luck on the connection which is cracked. Calling Heartland tomorrow to see our options for that.

I have no idea which pex lines feed the water and don't know how to cap the third, or which one the third is.
 
Last edited:

DougAndJudy

Well-known member
We had a similar problem with our 2013 Landmark. It turns out that the PEX fittings that go into the valve body did not have the rubber seals that most fittings of this type have. I replaced our valve at the Goshen Rally and noticed this difference between the original valve and the replacement. See if Heartland will send a replacement valve under warranty.
 

simsfmly

Ohio Chapter Leaders-retired
New valve being overnighted. Now, would you a) only replace the nut that was leaking or b) replace the whole valve. Still leary about those clamps and that PEX tubing, but we'll do our best.
 

jbeletti

Well-known member
If it's only the nut that is defective, I'd replace only the nut and keep the new valve in my spare parts box. Unless you are getting a brass valve - then I'd install that.

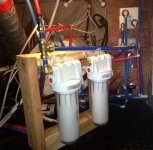
As for pex crimps, when done right, they work great. That said, if you want to spend the money, try Shark Bites. I used a bunch of them installing my water filters - wow - awesome fittings and re-usable.
photo 1 (4).JPG photo 2 (5).JPG
 

simsfmly

Ohio Chapter Leaders-retired
Getting there. When I got the valve, I'm a little worried about removing the nut -- looks different than what I have on. So, I've decided to put the new valve in.

Have undone the clamps on the pex tubing, but are there any tricks to removing the pex tubing from the barbs that they're in?
 

DougAndJudy

Well-known member
Getting there. When I got the valve, I'm a little worried about removing the nut -- looks different than what I have on. So, I've decided to put the new valve in.

Have undone the clamps on the pex tubing, but are there any tricks to removing the PEX tubing from the barbs that they're in?

I usually consider the pieces of PEX on the old fittings as goners. So I slice the PEX above the barbs and just twist it off. Get a length of PEX from a hardware store and replace the pieces that were attached to the old valve.
 

sengli

Well-known member
One of the plastic nuts on my bypass from B&B looks like it was overtightened, and is cracked. I had noticed water in the basement several times before, but it was infrequent. Now I know where it came from. My coach is 4 months out of warranty so I guess I have to buy. Its cracked in the same place the simfmly's was. The part number from heartland is 18908, and its $47.20.
 
Last edited:

sengli

Well-known member
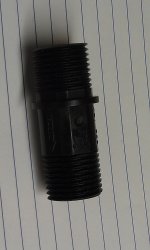
Got my B&B bypass valve replacement kit from heartland yesterday. There was a black plastic(garden hose connections) one valve included with the kit. I am not sure where this is to go, or if its really needed anywhere. Crawling around in the basement of doom, I havent seen anything like this one way valve anywhere yet. Also this new replacement bypass valve has internal rubber gaskets/ seals in it, my old one did not. The old one without seals requires alot of teflon tape, and apparently was torqued in an effort to make it seal, thats why it was cracked. Mine was cracked on the side facing the UDC, so it was not apparent on a visual inspection to see the spot where the leak was occuring.
 

TravelTiger

Founding Texas-West Chapter Leaders-Retired
Got my B&B bypass valve replacement kit from heartland yesterday. There was a black plastic(garden hose connections) one valve included with the kit. I am not sure where this is to go, or if its really needed anywhere. Crawling around in the basement of doom, I havent seen anything like this one way valve anywhere yet. Also this new replacement bypass valve has internal rubber gaskets/ seals in it, my old one did not. The old one without seals requires alot of teflon tape, and apparently was torqued in an effort to make it seal, thats why it was cracked. Mine was cracked on the side facing the UDC, so it was not apparent on a visual inspection to see the spot where the leak was occuring.

Can you post pictures?


Sent from my iPhone using Tapatalk
 

sengli

Well-known member
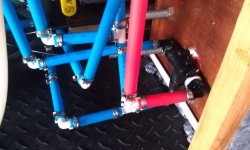
Well with some help from this site, someone pointed out the extra one way valve goes in the outlet of the water heater. So I now have replaced the the bypass valve, and all the pex plumbing attached to it with no leaks so far. Also moved my converter off the basement floor. I did find evidence of water sitting under the converter! And while I was bored I installed an EMS hardwired surge and voltage protector , and again mounted it off the floor. I have spent two days in the basement doing this.

IMAG0248.jpgIMAG0254.jpgIMAG0249.jpg
 

danemayer

Well-known member
If you put a plastic check valve into the water heater outlet (top fitting), replace it with brass while it's still easy to remove. Plastic water heater check valves eventually crack and leak. The longer they're in, the more likely they are to disintegrate when you try to remove them, making replacement a very hard job.
 
Top