MORryde Sliding Tray Install

'Lil Guy'

Well-known member
My 29 X 90 sliding tray will be here Monday. I received the extender kit today which consists of 6 adjustable lifts for the tray. With no instructions included and not seeing the tray itself, I'm wondering how they mount to the slide. Looks like you have to disassemble the extender and bolt it to the bottom of slide tray with the 3 small screws provided. Just wondering if the tray is predrilled to accept these pieces. Once the extender is bolted to tray, it appears you have to set the height needed with the 2 long thru bolts on side of extender. I guess you would set tray into compartment and screw it down with the extenders attached. Looks like 4 screws to each extender base. Anyone done this and are my assumptions right?
Thanks in advance.
 

jbeletti

Well-known member
Frank - when you say "extender", do you mean the floor risers to raise the tray up to get over the lip of the door opening?

If so, there are a line of holes on each riser (for adjustable height) and a hole in the stationary portion of the tray. Take your time putting them on and get their height right the first time!

Note too that once you load up the tray, it may push down on the floor. Point being, the hat channel stiffener welded to the bottom of the tray may rub or get stuck on the rubber strip on the bottom of the door opening.

Trust me on this. Leave another 1/2" clearance between those channels and that rubber strip.

See my pics here: https://beletti.smugmug.com/RV/2018-Heartland-Landmark-Newport/Storage-Area/
 

'Lil Guy'

Well-known member
Jim, after I determine the correct height, can I install the 6 extenders and then load the whole tray into the bay to bolt down? If so, what screws are you attaching the unit to the floor of the basement. I have a 29 3/4" opening and am going to be installing a 29" tray. I need to make sure it clears the sides as well. Thanks in advance.
 

jbeletti

Well-known member
Frank - I’ve always installed the base in place, then added the tray to it.

Don’t use anything longer than 1” screws into the floor. 5/8” or 3/4” - even better.

You likely have 2 tanks below that floor :)


Sent from my iPhone using Tapatalk
 

'Lil Guy'

Well-known member
OK, I think I have it.lol I assemble the extenders (6) to the base and then install the base in the compartment. Then lift the tray into the compartment and put it into track. Are people using the self tapping screws to secure the base?
 

jbeletti

Well-known member
Don’t use self-tappers in wood. Just use wood screws with square or cross-point heads and drive them in.


Sent from my iPhone using Tapatalk
 

jbeletti

Well-known member
Those are fancy extenders. I was just going to use some 2x2's

I’d rather have no wood on the floor to soak up any water - just in case. Used the risers in the last 2 coaches - worked great.

And lengths of PEX can slide inside them! :)


Sent from my iPhone using Tapatalk
 

'Lil Guy'

Well-known member
Thanks Jim. Just like your install. Set the extenders at their lowest position giving me 1/2" of clearance. The 29X90 tray fits my BH3270RS like a glove. Easy install using 1 1/4" X 1/4" wood screws and appropriate washers to control depth. Slides smoothly throughout. Thanks again for the pics and help.
 

'Lil Guy'

Well-known member
Jim, I noticed your position Is the 2nd position which is about an inch higher. I've since reloaded my storage and I'm nowhere near the top or even hitting the level up panel. I'm going to move it up to your location. That inch will really enlarge the under tray storage area. Oh well. At least I put the nuts on he outside so I can change the height without removing the bases. Anybody installing one of these should look at the benefit of the extra clearance under the tray. Lots of storage area.
 

TajMyhaul

Active Member
Thanks to all who have installed their cargo tray and posted detailed information. Yesterday I installed my 29"x90" with Cargo Height Kit (CTG54-001).


I encountered 2 issues 1) no instuctions on how to attach the Height Kit to bottom rail & got quick response from Ashley McClintic at MORryde to send me photos of how to install plus a pdf of the parts and diagrams.

View attachment CTG54-001.pdf

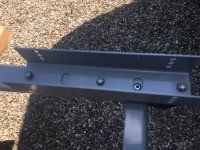
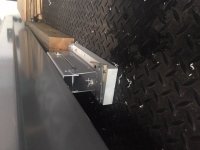
As mentioned by others, remove the tray from the lower rails and turn it upside down to attach the upper U to the bottom of the rail

IMG_7865.JPG

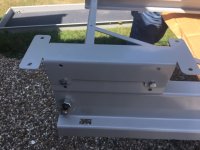
Then attach piece with 4 holes that will be used to attach to floor of basement. I followed the advice of others to get the maximum storage space below the installed tray.

IMG_7866.JPG

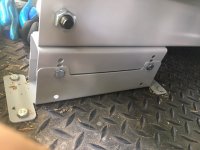
I used 1/4" x 1" zinc plated lag screws to attach tray to basement floor

IMG_7868.JPG


Discovery number 2) My basement floor is not flat but drops 1 1/8" in the center of the rail that is towards back of the Landmark!

IMG_7869.JPG


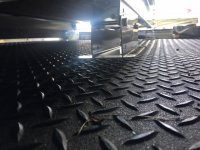
I cut a composite board to fit the footprint of the height extender plus a couple of washers and shims. Attached that to floor with screws and then used lag screws through foot into the composite board.

IMG_7883.JPG sorry I could not get the rotation right

But I love the new install and again thanks to all you who have led the way and posted details and photos.
 

porthole

Retired
When I added my riser blocks I put the two pieces together then attached to the side rails.
After it was all assembled I slid it around until finding the ideal location.

I also had no one to help with taking it out and flipping it.

I removed the diagonal braces from the side rails to the end rails.
Doesn't change operation at all. My guess is they are an assembly, shipping, installation thing.
 

TajMyhaul

Active Member
Just like the old 4-H motto “learning by doing”!

I also had to move one of the “D” ring tie downs.


Sent from my iPhone using Tapatalk
 

porthole

Retired
Note on the big tray.
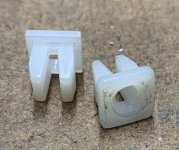
The small white plastic bushings on the ends were constantly getting crushed or knocked out.
After being replaced several times under warranty I tried a different approach.

1” wide roll of HDPE tape.

Placed the tape the entire length.
Works great and and no more squeaks.
 

Jesstruckn/Jesstalkn

Well-known member
Note on the big tray.
The small white plastic bushings on the ends were constantly getting crushed or knocked out.
After being replaced several times under warranty I tried a different approach.

1” wide roll of HDPE tape.

Placed the tape the entire length.
Works great and and no more squeaks.
No pictures ?

Sent from my SM-N950U using Tapatalk
 
Top