Our 3010 Modifications

porthole

Retired
Great job, but that vent is almost directly over where the Commander sits at the dinner table. It blows pretty good tho. Also but, not as big a deal, is the auto vent is still blocked. Now if we used that bunk, moving the a/c vent is probably what I'd do.

Just so you know, I'll probably be pilfering your auto level control modification. Ours is really unhandy where they have it mounted. :cool:

Not sure what you mean. Your dinner table is in the garage?

The distribution vent I used does not blow straight down, the vents are angled to about 45 degrees off the centerline in two directions. Auto vent, you mean the fantastic fan roof vent?
when I use that vent with the fan I lower the bunks a few inches.


Pilfer away :cool:
 

Sniper

Well-known member
Not sure what you mean. Your dinner table is in the garage?

The distribution vent I used does not blow straight down, the vents are angled to about 45 degrees off the centerline in two directions. Auto vent, you mean the fantastic fan roof vent?
when I use that vent with the fan I lower the bunks a few inches.


Pilfer away :cool:
Yes, we do not even set up the table in the living room area. Once the motorcycles are out we put down a rug in the garage, set up the table there. Gives us more living space. Yes. I may need to replace with an adjustable vent. Yes, the fantastic fan. Again if we used that bunk I would move the a/c vent, and I was just going to remove the bunk altogether, but then she said: I'd like to have some kind of desk on the wall. (where the tables are stored), and here I am. :rolleyes:

Edit: Now dang on it Porthole, now I'm back to rethinking this. Since I'm gonna ditch the mattress, maybe I won't need to do any sort modification at all other than straps to secure the tables up there (and a plastic vent in it over her head ;)), and have the whole thing for storage. I picked one heck of century to stop drinking. :cool:
 

Sniper

Well-known member
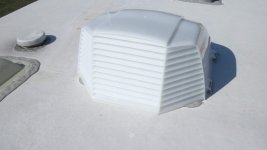
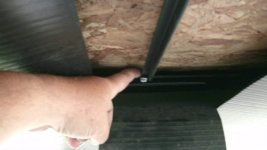
Finally getting around to installing vent covers. The Commander don't have to remind me every three years...I'll get it! :cool:
GEDC1743.jpg
I had pictures of the install with all the tools required but they must have got hurled into the "great void" somewhere. I'll redo on the next vent if anybodies interested.
 

Sniper

Well-known member
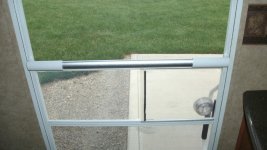
Installed a screen door handle cross bar for the Commander. Camco part # 42186. Pretty straight forward install. Less than 20 bucks off amazon and less than 20 minutes to install and the Commander happy. :)

GEDC1833.jpg
 

Jesstruckn/Jesstalkn

Well-known member
Nice..
You'll love the handle !!! Now add one more about 12" down and you'll love them even more.

Sent from my XT1585 using Tapatalk
 
Last edited:

Jesstruckn/Jesstalkn

Well-known member
Trust me !!!

The top one is the perfect hieght when your inside going out and the bottom one is the perfect hieght when out side going up.
We use both every time we go in and out.

Stand on the ground and reach up to the one you have then move you hand down 12" and see what that would feel like.

Maybe my Landmark is taller but 2 works awesome for us.

Jerrod
2f4411997ce93acb782e827caa091f12.jpg


Sent from my XT1585 using Tapatalk
 

Sniper

Well-known member
Trust me !!!

The top one is the perfect hieght when your inside going out and the bottom one is the perfect hieght when out side going up.
We use both every time we go in and out.

Stand on the ground and reach up to the one you have then move you hand down 12" and see what that would feel like.

Maybe my Landmark is taller but 2 works awesome for us.

Jerrod
2f4411997ce93acb782e827caa091f12.jpg


Sent from my XT1585 using Tapatalk
I'll run this pic by the Commander. :)
 

Mrsfish

Well-known member
Trust me !!!

The top one is the perfect hieght when your inside going out and the bottom one is the perfect hieght when out side going up.
We use both every time we go in and out.

Stand on the ground and reach up to the one you have then move you hand down 12" and see what that would feel like.

Maybe my Landmark is taller but 2 works awesome for us.

Jerrod
2f4411997ce93acb782e827caa091f12.jpg


Sent from my XT1585 using Tapatalk

i was going to post the same comment. We LOVE our 2nd handle...you won't be sorry
 

Sniper

Well-known member
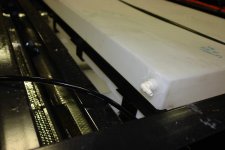
Over the past Memorial weekend we pulled into an Indiana State Park, filled our water tank, and got into our site. Behold! The left front landing leg would not lower! Anyway I jumped one of the solenoid and got unhook. (even managed to get fairly level) :)

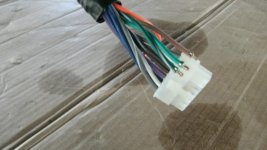
once we got home I traced the problem to wires being broken at the leveling system sensor mounted just fore and above the front axle.
GEDC1849.jpg
Upon further inspection it seemed that the harness was routed under the tank low point sump and upon filling the tank it had flex enough to stress the wires over the last couple of years. (I'm guessing) Fixed the harness (thanks Jim at Big Foot).

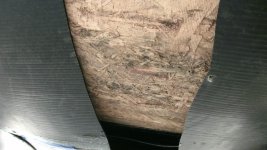
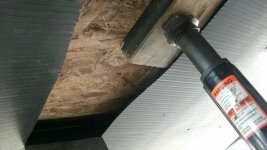
Now for the modification: Cut into the underbelly and raised the tank using a jack. ( it's hard to see in the pic but the particle board is really bowed) GEDC1853.jpg GEDC1854.jpg

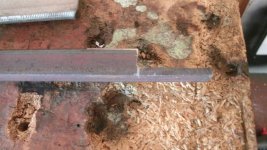
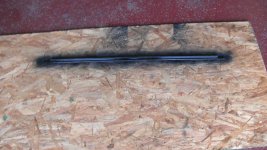
1/8" x 1/2" angle cut to 31 1/2" to fit between the rails, notched GEDC1857.jpg primed GEDC1858.jpg

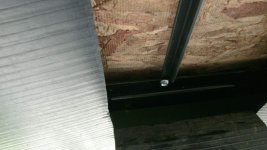
Fit between the rails and secured with self tapping screws GEDC1859.jpg

As you can see with the weight of the tank on the installed angle the bowing is so bad I can put my finger between the board and the rail GEDC1860.jpg I the secured the under belly with black gorilla tape. GEDC1861.jpg
I was very surprised to see only one metal strap under the particle board from the factory. Anyway I hope this mod takes care of our problem. I may go ahead and do the same thing on the door side of the tank too. :)
 

porthole

Retired
Over the past Memorial weekend we pulled into an Indiana State Park, filled our water tank, and got into our site. Behold! The left front landing leg would not lower! Anyway I jumped one of the solenoid and got unhook. (even managed to get fairly level) :)

once we got home I traced the problem to wires being broken at the leveling system sensor mounted just fore and above the front axle.
View attachment 52339
Upon further inspection it seemed that the harness was routed under the tank low point sump and upon filling the tank it had flex enough to stress the wires over the last couple of years. (I'm guessing) Fixed the harness (thanks Jim at Big Foot).

Now for the modification: Cut into the underbelly and raised the tank using a jack. ( it's hard to see in the pic but the particle board is really bowed) View attachment 52340 View attachment 52341

1/8" x 1/2" angle cut to 31 1/2" to fit between the rails, notched View attachment 52342 primed View attachment 52343

Fit between the rails and secured with self tapping screws View attachment 52344

As you can see with the weight of the tank on the installed angle the bowing is so bad I can put my finger between the board and the rail View attachment 52345 I the secured the under belly with black gorilla tape. View attachment 52346
I was very surprised to see only one metal strap under the particle board from the factory. Anyway I hope this mod takes care of our problem. I may go ahead and do the same thing on the door side of the tank too. :)


I laminated two pieces of 1/2" plywood with marine epoxy (West Systems) and did a major refit with my tanks. Was worth the effort as many times we leave the house with a full 120 gallon water load.
 

porthole

Retired
Trust me !!!

The top one is the perfect hieght when your inside going out and the bottom one is the perfect hieght when out side going up.
We use both every time we go in and out.

Stand on the ground and reach up to the one you have then move you hand down 12" and see what that would feel like.

Maybe my Landmark is taller but 2 works awesome for us.

Jerrod
2f4411997ce93acb782e827caa091f12.jpg


Sent from my XT1585 using Tapatalk

H'mmm
Looking at new campers at Goshen I figured I could take one handle off the Cyclone for a new rig and leave one on.
Looks like both will come off now.

One of the new landmarks at Goshen had the new MOR/ryde steps, which sit inside the trailer when stowed.

The doors are high enough that Deb could barely open the door between the extra effort due to the steps and friction hinges.
At least when open the extra handle will be good for height challenged.
 

Jesstruckn/Jesstalkn

Well-known member
H'mmm
Looking at new campers at Goshen I figured I could take one handle off the Cyclone for a new rig and leave one on.
Looks like both will come off now.

One of the new landmarks at Goshen had the new MOR/ryde steps, which sit inside the trailer when stowed.

The doors are high enough that Deb could barely open the door between the extra effort due to the steps and friction hinges.
At least when open the extra handle will be good for height challenged.
Ya I didn't even think about that with no steps outside​ a shorter person wouldn't even be able to open the door.

Sent from my XT1585 using Tapatalk
 

Sniper

Well-known member
I laminated two pieces of 1/2" plywood with marine epoxy (West Systems) and did a major refit with my tanks. Was worth the effort as many times we leave the house with a full 120 gallon water load.
If we hauled with a full tank (or even a half tank) I would NEVER trust the factory set up under there. One good bump in the road and the whole tank would come out. :eek:
 

danemayer

Well-known member
If we hauled with a full tank (or even a half tank) I would NEVER trust the factory set up under there. One good bump in the road and the whole tank would come out. :eek:

Our 2011 Landmark is 7 years old. A lot's changed since then. Here's a picture from June 2015 showing a vastly improved support structure on the fresh tank. Sorry, I don't have pictures of the other tanks and how they're supported.
Fresh Tank Support 2015.jpg
 

Nbomar

Well-known member
I've towed a full tank of water from Arkansas to Bristol. Little over 1000 miles. I have a 2014 road warrior. Never thought to look at braces. Ignorance is bliss until it goes wrong


Sent from my iPhone using Tapatalk
 
Top