billyjoeraybob
South Carolina Chapter Leaders-Retired
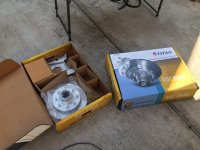
Last weekend LDuguay and I installed the Titan Disc Brake system on his Big Country. We were very impressed with the kit provided by Ron Russell(Titanguy on the forum) of Performance Trailer Braking www.performancetrailerbraking.com Ron presented a seminar on this system that was very well received at our recent SC Chapter Rally. He mentioned that when he supplies a kit, it comes with everything you need to install with the exception of bearing grease and thread locker. When we opened the kit, this was absolutely the case. All of the components are very high quality and the system utilizes standard GM brake pads that are readily available at any auto parts store. This is our saga and is in no way meant to be a step by step installation guide.
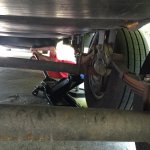
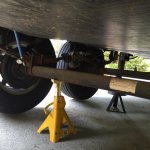
After Lance had the pleasure of backing his Big Country into my tight residential driveway, we began preparing the camper for the install. We left the rig hitched to the truck and manually extended his LevelUps to stabilize the rig. Next we jacked up each axle with a floor jack to get the tires off of the ground. The axles were then supported by jack stands.
Then the fun began! All of the lugs were either seized or torqued to about 300 ft/lbs. My impact wrench would not even budge them. Lance had to take a breaker bar and stand and bounce on it to break the lug nuts free. Well that added about an hour to the job.
Next I removed the old drums, electric brakes, backing plates, and studs that secured the backing plates. This got us down to the spindles which were cleaned and prepped to install the new rotors. The only parts that were retained were the castle nut, washer, and castle nut retainer. All other parts are provided in the kit.
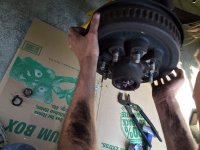
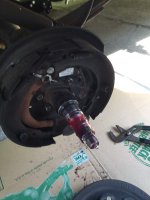
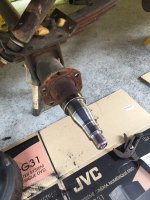
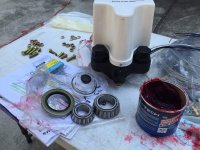
While I was doing this Lance was packing the new wheel bearings that were supplied in the kit. He taught this old shade tree mechanic a new trick. He wore disposable gloves while packing them and as he finished one he would pull the glove off inside out keeping the freshly packed bearing inside the glove preventing dirt from getting in it.
Next we installed all the new parts. First we had to install the new caliper mounting plate. This is secured to the axle using grade 8 bolts in the same holes where we knocked out the old backing plate studs. I was a little concerned with the torque spec so Lance gave Ron a call. Ron confirmed (on a Saturday no less) the 50 ft/lb spec. Now that is customer service!!! We then put the inner bearings and grease seals in the new rotors and installed the rotors. This is very straight forward and done exactly like you would on any rotor that did not have sealed bearings. The kit comes with new clear plastic grease caps, that required another call to Ron to confirm how tight they should be screwed in. A little past hand tight was his response. Thanks again Ron!!!!
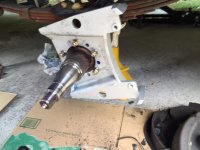
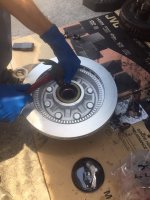
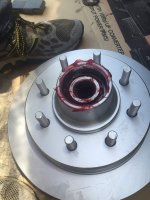
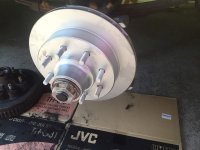
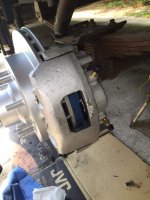
Now it was time to install the calipers and brake pads. The calipers are very well made and installed with no issues on 3 of the 4. We did put some blue thread locker on these mounting bolts. For some reason the fouth caliper just wasn’t seated properly. Upon inspection, I found that I had snagged the grease seal when installing that rotor and the small spring that helps to keep the rubber seal against the spindle had come out and was preventing the rotor from seating. Fun, fun, fun! Try to find a new double lip seal on Saturday afternoon after the NAPA warehouse has closed. Fortunately, Marcus at NAPA went over and beyond and sourced us one at O’Reillys down the street. 3 hrs later we are back at it.
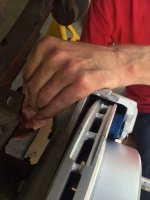
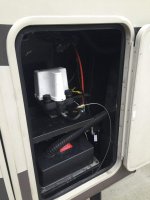
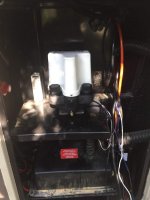
Lance’s Big Country had an awesome place to mount the electric over hydraulic actuator. His battery compartment is door side, where you would normally find propane storage. He mounted the actuator while I wired the connections in the junction box on the pin box.
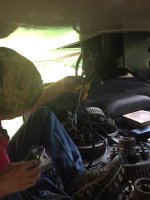
He proceeded to run the brake lines from the actuator to the calipers. No flaring or cutting of lines required. They are part of the kit. Thanks Ron!!! I completed the wiring and testing of the actuator. We had some of wire loom left over from the wiring and just for some added protection we put it over the rubber brake lines at each caliper. We then added some DOT 4 and bled the system using the breakaway switch to activate the actuator.
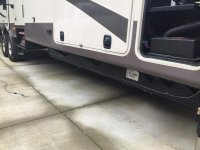
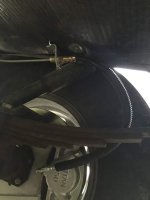
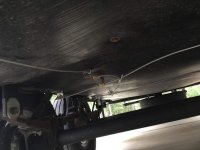
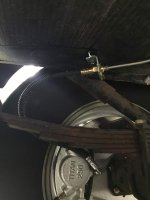
Finally after 12 hrs we were able to take a test drive. WooHoo Lance has brakes again!!!!
I just want to say that if you are looking for a disc brake conversion for your rig you absolutely can not go wrong with the Titan products or Ron Russell of Performance Trailer Braking. Ron also has a team of installers that will do your install. Reach out to Ron Titanguy on the forum. www.performancetrailerbraking.com


After Lance had the pleasure of backing his Big Country into my tight residential driveway, we began preparing the camper for the install. We left the rig hitched to the truck and manually extended his LevelUps to stabilize the rig. Next we jacked up each axle with a floor jack to get the tires off of the ground. The axles were then supported by jack stands.


Then the fun began! All of the lugs were either seized or torqued to about 300 ft/lbs. My impact wrench would not even budge them. Lance had to take a breaker bar and stand and bounce on it to break the lug nuts free. Well that added about an hour to the job.
Next I removed the old drums, electric brakes, backing plates, and studs that secured the backing plates. This got us down to the spindles which were cleaned and prepped to install the new rotors. The only parts that were retained were the castle nut, washer, and castle nut retainer. All other parts are provided in the kit.


While I was doing this Lance was packing the new wheel bearings that were supplied in the kit. He taught this old shade tree mechanic a new trick. He wore disposable gloves while packing them and as he finished one he would pull the glove off inside out keeping the freshly packed bearing inside the glove preventing dirt from getting in it.
Next we installed all the new parts. First we had to install the new caliper mounting plate. This is secured to the axle using grade 8 bolts in the same holes where we knocked out the old backing plate studs. I was a little concerned with the torque spec so Lance gave Ron a call. Ron confirmed (on a Saturday no less) the 50 ft/lb spec. Now that is customer service!!! We then put the inner bearings and grease seals in the new rotors and installed the rotors. This is very straight forward and done exactly like you would on any rotor that did not have sealed bearings. The kit comes with new clear plastic grease caps, that required another call to Ron to confirm how tight they should be screwed in. A little past hand tight was his response. Thanks again Ron!!!!


Now it was time to install the calipers and brake pads. The calipers are very well made and installed with no issues on 3 of the 4. We did put some blue thread locker on these mounting bolts. For some reason the fouth caliper just wasn’t seated properly. Upon inspection, I found that I had snagged the grease seal when installing that rotor and the small spring that helps to keep the rubber seal against the spindle had come out and was preventing the rotor from seating. Fun, fun, fun! Try to find a new double lip seal on Saturday afternoon after the NAPA warehouse has closed. Fortunately, Marcus at NAPA went over and beyond and sourced us one at O’Reillys down the street. 3 hrs later we are back at it.


Lance’s Big Country had an awesome place to mount the electric over hydraulic actuator. His battery compartment is door side, where you would normally find propane storage. He mounted the actuator while I wired the connections in the junction box on the pin box.


He proceeded to run the brake lines from the actuator to the calipers. No flaring or cutting of lines required. They are part of the kit. Thanks Ron!!! I completed the wiring and testing of the actuator. We had some of wire loom left over from the wiring and just for some added protection we put it over the rubber brake lines at each caliper. We then added some DOT 4 and bled the system using the breakaway switch to activate the actuator.


Finally after 12 hrs we were able to take a test drive. WooHoo Lance has brakes again!!!!
I just want to say that if you are looking for a disc brake conversion for your rig you absolutely can not go wrong with the Titan products or Ron Russell of Performance Trailer Braking. Ron also has a team of installers that will do your install. Reach out to Ron Titanguy on the forum. www.performancetrailerbraking.com
Last edited:
