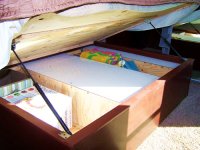
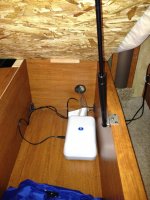
Do you wish you had more than the 3 or so inches of storage found under the bed? Well it really isn't very hard. Start by removing the mattress and then the deck. You will want help those are big pieces in a small space. Next remove the cover over two empty spaces and the hydraulics for the slide. Now make up to boxes that will suspend with 1/2" clearance over the flooring and attach to the existing bracing. Be very careful not to infringe on the movement of the slides, the hydraulic lines, or any wiring that may be present. Attach the new bins so that they are flush with the existing bracing. Now either have an assistant or use your remote to cycle the slide in and out while observing that all is well. Now cut the cover so that it just covers the hydraulic area and reattach. Reinstall the deck (or as I did make a new lighter one out of plywood, yes, you will need to securely attach pads for the lifts there is a lot of pressure there). Put the mattress back and you have gained a lot of very useful storage space. If you are not very handy get together with another camper and do the job twice and have three times the fun.
 Next remove the cover over two empty spaces and the hydraulics for the slide. Now make up to boxes that will suspend with 1/2" clearance over the flooring and attach to the existing bracing. Be very careful not to infringe on the movement of the slides, the hydraulic lines, or any wiring that may be present. Attach the new bins so that they are flush with the existing bracing. Now either have an assistant or use your remote to cycle the slide in and out while observing that all is well. Now cut the cover so that it just covers the hydraulic area and reattach. Reinstall the deck (or as I did make a new lighter one out of plywood, yes, you will need to securely attach pads for the lifts there is a lot of pressure there). Put the mattress back and you have gained a lot of very useful storage space. If you are not very handy get together with another camper and do the job twice and have three times the fun.
