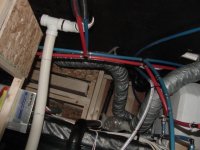
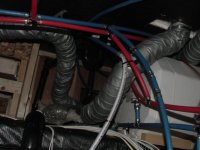
Water manifold and basement remodel. (Long and lots of pictures)

SouthernNights

Past South Carolina Chapter Leader
Parts list used:
Both of these items I purchased through PEX Supply here-http://www.pexsupply.com/
1) Viega Manabloc #41143 You order these by what ever fitting you want to use at the manifold. I used the crimp fitting but they have compression and others.

http://www.pexsupply.com/Viega-41143-1-2-14-Port-Crimp-MANABLOC-6-hot-8-cold
3) Viega Supply Adapters #50141-PloyAlloy or 46414 Brass "no lead". Both of these are 3/4" PEX crimp. You order the fittings based on the type of connection you plan on using.
http://www.pexsupply.com/MANABLOC-Supply-Adapters-764000
The rest of these items came from a plumbing house I do a lot of business with. You can get the same thing from any box store if you don't mind paying their price.

6) 1 1/2" 45 degree thinwall PVC (for drains)

1) 1 1/2" hi-rise "T" thinwall PVC

1)1 1/2" thinwall coupling.

4' of 1 1/2" Flex PVC

2) 20' sticks of 1/2" PEX line; 1 blue, 1 red

24) 1/2" PEX inserts 90 degree-I didnt use all of them but each application will be different. You will be removing A LOT of "T"s.

4) 1/2" PEX insert couplings

1) 1/2" test plug to block off the bottom port of the manifold.

100) Pinch or Oetiker type rings. You can also use the crimp black copper crimp rings depending on your tool type. Our trailers are built with the Oetiker or pinch type so I just continued using that type. Here is why:http://cloudsandoceans.blogspot.com/2012/05/pex-connections-and-fittings.html if you would like to read a little bit about them.

Get a bag of zip ties, or tie wraps (what ever you like to call them) with the little screw hole in them. They come in handy holding lines in place.

The lights just came from a little hardware store in our town that happens to have a small RV section. No idea what make they are but I bet Camco-they seem to make everything. The breaker and switch came from O'Reilly's auto parts.

I reused the black thin wall drain pipe that was in the trailer. I actually ended up with a few extra feet of it when I was done.

Total cost was right at $225.00 including the manifold. If you do order a manifold from PEXsupply, google pexsupply manabloc coupons. I found a 5% discount for the manifold on line with a promo code.
 

DougAndJudy

Well-known member
Larry -

I'm so impressed with what you did, I'm even tempted to do something similar on our Mesa. So - a few questions...

Did you run 3/4" PEX from the Manabloc cold water supply to a reducer at the Anderson Valve for the cold or did you reduce at the manifold?

Same question for the hot water heater and manifold supply? I'm guessing there would be greater flow for the manifold if 3/4" ran from the Anderson valve and the water heater checkvalve.

When you say you moved the shower drain over about 10" I'm guessing you meant you rotated the drain pipe at the shower fitting so that it pointed the drain pipe closer to where you "Y"d the two drains into one. Correct?

Is there any significance to the different shades of red on the PEX in your pictures?

Where did you relocate the converter?

Finally - have you noticed a difference in water flow?

Thanks!!


PS: OK - I guess I'm beyond tempted... I just ordered a manifold and the supply fittings...

Thanks again...!!!
 
Last edited:

SouthernNights

Past South Carolina Chapter Leader
Larry -

I'm so impressed with what you did, I'm even tempted to do something similar on our Mesa. So - a few questions...

Thank you for the kind words . It really is fun to do


Did you run 3/4" PEX from the Manabloc cold water supply to a reducer at the Anderson Valve for the cold or did you reduce at the manifold?

I have 3/4" to my filter. Past the filter which is mounted on the UDC is all 1/2". So I have 1/2" from the Anderson valve to the manifold.
I thought about 3/4" from the Anderson valve but the diameters of the Anderson valve negate any advantage of the 3/4" beyond it.

Same question for the hot water heater and manifold supply? I'm guessing there would be greater flow for the manifold if 3/4" ran from the Anderson valve and the water heater checkvalve.

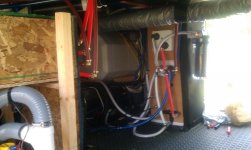
The manifold does have a supply meant for the water heater supply at the bottom. That is the third Supply Adapter you need. However, if you send cold water to the water from from the manifold, you loose the ability of using the bypass valve. So I am actually feeding the manifold hot water from the line that tees into the bypass valve from the water heater. I have attached a picture at the bottom so you can trace the two supply lines to the manifold. If you don't want to keep the bypass functional, you can have one cold supply to the manifold, feed the water heater from the manifold and then bring hot water back to the manifold. They actually show a picture of that in their instructions. But to answer your question, because everything before the manifold is also 1/2" I kept the supply to 1/2" also.

When you say you moved the shower drain over about 10" I'm guessing you meant you rotated the drain pipe at the shower fitting so that it pointed the drain pipe closer to where you "Y"d the two drains into one. Correct?

Not exactly. If you look at your shower drain now, you will see it comes out of the shower pan and goes towards the wall behind the shower (in the basement). It goes into a "T" which is where they are venting the shower. Then it goes towards to the front to the holding tank. I did NOT combine this drain line with another. I did install a 45 in the line which pointed it at the water heater. Then another 45 towards the tank again. That moved the drain over. When it got to the edge of the floor I installed a 90 at angle and let the natural curve of the flex PVC make the turn to the tank.


The two lines I ties together were the washer drain and vanity drain.

Is there any significance to the different shades of red on the PEX in your pictures?

No difference- kind of. The lighter red line is what is installed from the factory. The darker red one is the PEX I purchased locally. The factory uses a thinner wall PEX than we do here. I am sure it has to do with cost but I am also sure it doesn't have any negative effect on the integrity of the system. I am guessing all HL trailers use the same PEX (probably the whole industry). I have never seen PEX burst. Always a fitting. The fittings do fit a little looser in the factory PEX but the OD is the same because the crimp rings fit the same on both PEX.

Where did you relocate the converter?

Oh ok. Thats right. The convertor never made it in the pictures. My was sandwiched (squished) behind the rear support leg of the battery compartment storage box. it was screwed to the side of the end floor joist at an angle. I removed the ground to the convertor and reattached it to the side of storage box so it is above the floor about a foot behind the manifold and then rerouted the ground back to the convertor. It is protected by the the piece of Thermoblock (the shiny stuff) that the manifold is attached to in case the lines at the manifold ever have a leak. Thermoblock is just foil backed OSB.

Finally - have you noticed a difference in water flow?

Yes but we have not been out with the trailer and used it for any length of time. What we did see was very little differnce in flow when more than one faucet was on. You will find that the longest runs of PEX will have many "T" in them feeding other things. The biggest problem was the "T" in the line for the shower going to the kitchen faucet. My wife was taking a shower one night and she likes HOT showers. I started washing dishing. The moment I turned on the hot water at the kitchen sink I knew I had just ruined her HOT shower . The homeruns will eliminate that problem. We are leaving Monday on a trip and will find out how big of an improvement all this made or if anything else needs to be tweaked.

Thanks!!


PS: OK - I guess I'm beyond tempted... I just ordered a manifold and the supply fittings...

Good for you. Once you get past the initial shock of all the lines, it really falls together pretty easy. Just moving the drain lines helps a lot. I should add I also just rerouted the black tank flush line from where they had it. I just kept it up against walls and then down across the front floor joist.

Make sure you post pictures when your done. Cant wait to see them!!!

Thanks again...!!!


Back of UDC
UDC back after.jpg

BTW, We love this floor plan!!!! Hope you guys do too!!!!
 

SouthernNights

Past South Carolina Chapter Leader
I'm tempted......................

Larry, did you give any thought to bending the pex instead of all the 90's?
http://www.pexsupply.com/Viega-51040-5-8-3-4-PEX-Plastic-Bend-Support
Not a lot Duane. Only one place where I could have used support other than at the manifold. I wanted to keep the manifold lines heading straight to the ceiling to keep them out of the way. If your basement has enough room to allow the use of the supports then I would definitely use them. I I could have put the manifold againsyt the back wall then the supports probably would have worked very well there. Just no room. If you do use them I would like to see how you made out with them.

I used a couple of these when iI was re-doing my water lines.

How did you interface to the 12 volt pump?
Did you manage to eliminate the pump racket?

The pump is still hooked up the same way. I just moved it out of the middle of the floor. We don't use the pump very often but when we do -it is still a little noisy. We had much better pumps on our boat that were very quiet. The only thing I did to them that seemed to quiet them done even more was I mounted them on a piece of heavy rubber mudflap along with the insulators built into the pump feet. I would imagine it would work in an RV but never really thought about it during this project.
 

SouthernNights

Past South Carolina Chapter Leader
Thanks for the clarifications, Larry!

We love both ends of our floor plan - the living room/kitchen and the bedroom! I find that I should be a foot shorter to more fully enjoy the bathroom...

Sent from my Kindle Fire using Xparent Red Tapatalk

I am 6'2" so I have a little issue in the "head". It would be nice to have an additional 6 or 8 inches of leg room but I am not willing to give up any space for it. I have also learned (the hard way) to duck getting in and out of the shower. :rolleyes: But the room to change clothes in the bedroom is amazing.
 

plumberdude

Well-known member
Hey there SN,
As you can tell on the name here what do still for a living, very good job.
We have a few plbg jobs here to do are you in need of employment;)?
We use alot of wirsbo(trade name) piping here do to the cost of copper,of course by now you do know that you use a shark bite (trade name) fitting if your in a jam..
The comments about what HL could do is correct but what would we do then!!!!
we would find something..
Again nice job and keep up the good work.

pat the plumberdude
 

rick_debbie_gallant

Well-known member
Well just went out and spent a couple "5er units" and bought the stuff for my behind the wall fix plumbing mod. I will also address the nest of wires etc. Will post stuff as I go..
 

porthole

Retired
The pump is still hooked up the same way. I just moved it out of the middle of the floor. We don't use the pump very often but when we do -it is still a little noisy. We had much better pumps on our boat that were very quiet. The only thing I did to them that seemed to quiet them done even more was I mounted them on a piece of heavy rubber mudflap along with the insulators built into the pump feet. I would imagine it would work in an RV but never really thought about it during this project.

On our boat I have the 12 volt pump mounted on rubber hoses. Really hard to hear, but there is a lot more stuff between the pump and our ears. I also have almost no hose in the main system, it is all 3/4" PVC
When on 110 power I have well pump plumbed in. The only noise you hear from that is the relay kicking in if you listen closely.

Two things I have thought about doing similar to the boat. One is adding the well pump, would be so much quieter in the middle of the night when someone uses the bathroom, sinks.

The second is a macerator style toilet. The newest versions are really quiet and it would solve some of the other "plumbing" issues with regards to how current systems work.
I have seen macerator bowls in some motor homes now when using two toilets and one being a good distance away from the tanks.
The toilet in the boat is pretty fancy, even for being 15 years old. All electric activation, quiet and no trouts.

*********
The picture is my well pump (gauge). Under the board is the 12 volt pump. They are plumbed so that I can prime the well pump if needed with the 12volt. I get a steady, quiet 50 psi out of the system, now matter what is being used.
 

Attachments

  • Waterpump_shelf_b.JPG
    Waterpump_shelf_b.JPG
    249.6 KB · Views: 93

SouthernNights

Past South Carolina Chapter Leader
Hey there SN,
As you can tell on the name here what do still for a living, very good job.
We have a few plbg jobs here to do are you in need of employment;)?
We use alot of wirsbo(trade name) piping here do to the cost of copper,of course by now you do know that you use a shark bite (trade name) fitting if your in a jam..
The comments about what HL could do is correct but what would we do then!!!!
we would find something..
Again nice job and keep up the good work.

pat the plumberdude


Thanks for the job offer but NM is a little far for me to commute-and I have asked my plumber if I could help him and he says he would have to charge more then.. Not really sure what he meant?:confused: but i think it means I should stick writing checks.
 

CactusTwo

Active Member
Love the Manablock idea, great job. I noticed lots of brass fittings for 90 degree turns. My experience is that they restrict flow in each use along a line. Could you of bent the pex pipe and got the same results. My plans are to do the same and I hope to go back as far as possible and use a "Shark" exterior coupler fitting to keep flow good and bend the pex and MAYBE it will look as good as yours GREAT JOB
 

SouthernNights

Past South Carolina Chapter Leader
Love the Manablock idea, great job. I noticed lots of brass fittings for 90 degree turns. My experience is that they restrict flow in each use along a line. Could you of bent the pex pipe and got the same results. My plans are to do the same and I hope to go back as far as possible and use a "Shark" exterior coupler fitting to keep flow good and bend the pex and MAYBE it will look as good as yours GREAT JOB

Thanks Cactus two. You are right. The 90s do restrict to a certain extent but not enough to notice in this application. Considering how many "T"s were in the lines I think it will do fine. . Another poster above is planning to use bend supports . See post 25. I did not have the room for all the bend supports. It would have taken up too much room coming out of the manifold.

Along the same lines, I think with in 5 years you will see the disappearance of PEX inserts in the housing industry for the very reason you mentioned. The only thing holding back the wide usage of external fittings such as the SharkBites right now is cost. It would have to be passed on in the house price. Kind of like building trailers. You keep adding things and they end up in a different price point.
 

rick_debbie_gallant

Well-known member
Make sure you post the pics. Are you putting in the manifold too??

I am putting in a manifold but they will be of the brass type. There will be a 4 run and a 6 run. The 4 run for hot water and the six for hot.
staticmap
13288 Belsay Rd, Millington, MI 48746, USA


---
I am here: http://tapatalk.com/map.php?2euw1s
Sent from my iPhone using Tapatalk
 

ihsolutions

Well-known member
Simply outstanding!

My back hurts just thinking about how much time you spent hunched over in that basement.

The problem for me is, if I ever go through the brain damage of a very worthwhile mod like this, there's no way I'm ever getting rid of my coach for a newer one. Maybe this is cheap insurance?

I've been thinking about cleaning up the basement utilities, in such a way that I can remove the basement walls completely, gain some more storage, and somehow protect the utilities from my storage items slamming into them. We keep most of our stuff in bins, so it seems like it wouldn't be too difficult to craft some kind of barrier that keeps bins from doing any damage.
 

DougAndJudy

Well-known member
Well - I started this project yesterday. I'm only trying to get the preliminary work done, as my Manabloc won't be hereuntil next Tuesday. The first challenge was to see if I could find all the parts and supplies I needed locally. We're in a little town in the Ozarks of Arkansas currently and the closest Home Depot or Lowes is 40+ miles away. As fortune would have it, there is a local hardware store that had almost everything I needed and it's only 2 miles away! I got everything on Larry's parts list, and then some... I added:

2) 1/2" x 3/4" PEX reducers - to drop the supply fittings to 1/2"
1) 6" length of 3/4" PEX tubing - also to drop the supply line size
4) 3/4" PEX crimp rings - see above
1) 1 1/2" PVC cap - for middle drain pipe that gets eliminated
6) 1 1/2" PVC couplings - just in case...
1) small can PVC cement
1) roll 3/4" plastic plumber's tape - for hanging heater ducts
1) switch and mount for new lights in basement - I'm going to use the two porch lights that I removed from both of our Heartland rigs when I replaced them with LED Smartlights

The overall cost was about $100 higher than Larry's, as I don't have access to a wholesale plumbing supply house

Here's what I have so far:

UDC as we use it. We have filters in a tub outside the trailer feeding the city water inlet. Not as fancy as Lerry's setup, but it works for us.

DSC00286.JPG

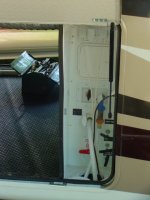
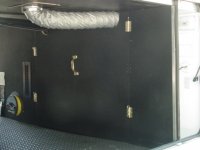
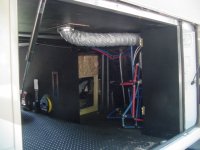
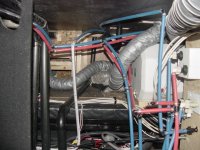
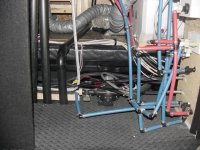
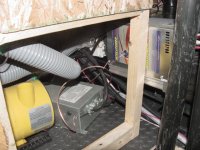
Basement before starting to work I added a handle and hinges to the basement access door when we first got our trailer. The wall panel that it attaches to is about 8" longer that it needs to be so it will get cut down so that the edge of the access door butts to the wall panel, and the hinges will be flush. I may use the cut off piece to mount the Manabloc to. The tangled mess is pretty much the same as Larry's was ... I think I may leave the converter where it is, but I definitely need to get the autoswith (from generator prep) up off the floor.

DSC00287.JPGDSC00290.JPGDSC00293.JPGDSC00294.JPGDSC00297.JPG

For the first day, I combined the bathroom sink drain and the washer prep drain similarly to Larry's and lifted the heater duct that was sitting on the floor.

DSC00307.JPGDSC00309.JPG

The next steps will be the lights and moving the other drain pipe closer to the water heater.
 
Top