What did you do to your camper today?

danemayer

Well-known member
Added upper and lower blowers like this to the refrigerator vents. Wago 3 conductor lever nuts made it a pretty easy job. Picked up 12V DC at the main power coming to the fridge from the fuse box. Replaced the wire nuts with Wago connectors.

Blowers are zip tied to the vent covers. The blowers and zip ties are not visible from outside.

There is now an amazing amount of air coming out the top vent and it is quite a bit warmer than ambient temp.

I have a switch on the way that'll be mounted next to the lower vent. I may add a thermostat in the future so the blowers run only above a set temp.
 

TravelTiger

Founding Texas-West Chapter Leaders-Retired
Added upper and lower blowers like this to the refrigerator vents. Wago 3 conductor lever nuts made it a pretty easy job. Picked up 12V DC at the main power coming to the fridge from the fuse box. Replaced the wire nuts with Wago connectors.

Blowers are zip tied to the vent covers. The blowers and zip ties are not visible from outside.

There is now an amazing amount of air coming out the top vent and it is quite a bit warmer than ambient temp.

I have a switch on the way that'll be mounted next to the lower vent. I may add a thermostat in the future so the blowers run only above a set temp.

Keep an eye on the zip ties. We have bug screens on our fridge vents held on with zip ties. One fails about every 6-9 months. I just noticed before our last trip that a zip tie holding things to our flexible race under the slide had failed, causing the propane hose to possibly rub against the j-wrap.


Sent from my iPhone using Tapatalk
 

carl.swoyer

Well-known member
Last night about 7:20 we had a gust of wind hit the awning. We were trying to retract it when the gust hit. Now it has bent arms and is crooked.
Anyone else had this happen?
Did you use your insurance to replace/repair?
What was the cost?


cbb52aab1f0d4fc8e253573eb261255a.jpg
44598355810361c4067cf3251b5dde60.jpg
2e1ba340ba4382c4360d47f16f08ccc7.jpg


Sent from my moto z3 using Tapatalk
 

JWalker

Northeast Region Director-Retired
Added upper and lower blowers like this to the refrigerator vents. Wago 3 conductor lever nuts made it a pretty easy job. Picked up 12V DC at the main power coming to the fridge from the fuse box. Replaced the wire nuts with Wago connectors.

Blowers are zip tied to the vent covers. The blowers and zip ties are not visible from outside.

There is now an amazing amount of air coming out the top vent and it is quite a bit warmer than ambient temp.

I have a switch on the way that'll be mounted next to the lower vent. I may add a thermostat in the future so the blowers run only above a set temp.


Dan, is this similar to the fans you are using?

SoundOriginal 12V DC Brushless Blower Cooling Fan 75x75x30mm, 2pin, Dual Ball Bearing, Computer Fan, Multi Use, Black, US Support (2, 12V 75x75x30) https://www.amazon.com/dp/B07557VGC2/ref=cm_sw_r_cp_api_i_T.AbFbSNVWWA1
 

Fox

Well-known member
In about 3 hours we'll be turning both it (Bighorn 3750FL) and the tow buggy over to a dealer - and driving off in a 40 foot 2010 Tiffin Phaeton. While its been good to us we want something easier to pilot in those tight spots.
 

Attachments

  • F350 n Bighorn.jpg
    F350 n Bighorn.jpg
    5.5 MB · Views: 55

JWalker

Northeast Region Director-Retired
Same idea, but the ones I got are 120MM X 120MM versus 75MM x 75MM.

Finished up the fan mod this morning. I picked up a 120mm version. But I picked it up as a 120v versus 12v. Right below the refrigerator is an outside receptacle. So I just ran the plug through the vent cover. I can plug it in when I think it’s needed. Or push it up into the vent when not.

Simple is good.
f976abdbac300231c4ac7fabe4aa7295.jpg


ea428c75240484efce839a5916535a94.jpg
 
Last edited:

Nabo

Southeast Region Director-Retired
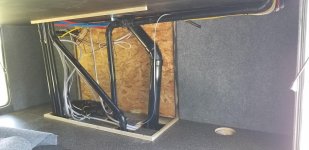
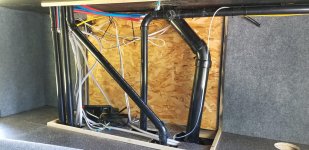
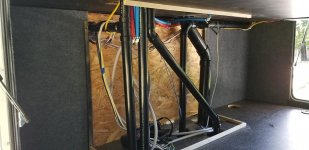
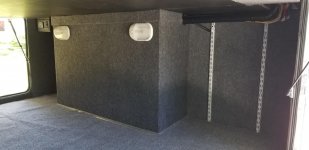
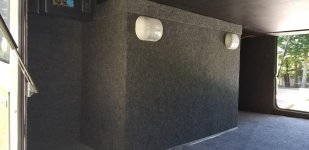
Did a mod in the cargo area which I know several folks have done. Removed front wall, untangled the electrical lines with the pex line (very dangerous), moved the LevelUp box so you don't bump your head and opened up some more storage space. Sorry no before pics as wall was being taken down showing the mess but ....
108123366_10220199337480872_6976191457865956777_o.jpg
108222920_10220199337840881_7659653871938183856_o.jpg
108562833_10220199338120888_5528921496391334372_o.jpg
107581124_10220199338360894_7348709588552325754_o.jpg
109115792_10220199338720903_8470279779573354358_o.jpg
 

Dahillbilly

Well-known member
cleaned the rubber roof, washed sides; found yellowjacket nest in the refig compartment. Then applied rubber roof protection should be good to go now.
 

Kathi-27

Well-known member
Did a mod in the cargo area which I know several folks have done. Removed front wall, untangled the electrical lines with the pex line (very dangerous), moved the LevelUp box so you don't bump your head and opened up some more storage space. Sorry no before pics as wall was being taken down showing the mess but ....
View attachment 64413
View attachment 64414
View attachment 64415
View attachment 64416
View attachment 64417
looks good. that was one of the first mods i did to ours.
 

CoveredWagon

Well-known member
Glued several pieces of Coffered ceiling trim up. The 3 or 4 ok maybe 5 pin nails didn't hold.
I noticed while watching tv one section was missing. Looked behind the trim at the top of the slide and guess what. Thank goodness / God it was not damaged. By the end of the evening I had pulled down 3 sections and glued three back in place.
 

JWalker

Northeast Region Director-Retired
A BIG SHOUT OUT to our NJ chapter leaders and to Bugg Banner for the awesome prize for the clubs 2019 charitable event.

First trip out with it
0847c9dae775af60767b21f570f97ac4.jpg

2b5025ae6dd04b156073f988f2fcc481.jpg

2f788a02ad6a208a816dca446719b8f7.jpg


No bugs or stone chips at the campground
3eff484b29909838edc61cc4de834c1c.jpg


Sent from my iPhone using Tapatalk
 

TravelTiger

Founding Texas-West Chapter Leaders-Retired
When we bought our Big Country in 2016, I thought it needed a backsplash in the bathroom. 5 years later, I finally got around to doing it! These are self-stick gel tiles, about 12x12 sheets. Purchased from Amazon.

078a1f0a3db12ecd42ae0efea7803d0d.jpg

Before


e9965a2812b8b223bf550c86c4bd97d8.jpg

After

60832b33dbfc38b685183a80a00b2d76.jpg


Sent from my iPhone using Tapatalk
 

Chippendale

Well-known member
When we bought our Big Country in 2016, I thought it needed a backsplash in the bathroom. 5 years later, I finally got around to doing it! These are self-stick gel tiles, about 12x12 sheets. Purchased from Amazon.

078a1f0a3db12ecd42ae0efea7803d0d.jpg

Before


e9965a2812b8b223bf550c86c4bd97d8.jpg

After

60832b33dbfc38b685183a80a00b2d76.jpg


Sent from my iPhone using Tapatalk


Erica, that looks nice. What do you charge to install? I am down here not too far from Cisco with nothing to do, I can be up there in a few days for the installation. :D
 

danemayer

Well-known member
When we bought our Big Country in 2016, I thought it needed a backsplash in the bathroom. 5 years later, I finally got around to doing it! These are self-stick gel tiles, about 12x12 sheets. Purchased from Amazon.


e9965a2812b8b223bf550c86c4bd97d8.jpg

After


Sent from my iPhone using Tapatalk

What a nice neat countertop!
 

TravelTiger

Founding Texas-West Chapter Leaders-Retired
Erica, that looks nice. What do you charge to install? I am down here not too far from Cisco with nothing to do, I can be up there in a few days for the installation. :D

Haha, George, the problem is my time! This took much longer than it should. The tile is on 10x10 sheets, with a specific overlapping pattern. Each sheet is identical. Well, I didn’t want the pattern to repeat so often, so I cut the sheets and shifted it, so it repeats less noticeably. This created a much more difficult install, as every sheet had to be cut and carefully placed, rather than apply them one right after another as is.

If you don’t mind the repeat, applying these sheets is pretty easy. The key is that the first one absolutely must be straight!

STIQUICK TILES Peel and Stick Backsplash - for Kitchen Decorative Tiles (10 Sheets) (10" X 10" 10 Sheets, Polito Bella) https://www.amazon.com/dp/B07XM16NZR/ref=cm_sw_r_cp_api_i_nZyfFb5PWFEW2


Sent from my iPhone using Tapatalk
 
Top