Outside shower faucet freeze-up...

JohnD

Moved on to the next thing...
I've recently discovered that my outside shower must have frozen up and has been leaking under the coroplast (not sure how long).

I am going to maybe tear into this issue today, but most likely tomorrow as it is supposed to be much warmer outside.

Since I discovered this leak I've unhooked from the city water and have been running off of the fresh water tank and water pump so I can shut the water off when not needed to stop the flow through the leak.

I think I've isolated the problem to the faucet itself as when I open the hot water knob it leaks from behind the knob, but when closed, the water drips behind the faucet and into the belly of the trailer.

What I'd really like to do is to close off the outside shower, but to get to the start of the water lines I'd have to drop most of the coroplast.

I may just remove the faucet and plug the lines there for now until I get to a warmer climate (and a cement pad under the Prowler) and then drop the coroplast.

My questions are these:

Is there a better faucet available that can handle cold weather?

Or would I be better off just removing this faucet and plugging the lines?

And, can I just remove this faucet or do I need to take out the whole bucket that holds the faucet to the outside of the trailer?

I'm leaving Denver and heading south next Monday (3-26-2018) so I'd like to get this under control before then.

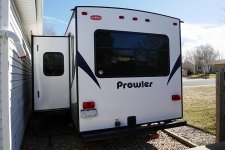
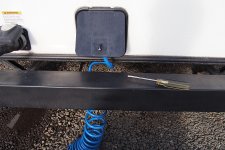
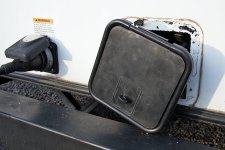
The shower is the black square center over the rear bumper.
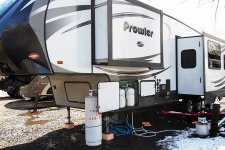
ProwlerLeakingOutsideShowerFaucet-P3191815.jpg ProwlerNextToHouse-P1010708.jpg
 

jerryjay11

Well-known member
Haven't seen anything on the market that is freeze proof. My outdoor shower began to leak, Heartland send me a replacement, and I replaced it. It it weren't under warranty I would just as soon plug it off as we don't use it. That's the question to ask, "How many times have I used it and will I use it in the future?"
 

JohnD

Moved on to the next thing...
I don't use it, either.

Although I want to wait until I get south to AZ before I rip the bottom off of this thing to find where the plumbing lines start.

I'm getting ready to run to some of the local RV supply shops to see what I can find (Camping World not included).
 

danemayer

Well-known member
I don't use it, either.

Although I want to wait until I get south to AZ before I rip the bottom off of this thing to find where the plumbing lines start.

I'm getting ready to run to some of the local RV supply shops to see what I can find (Camping World not included).
John,

While I don't know your floor plan, I'd guess the PEX tubing to the shower is probably teed off the main PEX lines in one of 2 locations; either near the output of the water heater, or on the run to the kitchen. When you locate the tee, you can install Sharkbite press-on ball valves. (You can probably find them or a comparable competitor at a plumbing supply store or big box hardware store). Then use compressed air to evacuate the water between the valve and shower head, then close the valves. If you ever want to use the shower, or restore it before buying your Bighorn, you open the valves.

If near the water heater, you can probably get in by taking down the rear wall of pass through basement storage. If you have to go in from the coroplast, consider installing a Zippered Trap Flap in the coroplast so you can have access to the valves in the future.
 

JohnD

Moved on to the next thing...
Thanks Dan!

I looked under the kitchen sink (in an island) to see if it runs out of there, but if it does it must be under the floor as I didn't see any tee's there.

I'm going to take a peek behind the basement wall in a few to see if I can find the pipe run in there.

If not, I may just buy a new faucet and put it on (or maybe just cap the ends of the plumbing off) as the weather is supposed to be good up until I leave Colorado next Monday and head south to where it is warm.

After inspecting it, it sure looks like it is the faucet that is bad.

I'll let you know what I discover in there . . .

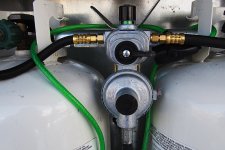
Last week I had to replace the LP regulator as it was leaking from both sides.

Lost all gas in both 30 pound tanks, plus a bunch in the 100 pound tank I'm renting.

Full-timing . . . ain't it fun! :cool:

This new regulator is much more heavy duty than the stock one . . .

ProwlerNewLPregulator-P3191817.jpg ProwlerNewLPregulator-P3191821.jpg
 

olcoon

Well-known member
Not too long after we got our rig in 2011, I started getting a leak in the basement. Finally got it isolated to the outside shower. As we had never used it, & didn't think we ever would, I got shutoff valves and installed them on the back of the UDC. Stopped the problem, & haven't had a leak since. Somewhat easy fix for a messy & potentially damaging problem.
 

JohnD

Moved on to the next thing...
My Prowler doesn't have the UDC like the bigger 5'vers do, but have all connections on the outside of the trailer.

I'm going to take a look behind the basement wall to see if I can locate the water lines that run to the shower in there, but I'm thinking that they run to the back of the trailer from under the kitchen island.

I've looked inside the island but didn't see any connections there, which means that they might be under the floor and inside of the coroplast.

I'm hoping I find them somewhere near the water heater in the basement.
 

ksucats

Well-known member
As a temporary fix - assuming you can get to the back of that faucet - could you use the ball valves shown above and just put them in -- unhook the connections from the back of the faucet and terminate with the ball valves. That would stop the leak and give you time to get to a warmer climate to fix permanently.
 

jerryjay11

Well-known member
It isn't that difficult to remove the screws holding the box in place and cap off the lines there. It would be easier than crawling under your rig. A little butyl tape and flex-seal and pop the boax back in. Also a replacement shower/box assembly is less than $50.00.
 

JohnD

Moved on to the next thing...
I was able to fix the outside shower leak today...

It was easier to fix than it was to find the faucet!

I haven't screwed the box back in yet as I want to let the box hang tomorrow so that the underbelly can dry out faster (here in Colorado at around 5800 feet above sea level it shouldn't take long).

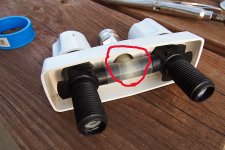
The old faucet had a small crack in the plastic right behind the metal quick connect.

I also found another leak in the basement and thought I had that fixed with a new hose, but as it turns out I also need to replace the city water receptical as well.

I saw one with a brass fitting when I was looking for the faucet this afternoon, so will go get that in the morning and get that job finished.
 
Last edited:

Lynn1130

Well-known member
I had to replace mine a few years back as it developed a leak. The company that makes and sells these told me that most problems come because of freezing. Mine is in the UDC and I pack that with insulation and insulate under the UDC when I am in cold country. I have been down to 6 above and have had no further problems. In your case it appears that yours is in a compartment by itself. I wonder if that could be packed with insulation to solve the freeze issue?
 

JohnD

Moved on to the next thing...
I had to replace mine a few years back as it developed a leak. The company that makes and sells these told me that most problems come because of freezing. Mine is in the UDC and I pack that with insulation and insulate under the UDC when I am in cold country. I have been down to 6 above and have had no further problems.

In your case it appears that yours is in a compartment by itself.

I wonder if that could be packed with insulation to solve the freeze issue?

Ironically...that is the question I was going to ask!

I haven't screwed the box back in place as I want to let it dry out in there.

What type of insulation would be good for that?

And the best caulk?

By the by...I did find a crack in the faucet.

And, I've got photos that I'll post after I get my first cup of coffee...
 

jerryjay11

Well-known member
You should check out what's available at Lowes or Home Depot to see if they would work. They have rolled insulation, faced and non-face, styrofoam rolls, etc. Also along with stuffing insulation in side the compartment I would add insulation to the outside portion of the valve though it may be a tight fit to get something in there and still be able to close the access door.
 

Lynn1130

Well-known member
John, I used standard rolled insulation that I got at Home Depot, mainly because I was packing several areas and also using it over the low points while elk hunting. It worked fine but I had to be sure that I got all of the open spaces under the UDC. There are some areas that are open just below the screw in plug at the bottom of the UDC in mine that I packed just to be safe. If your water connection is up higher on the trailer I would think just packing the compartment would work fine. I had the shop completely recalk the outside of the trailer recently and they used Geocel Pro Flex roofing, doors and windows. I used that same stuff to seal around the outside vent fan cover that I just replaced. It seems to be holding well in our "dry heat".
 

danemayer

Well-known member
John,

In the case of the exterior shower, I think you'll be wasting your time with insulation. You need to put in cutoffs and evacuate the water from the faucets and nearby tubing. Your water inlet connection presents a challenge if it's on the exterior wall, covered or not. If you're going to spend a lot of time in sub-freezing temps, I'd suggest putting a small foamboard enclosure around the water connection and putting a 25W clip on lamp inside the enclosure.
 

JohnD

Moved on to the next thing...
OK...here are some photos:


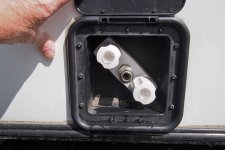
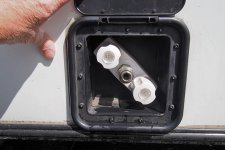
Leaking faucet before removal and draining the water out:

ProwlerLeakingOutsideShowerFaucet-P3191815.jpg ProwlerLeakingOutsideShowerFaucet02-P3211833.jpg


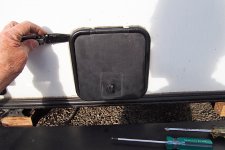
Prying the bucket out:

ProwlerLeakingOutsideShowerFaucet03-P3211836.jpg ProwlerLeakingOutsideShowerFaucet04-P3211837.jpg


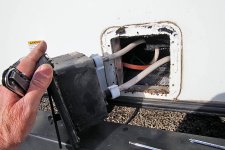
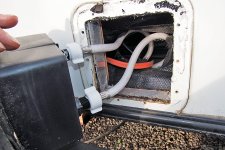
New faucet installed with water lines hooked back up and left it out so that the inside of the trailer can dry out:

ProwlerLeakingOutsideShowerFaucet05-P3211847.jpg ProwlerLeakingOutsideShowerFaucet06-P3211857.jpg


Notice the crack in the semi-clear plastic inside the red circle:

ProwlerLeakingOutsideShowerFaucet07-P3211851.jpg

I did buy some of that black gooey tape to put on before I remount the faucet bucket to the trailer.
 

LBR

Well-known member
OK...here are some photos:


Leaking faucet before removal and draining the water out:

View attachment 57041 View attachment 57035


Prying the bucket out:

View attachment 57036 View attachment 57037


New faucet installed with water lines hooked back up and left it out so that the inside of the trailer can dry out:

View attachment 57038 View attachment 57039


Notice the crack in the semi-clear plastic inside the red circle:

View attachment 57040

I did buy some of that black gooey tape to put on before I remount the faucet bucket to the trailer.
Would you be able to use a block of styrofoam directly behind that faucet, like a 1" or so thick piece shaped around the 2 hoses to protect the backside of the assembly?
 

Lynn1130

Well-known member
I think you'll be wasting your time with insulation

I am not sure why. It worked well in my case. Packing behind the fixture box, whether with board or rolled will prevent freezing from below, which is the main problem when it is at the bottom of the RV as in this case. If the lines and box are insulated, one way or another it has protection. The other issue here is the thin door which provides no protection from the outside wall. Some foam insulation will help but again, if this is not used most of the time packing it in cold weather along with insulating the inside should provide good freeze protection.

The light is a good idea but in my case not available dry camping.
 

JohnD

Moved on to the next thing...
I had stuffed some wash rags inside the box around the faucet, but I guess that wasn't enough.

I'm going to Lowe's or Home Depot in a few minutes to see what type of insulation I can get for that.

The inside of that hole is not very deep back to front, but it looks like it is the whole width of the trailer from what I could see.

I wonder if a short length of heat tape might help?

Supposed to have one more shot of cold this coming weekend, and I leave here for the south a week from this Saturday (had to add more time as I have a couple things I've got to do next week here).

- - - Updated - - -

Would you be able to use a block of styrofoam directly behind that faucet, like a 1" or so thick piece shaped around the 2 hoses to protect the backside of the assembly?

Might just try that!

I'll see what I come up with at HD!
 

JohnD

Moved on to the next thing...
John,

In the case of the exterior shower, I think you'll be wasting your time with insulation. You need to put in cutoffs and evacuate the water from the faucets and nearby tubing. Your water inlet connection presents a challenge if it's on the exterior wall, covered or not. If you're going to spend a lot of time in sub-freezing temps, I'd suggest putting a small foamboard enclosure around the water connection and putting a 25W clip on lamp inside the enclosure.

I looked for shutoff valves in the basement and inside the kitchen island, but didn't find any.

I'm guessing there aren't any on this trailer.

I'd have to get inside the coroplast to install them.

Might save that project for this summer when I'm not in crunch mode getting ready to hit the road!
 
Top