Pinbox Frame Flex (Again) in So. Ca.

wdk450

Well-known member
Gang:
After paying $1400 to have my pinbox frame made safe enough for the 2300 mile trip to Elkhart for the Heartland Factory to do a full pinbox frame flex repair on my 2008 production Bighorn, paying all of the 2013 $4.00 diesel fuel expenses and RV park stay charges on the round trip, I find that I have severe pinbox frame flex again. I am planning to stay in So. Ca. this time and pay for it all myself. Does anyone have any So. Ca. repairer recommendations to pull the front cap, maybe the bedroom slide, and beef up the metal strong enough that this NEVER happens again???

I found 1 place in Norco on the internet (All Magic Paint and Body - http://www.allmagicauto.com/norco-ca-rv-repair ) that sounds promising.
 

Bones

Well-known member
Gang:
After paying $1400 to have my pinbox frame made safe enough for the 2300 mile trip to Elkhart for the Heartland Factory to do a full pinbox frame flex repair on my 2008 production Bighorn, paying all of the 2013 $4.00 diesel fuel expenses and RV park stay charges on the round trip, I find that I have severe pinbox frame flex again. I am planning to stay in So. Ca. this time and pay for it all myself. Does anyone have any So. Ca. repairer recommendations to pull the front cap, maybe the bedroom slide, and beef up the metal strong enough that this NEVER happens again???

I found 1 place in Norco on the internet (All Magic Paint and Body - http://www.allmagicauto.com/norco-ca-rv-repair ) that sounds promising.
Sorry to hear about the flex again. Did you take pictures from the last repair to see what they did so you can reference it and improve.
 

Dean-Pam

Well-known member
When they (Heartland Factory) repaired my flex issue, I also paid to get it to the factory. When it was completed, John H stated if the flex should come back, they would pay to have the camper transported back to the factory. He said they didn't feel it was right to have a customer have to pay a second time.

You may want to give Heartland a call and see if that policy is still in place.
 

Bob&Patty

Founders of SoCal Chapter
Well Bill, welcome to the club. Had mine fixed a year and a half ago.....not by HL......Allstate payed the bill. After leaving Wilderness Lakes last week end and returning to Pechanga. I noticed that the ODS filon to wall moulding was pulling away from the wall. SO I says to myself.....said I...........swell. No home to go to....living in the Horn. I did call Temecula Valley RV...who did the repair last time and said bring it back. We really like our Horn....but enough is enough. We are signed up for Vegas and that's only 5 months away. Maybe Allstate will total it and we could get a SOB. Just kidding, this OL' girl is almost 10 years old and has had very few issues but maybe it's time.
 

JohnD

Moved on to the next thing...
We are signed up for Vegas and that's only 5 months away. Maybe Allstate will total it and we could get a SOB. Just kidding, this OL' girl is almost 10 years old and has had very few issues but maybe it's time.

You've got to come to Vegas . . . the helmet will be there!

AZRodeoRally-P1010651.jpg
 

8amps

Well-known member
Oh no! Sorry to hear that on both counts. We are still trying to get ours fixed correctly. Will be watching this thread with great interest.
 

BigJim45

Luv'n Life
Well Bill, welcome to the club. Had mine fixed a year and a half ago.....not by HL......Allstate payed the bill. After leaving Wilderness Lakes last week end and returning to Pechanga. I noticed that the ODS filon to wall moulding was pulling away from the wall. SO I says to myself.....said I...........swell. No home to go to....living in the Horn. I did call Temecula Valley RV...who did the repair last time and said bring it back. We really like our Horn....but enough is enough. We are signed up for Vegas and that's only 5 months away. Maybe Allstate will total it and we could get a SOB. Just kidding, this OL' girl is almost 10 years old and has had very few issues but maybe it's time.

Bob.....you can always get that Landmark you wanted......lol
 

wdk450

Well-known member
As I remember it Heartland did not want you taking pictures of the internal framework repairs they made, so I have no pictures. In fact, I have been trying to visualize this area of the frame, and even tried doing a Google Images search. I found 1 pic that was slightly helpful. I talked with the body shop in Norco, and the guy sounded positive and helpful, but we will have to see.

A copacetic occurrence is that my brother in Riverside who is having some aging issues needs someone to be with him while his wife flies to Australia for a while to see her sister after school lets out. They have a guest room. She is retiring at the end of the school year.

I guess I will start making calls and sending photos to Heartland Service "jumping through the hoops" to get them on board. I guess with my mainly SS income I have to do this.
 

mlpeloquin

Well-known member
Bill,
Sorry to here about your frame-flex issue coming back. After I had my frames repaired, I put on a Trailair Flex Air king pin. It makes the front of the coach float. No shock or vibrations. It dampens them out and it makes driving a pleasure.
 

wdk450

Well-known member
Bill,
Sorry to here about your frame-flex issue coming back. After I had my frames repaired, I put on a Trailair Flex Air king pin. It makes the front of the coach float. No shock or vibrations. It dampens them out and it makes driving a pleasure.


I have the MorRyde pinbox which helped a lot with front-rear "chucking", but probably doesn't do much for the up-down bouncing. These poor California roads don't help much either. I wince at every chuckhole on the interstates. Most of those billions gas tax money that was originally promised to go entirely to road maintenance is now diverted to the state's general tax fund.
 

Lance & Jo

Well-known member
I have some pictures from when they repaired ours in 2011, claims rep said it was our trailer but was never sure as there were several others in for same repair. Anyhow pictures show 2 large triangular pieces welded in the corners of the overhang and 4 more around the corners of the pinbox foundation. The part I have never understood is the 2 large pieces seem to give lateral (side to side) support rather than doing anything for the fore and aft loading on the stress points. If you need pictures I can locate the hard copy and send them to you (my computer along with scanned pictures went to computer heaven last week so....)
 

mlpeloquin

Well-known member
The frames are held together with self drilling/tapping screws. Mechanical engineering for shear, a harden set of pins or sleeves around bolts should be used for shear forces not screws or bolts. All fifth wheel manufactures appear to not do this. And if you look at the construct of them, they really cannot. I have seen bolts used for shear in Mil as well as NASSA programs as well as shear pins and harden shear sleeves. Without the shear pins or sleeves, the amount of fastener hardware is increased enable the fasteners to take the shear loads. We had unexpected failures in shear using bolts. An analysis under an electron microscope showed a contaminate in the fastener was the cause of the embrittlement and failure. The certifications were bogus. The metal came from a foundry in China and so did the certs. So how much confidence do you have on consumer hardware not having embrittlement problems? If one fastener fails, the load has to be added to the remaining fasteners. The another and another etc.. So I asked that larger and longer and more hardware be used. My shop doubled up on the fasteners as well. After I had mine repaired, I wanted to reduce the shock/shear forces on the fasteners. So I added the Trailair Flex Air king pin. It nice to see all the pounding from the fantastic roads, lol, not being transferred to the fasteners in the fifth wheel.

Fix and keep, or new fifth wheel, I would not use a kingpin that doesn't remove the shear/shock off the fasteners. There is also a king pin hitch out there that has the airbags, four, in the base, but I really like the Flexair Trail Air kingpin.
 

wdk450

Well-known member
The frames are held together with self drilling/tapping screws. Mechanical engineering for shear, a harden set of pins or sleeves around bolts should be used for shear forces not screws or bolts. All fifth wheel manufactures appear to not do this. And if you look at the construct of them, they really cannot. I have seen bolts used for shear in Mil as well as NASSA programs as well as shear pins and harden shear sleeves. Without the shear pins or sleeves, the amount of fastener hardware is increased enable the fasteners to take the shear loads. We had unexpected failures in shear using bolts. An analysis under an electron microscope showed a contaminate in the fastener was the cause of the embrittlement and failure. The certifications were bogus. The metal came from a foundry in China and so did the certs. So how much confidence do you have on consumer hardware not having embrittlement problems? If one fastener fails, the load has to be added to the remaining fasteners. The another and another etc.. So I asked that larger and longer and more hardware be used. My shop doubled up on the fasteners as well. After I had mine repaired, I wanted to reduce the shock/shear forces on the fasteners. So I added the Trailair Flex Air king pin. It nice to see all the pounding from the fantastic roads, lol, not being transferred to the fasteners in the fifth wheel.

Fix and keep, or new fifth wheel, I would not use a kingpin that doesn't remove the shear/shock off the fasteners. There is also a king pin hitch out there that has the airbags, four, in the base, but I really like the Flexair Trail Air kingpin.

Thanks for the pictures offer and the technical discussion on the metalworking. I was thinking of running this problem past my aerospace engineer son, too.

I thought the frame work was welded together like all of the other framework stuff. It seems to me my Sacramento RV repair guy said that he found broken welds.

I was out on my exercise walk this morning and taking particular notice of the 5th wheel hitches. Has anybody noticed that the design of the Lippert and aftermarket hitches moves the pin about 18 inches forward of the frame pinbox structure?? This forward mounting magnifies the leverage stress on the pinbox mount during up and down bounces. I realize that this forward mounting of the pin is needed to get the truck bed to clear the front compartment of the trailer, but it sure doesn't help the stress on the pinbox metal. I saw some older 5th wheel hitches that just seemed to go straight down from the pinbox on my walk, too.

I am going to take pictures of my rig this week, maybe some also of Heartland rigs in good condition in the park, along with measurements and a picture of the front cap to hitch string test. I will first talk to Heartland without wasting too much time, and maybe make a trip 100 miles over to Norco to explore possibilities with the repairer I may use there, and discuss things with my brother and his wife. I will keep this thread updated as things happen.
 

mlpeloquin

Well-known member
Each frame it self is welded together, but the two frames are held together with self drilling/tapping screws. I ran into one rig, not a Heartland, that was bolted together by the owner. I mean large bolts! He found some white plastic bolt covers, but they really stuck out. He said that he wasn't going to have the failure happen again. Another new fifth wheel, SOB and three months old, had its frames come apart. The manufacture fixed it, but the owner asked me about how often this happens. They were new to fifth wheels. So this is an industry problem not a single manufacture problem. I thought maybe only us owners putting a lot of miles on our fifth wheels are having the problem, but the SOB had it happen during their first trip.

I was told that the frames at one time were welded together, but the welds cracked and came apart. Thus the fasteners.......
 

wdk450

Well-known member
Gang:
Here is my most recent update. After moving the rig from Chula Vista to Menifee (about 70 freeway miles), I did my internet research, got a list of 10 potential repairers generated, took my laptop with the pictures of the problem, and planned a day of driving in So. Ca. to visit/interview them all.

Temecula RV was helpful, but had a backlog until the end of June. They DID give me a loose ballpark estimate of $4K - 6K for the repair.

I went over to Hemet Trailer Supply, and although they had 3 service bays, THERE WAS NO ONE PRESENT AT THE SERVICE DESK FOR OVER 10 MINUTES, AND NO EVIDENCE OF ANYONE WORKING IN THE SERVICE BAYS. There was even another customer waiting ahead of me. I walked out.

Next stop was my preliminary favorite from their website, All Magic RV Repair in Norco. They were very sympathetic and attentive, and were ready to send a mobile estimator the 40 miles to Menifee where the trailer is set up. Their facility, though, is on a major active street, with a small front lot up a small hill. I had terrible images of trying to get my 57 foot rig just into their asphalt, and I don't think they had a forklift for moving the rig around. They didn't want to make ANY financial estimates immediately.

I then went to Fontana to (Snells) RV Paint Department ( www.rvpaintdepartment.com ) I met with Raymond Lopez who runs the facility. I explained that I am a fulltimer, had enough room on my credit cards to pay only $5K, and wanted it fixed/upgraded correctly so that the problem DOESN'T RE-OCCUR. Raymond said that they would do the job for a MAXIMUM OF $5K, if their costs overran that they would eat the difference, if they took the front cap off and determined they couldn't do the job, they would replace the front cap and let me go with $0 charge. Once the front cap was off they would have the rig moved to an independent certified welder's shop (although they routinely do welding at their business). The welder will come up with the RIGHT fix (I am going to supply them with printouts of Marc's technical posts) and then the rig will be returned to RV Paint Department for final re-assembly. The only qualm I have with this proposal is that Raymond gave a time estimate of 1 to 2 months. My brother and his wife are comfortable with me staying with them for a month, but I do have other relatives in the area I could stay with. I am hoping that Raymond is way long on his time estimate, and the fact of small business cash flow will speed the job along.

So, I got on the roof with a heat gun yesterday and removed the Eternabond tape over the top front cap seal (the tape backer came off easily, the underlying adhesive goo took a lot of heating and scraping). I then defrosted the freezer and am unpacking the fridge/freezer for transport to my brother's house. I have a big checklist of stuff to take to my brother's house for my stay starting today.

I would like to look into moving from the MorRyde pinbox to one of the more Air Isolated ones as soon as I can build up my credit lines some.

Thanks for everybody's advice and commiseration, and I will keep the forum updated on the repairs. I hope to get internal pictures of the damage/problems/fix.
 
Last edited:

mlpeloquin

Well-known member
Bill, mine was put back together without having to remove the front cap. The front sub-frame is bolted to the main frame and can be gotten to by removing the front fiberglass only. I had them use longer and larger gage screws and double up on them. Then I ordered and installed the Trailair Flex Air king pin that isolates the shock and vibrations from the front. Watch it and it floats as you go down the road. One thing, when you finally pump up the air bag and drive around to make sure it has enough or not enough air, measure the air pressure in the air bag. This makes it easy to fill it up without having to hitch it up again. The repair cost was no where near the 5K you have. This is how the billing read:

E&I molding and bulkhead cover and them reseal 5 HR - $625.00
Remove and install high grade fasteners 2.5 HR - $312.00
Putty tape - $7.79
Screws SS-1 - $12.00
Sika flex - $12.79

Total Material & Parts: $32.58
Total Labor: $937.50
Subtotal: $970.08
Sales Tax: $2.85
Total: $972.93

I talked to someone else that had his frames welded and added gussets and then re-bolted. It cost about $1.5K more. They did not have to remove the front cap as well.
 

JohnD

Moved on to the next thing...
Gang:
Here is my most recent update. After moving the rig from Chula Vista to Menifee (about 70 freeway miles), I did my internet research, got a list of 10 potential repairers generated, took my laptop with the pictures of the problem, and planned a day of driving in So. Ca. to visit/interview them all.

Temecula RV was helpful, but had a backlog until the end of June. They DID give me a loose ballpark estimate of $4K - 6K for the repair.

I went over to Hemet Trailer Supply, and although they had 3 service bays, THERE WAS NO ONE PRESENT AT THE SERVICE DESK FOR OVER 10 MINUTES, AND NO EVIDENCE OF ANYONE WORKING IN THE SERVICE BAYS. There was even another customer waiting ahead of me. I walked out.

Next stop was my preliminary favorite from their website, All Magic RV Repair in Norco. They were very sympathetic and attentive, and were ready to send a mobile estimator the 40 miles to Menifee where the trailer is set up. Their facility, though, is on a major active street, with a small front lot up a small hill. I had terrible images of trying to get my 57 foot rig just into their asphalt, and I don't think they had a forklift for moving the rig around. They didn't want to make ANY financial estimates immediately.

I then went to Fontana to (Snells) RV Paint Department. I met with Raymond Lopez who runs the facility. I explained that I am a fulltimer, had enough room on my credit cards to pay only $5K, and wanted it fixed/upgraded correctly so that the problem DOESN'T RE-OCCUR. Raymond said that they would do the job for a MAXIMUM OF $5K, if their costs overran that they would eat the difference, if they took the front cap off and determined they couldn't do the job, they would replace the front cap and let me go with $0 charge. Once the front cap was off they would have the rig moved to an independent certified welder's shop (although they routinely do welding at their business). The welder will come up with the RIGHT fix (I am going to supply them with printouts of Marc's technical posts) and then the rig will be returned to RV Paint Department for final re-assembly. The only qualm I have with this proposal is that Raymond gave a time estimate of 1 to 2 months. My brother and his wife are comfortable with me staying with them for a month, but I do have other relatives in the area I could stay with. I am hoping that Raymond is way long on his time estimate, and the fact of small business cash flow will speed the job along.

So, I got on the roof with a heat gun yesterday and removed the Eternabond tape over the top front cap seal (the tape backer came off easily, the underlying adhesive goo took a lot of heating and scraping). I then defrosted the freezer and am unpacking the fridge/freezer for transport to my brother's house. I have a big checklist of stuff to take to my brother's house for my stay starting today.

I would like to look into moving from the MorRyde pinbox to one of the more Air Isolated ones as soon as I can build up my credit lines some.

Thanks for everybody's advice and commiseration, and I will keep the forum updated on the repairs. I hope to get internal pictures of the damage/problems/fix.

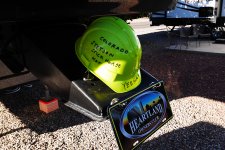
All I have to say is . . . 'Wow!'

If any of us have to deal with this type of issue . . . we shouldn't have to pay one cent!

No matter how old our RV is . . . this kind of issue should NEVER pop up!

I hate it when Heartland or any other manufacturer hides behind their warranty when something just isn't right (been there, done that)!
 

wdk450

Well-known member
Gang:
I am now staying at my brother's house in the downtown Riverside area while my repair is in progress in Fontana. Well, last night I walked to my truck parked next to a school across the street from his house, and found that my truck front passenger side window had been broken and some items in the truck stolen. The window repair is going to cost about $200, and the stupid things they took included my TPMS monitor (with a broken antenna) and my video display for my wired trailer rear camera system that is mirror shaped. Both items are most likely useless to anybody else. A replacement TPMS monitor is costing me over $150, but the replacement mirror monitor is only about $30. The idiots did NOT take the satellite radio receiver, my GPS or my checkbook. Go figure!!!
 

mlpeloquin

Well-known member
A lot of car and truck windows broken and theft in this area as well. Only with cars and trucks with stuff visible. Never leave or have anything visible in you car or truck. I wish my truck could fit in my garage. Too tall and too long!
 

wdk450

Well-known member
Well the front cap is off, and there is nothing major wrong in the pinbox frame area. The re-enforcement triangular metal gussets evidently put in by Heartland/Lippert are impressive. There were 4 horizontal ones around the pinbox mounting plates, and 2 big vertical ones on the top of the 2 front vertical framing. I took a lot of pictures, but my cellphone camera malfunctioned. I believe the bulge in the bottom seam was caused by just a broken screw going into wood. I did take the opportunity to order a Trailire AirRide pinbox, which will be installed soon. The repair estimate has been dramatically reduced.

The one thing that was noted was that the pinbox mounting bolts are thought to be cracking, and will be replaced. Does anyone have any recommendations on what strength these bolts/nuts should be?? Do the new pinboxes normally come with bolt/nut sets? Is there any other hardware like shear rings needed with the bolt/nut/ washer sets?

Thanks for everybody's help.
 
Top