You are using an out of date browser. It may not display this or other websites correctly.
You should upgrade or use an alternative browser.
You should upgrade or use an alternative browser.
What did you do to your camper today?
- Thread starter MagnoliaTom
- Start date

vakthund
Well-known member
Kitchen Sink
The one that must be obeyed finally had enough of the leaking sink. Took the sink out and dismantled everything as it was leaking from the rim and from each drain. Cleaned everything with denatured alcohol and used 10 times the sealant than the factory. No leaks, happy wife, cold beer. Sink looks like new.

The one that must be obeyed finally had enough of the leaking sink. Took the sink out and dismantled everything as it was leaking from the rim and from each drain. Cleaned everything with denatured alcohol and used 10 times the sealant than the factory. No leaks, happy wife, cold beer. Sink looks like new.
uncledon
Her chauffeur
After about two weeks in our new BH 3875FB I found a couple of things that would potentially be issues.
First, the sliding doors in the master bath have hardware for securing the doors during travel. When one door is opened to its fullest, it hits the hardware on the other door causing damage. They needed dead stops:
Next thing was discovered when grand daughter swung open the half bath door and it banged into the corner of the pantry. Ace harware had a door stop for that.


Sent from my SM-G900V using Tapatalk
JohnDar
Prolifically Gabby Member
Vacuumed it, dumped and flushed the tanks, closed it up and hauled it home to the storage yard. Our season is over for the year. Next few days, we'll be removing the non-perishable food stuffs, toiletries, clothing, electronics, and a few other items. Then winterizing it.
On another note, I have one of those little twin muffin fans in the refridgerator. One of the fans gave up the ghost but I was able to replace it with a similar 12V fan I had salvaged from an old computer. Noticed that some of the window glaze (vinyl outside trim) was shrinking, so I got a sample kit and measured the dimensions of all the windows. Each window uses two different sizes of the same design. Will be ordering enough to redo all of them.
On another note, I have one of those little twin muffin fans in the refridgerator. One of the fans gave up the ghost but I was able to replace it with a similar 12V fan I had salvaged from an old computer. Noticed that some of the window glaze (vinyl outside trim) was shrinking, so I got a sample kit and measured the dimensions of all the windows. Each window uses two different sizes of the same design. Will be ordering enough to redo all of them.
CoveredWagon
Well-known member
R & R the Furrion oven to replace the igniter. Was happy to find it mounted on the top side of the oven. Was unhappy when nothing happened after part replacement. Decided to dig a little deeper. Removed the back of the oven to follow the wire from the igniter to the sparker. Found the wire was stretched and in contact with the pilot lite gas tube, moved everything around a little to relieve the stress. Checked the wire visually and mechanically for insulation breaks found none. Attempted a lite and guess what? Click click click we got fire. DW is happy and I get the rest of the day off ��

JohnDar
Prolifically Gabby Member
Did the winterizing yesterday, including the washer. Removed tools and battery. Measured all windows for replacement of vinyl trim. Final check of all compartments for anything that might freeze. TV's, foodstuffs, clothing and other valuables were removed earlier. Put wire screen inside pinbox to keep birds out.
Sent from my iPhone using Tapatalk
Sent from my iPhone using Tapatalk
CoveredWagon
Well-known member
Did the winterizing yesterday, including the washer. Removed tools and battery. Measured all windows for replacement of vinyl trim. Final check of all compartments for anything that might freeze. TV's, foodstuffs, clothing and other valuables were removed earlier. Put wire screen inside pinbox to keep birds out.
Sent from my iPhone using Tapatalk
Winterized ??? John it's time to get ready for the travel season. Heck we're just packing for our next venture.
John it was great to meet you this summer and I'd bet we'll see you up north (that's a place not a direction for you non Michigan folks) next summer. That's a great place you call your summer home.
Replaced the cracked keypad on our RV Lock. The unit is about three years old (I think, seems I remember buying it at the Urbanna Rally in '14). Since we full-time and use the keypad to lock and unlock the trailer every day, I thought that was a pretty good service life.
Replacement keypads are available on the RV Lock site for about $10 and $2 for shipping (in an envelope via USPS). I ordered late last week and it arrived yesterday. Instructions for replacing the keypad are included in the package.
Here's the outside half of the lock ready for surgery.

Disassembly involves removing the five screws that hold on the keypad assembly from the back, pulling the rubber pad from behind the keypad and pushing the old keypad membrane off from behind (it just sticks onto the handle from the front). I removed any remaining adhesive from the old keypad, as well. The new keypad peels off the plastic backing it is shipped on and presses into place onto the handle assembly.

Here's a comparison of the new vs. old keypad. Ours was cracked on the unlock button and the 7/8 button. It looks a little rougher than it was when I started since the removal process involved pressing it out from behind which caused some additional cracks and bends.

And here it is reassembled. The whole process took about 15 minutes including removing the assembly from the door, fixing the keypad and reinstalling the assembly back on the door. (Taking pictures slowed the process slightly, as well).

Replacement keypads are available on the RV Lock site for about $10 and $2 for shipping (in an envelope via USPS). I ordered late last week and it arrived yesterday. Instructions for replacing the keypad are included in the package.
Here's the outside half of the lock ready for surgery.
Disassembly involves removing the five screws that hold on the keypad assembly from the back, pulling the rubber pad from behind the keypad and pushing the old keypad membrane off from behind (it just sticks onto the handle from the front). I removed any remaining adhesive from the old keypad, as well. The new keypad peels off the plastic backing it is shipped on and presses into place onto the handle assembly.
Here's a comparison of the new vs. old keypad. Ours was cracked on the unlock button and the 7/8 button. It looks a little rougher than it was when I started since the removal process involved pressing it out from behind which caused some additional cracks and bends.
And here it is reassembled. The whole process took about 15 minutes including removing the assembly from the door, fixing the keypad and reinstalling the assembly back on the door. (Taking pictures slowed the process slightly, as well).
Malcon, if you only replaced the plastic keypad you don't need to disassemble the lock. Just peal the old keypad from the outside and stock the new one on.
Or did you do the rubber membrane as well?
Peace
Dave
I followed the instructions that came with it. Knowing how it is assembled now, I could replace the keypad without disassembly. For that matter, the keypad could be replaced without removing the unit from the door.
TravelTiger
Founding Texas-West Chapter Leaders-Retired
Malcon, if you only replaced the plastic keypad you don't need to disassemble the lock. Just peal the old keypad from the outside and stock the new one on.
Or did you do the rubber membrane as well?
Peace
Dave
Dave, I replaced our keypad membrane last year, it was about 2.5 years old and cracking on the most used numbers. I just peeled off the old and stuck on the new, no disassembly.
jassson007
Founding Louisiana Chapter Leaders-Retired
Malcon, if you only replaced the plastic keypad you don't need to disassemble the lock. Just peal the old keypad from the outside and stock the new one on.
Or did you do the rubber membrane as well?
Peace
Dave
That is the way I did mine too lol and mine didn’t come with any instructions just had to figure it out lol.
Sent from my iPhone using Tapatalk
JohnD
Moved on to the next thing...
Yesterday I fixed a couple of trim pieces that fell off on our last trip, and also remounted the wall plate in the entertainment center with the coax connections for the TV and the screws from the factory were just put through the thin wall panelling and stripped out awhile back.
I put some drywall screw anchors in the holes and put some real screws in it.
Today I am going to try and figure out how to install a TireMinder TPMS system that I purchased from one of the Colorado HOC members at our last rally.
I put some drywall screw anchors in the holes and put some real screws in it.
Today I am going to try and figure out how to install a TireMinder TPMS system that I purchased from one of the Colorado HOC members at our last rally.
CoveredWagon
Well-known member
Today I am going to try and figure out how to install a TireMinder TPMS system that I purchased from one of the Colorado HOC members at our last rally.[/QUOTE]
John, what brand TPMS did you buy ? If it's a TST, you may need an amplifier repeater. Go ahead ask me how I know. Works perfectly now.
John, what brand TPMS did you buy ? If it's a TST, you may need an amplifier repeater. Go ahead ask me how I know. Works perfectly now.
WillyBill
Well-known member
Gave My Cyclone a bath and cleaned the inside from my month long hunting trip.
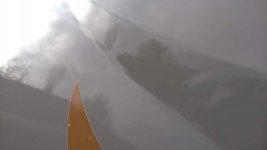
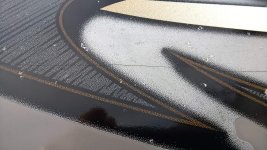
Filed an insurance claim for a new nose cone. Last month on the way hunting a Great Horned Owl flew into my trailer as I was driving down the Interstate-almost hit my truck windshield, but flared up at the last second and collided with the front of my Cyclone. I never noticed the spider cracks all over it until I gave it a bath yesterday.
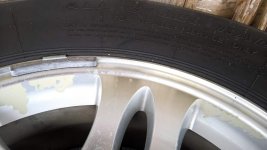
Sounds fishy but no joke!!! Also found "paint" coming off of two of my aluminum wheels.
Pics of both attached.
WB
Filed an insurance claim for a new nose cone. Last month on the way hunting a Great Horned Owl flew into my trailer as I was driving down the Interstate-almost hit my truck windshield, but flared up at the last second and collided with the front of my Cyclone. I never noticed the spider cracks all over it until I gave it a bath yesterday.
Sounds fishy but no joke!!! Also found "paint" coming off of two of my aluminum wheels.
Pics of both attached.
WB
Attachments

JohnD
Moved on to the next thing...
John, what brand TPMS did you buy ? If it's a TST, you may need an amplifier repeater. Go ahead ask me how I know. Works perfectly now.
It is the TireMinder TM66.
It did come with the signal amp.
WillyBill
Well-known member
Installed a new water pump. Original pump kept running for 1-2 seconds out of every 10. Plus it was mfg. in 2010. Went with a pump that pumped 3-5 gals/Min at 40 psi to help with water use while boondocking - which we do mostly.
https://www.amazon.com/gp/product/B00HRI9MAC/ref=oh_aui_detailpage_o01_s00?ie=UTF8&psc=1
Arterra PDSI-130-1240E RV Fresh Water Pump with Power Drive Technology
Easy install, runs quiet, uses less amps. What's not to like?
WB
https://www.amazon.com/gp/product/B00HRI9MAC/ref=oh_aui_detailpage_o01_s00?ie=UTF8&psc=1
Arterra PDSI-130-1240E RV Fresh Water Pump with Power Drive Technology
Easy install, runs quiet, uses less amps. What's not to like?
WB
Similar threads
- Replies
- 0
- Views
- 320
- Replies
- 11
- Views
- 727