What did you do to your camper today?

JohnD

Moved on to the next thing...
Both him (mobile repair tech) and I looked for some kind of face plate to cover up the damaged entertainment center cabinet to no avail, but he had some brown tape that he used to cover up the damage and it looks pretty good!

This is what is looked like after the stereo was removed a few weeks ago:

View attachment 44855

I didn't take a photo of it when he was done . . . I'll get one over the weekend!


Here is a photo of the new stereo installed:
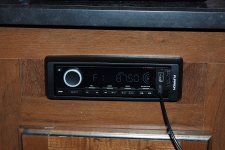
ProwlerEntCenterNewStereo-P5100150.jpg

The camera flash made the tape repair show up pretty good, but to the naked eye while standing in the trailer you can't even see that there was a repair . . . unless you are really looking hard to find it.

I'm still going to try and find a faceplate to cover up the whole thing, but in the mean time . . . this will do!

We are leaving in the morning for the Colorado HOC Spring Rally in Buena Vista, Colorado, so will give the Prowler a test run on the repairs.

We will have owned the Prowler for one year on May 29, 2016 . . . so hopefully we will not have anymore warranty issues.

I did give the radio a test a couple of hours ago and it is pulling in FM stations, but no AM stations.

Not sure what the deal is with that?

And we have 'The Blow Torch' (850 KOA - 50,000 watts of AM Broadcast) right here in Denver and their broadcast tower is one mile from our house.

I hate to say it, but I think I will probably end up unhooking the stereo from the roof antenna and putting a regular diapole antenna on it as it seems that having the AM/FM stereo hooked up to the roof antenna is a major PITA!

By the by . . . I have replaced the stock Batwing TV antenna with the King/Jack TV antenna . . .

If you haven't done this . . . you should!

Best $50 bucks I've ever spent . . .
 

MCTalley

Well-known member
Had our rear A/C unit replaced today by Beach RV mobile technicians here in Panama City Beach, Florida. If you are ever in the area and need some work done, give them a call. Great to deal with. Now sitting in my cool living room.
 

DougS

Doug S
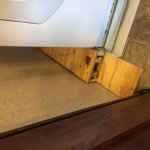
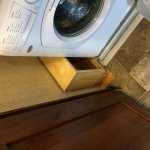
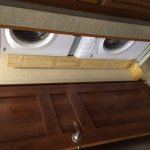
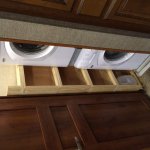
Today I built a slide out pantry for the 6 1/4" space next to the stackable washer/dryer in the BH 3160 EL. The shelves are designed around 1 gallon containers of water. A maximum of 10 jugs could be loaded, but I only plan on 4 gallons on the bottom two shelves. The other two enclosed shelves will contain food cans. The top open shelf is reserved for doggie things and doggie food.
The pantry had to be built as a modular to fit and install in the space, an assembled unit could not be installed. The pantry modular is attached to a platform which is attached by drawer slides to a oversized board to fit the area and will not have to be screwed to floor. The bottom enclosed shelf is screwed down to the platform then the other shelves are screwed to the shelf under it, so the whole modular pulls out as a single unit. The top shelf has a 5 inch board to keep items on the shelf. Side rails for top shelf will be added.
Each shelf modular has a 1/8" luan sheet nailed and glue to the back of it. Drawers are only 15" deep and drawers can only be pulled out 9 1/2" so there is a dead spot in each drawer so items can be slid into the back of the drawers.
Again this modular can be removed in about 5 minutes by removing approximately 20 screws and removing each modular shelf one at a time. This would be necessary for washer/dryer servicing. Pictures are taken before staining so pictures come out better.
Sorry about the sideways pictures, working from iPhone.
 

Attachments

  • image.jpg
    image.jpg
    95.7 KB · Views: 86
  • image.jpg
    image.jpg
    115.3 KB · Views: 87
  • image.jpg
    image.jpg
    93.5 KB · Views: 87
  • image.jpg
    image.jpg
    99.1 KB · Views: 91

mlpeloquin

Well-known member
Changed out the bathroom Studer valve. Smells a lot better in here now! 100* in Las Vegas today. AC's cycle on and off without any problem keeping it 74* in here.
 

Bones

Well-known member
Today I built a slide out pantry for the 6 1/4" space next to the stackable washer/dryer in the BH 3160 EL. The shelves are designed around 1 gallon containers of water. A maximum of 10 jugs could be loaded, but I only plan on 4 gallons on the bottom two shelves. The other two enclosed shelves will contain food cans. The top open shelf is reserved for doggie things and doggie food.
The pantry had to be built as a modular to fit and install in the space, an assembled unit could not be installed. The pantry modular is attached to a platform which is attached by drawer slides to a oversized board to fit the area and will not have to be screwed to floor. The bottom enclosed shelf is screwed down to the platform then the other shelves are screwed to the shelf under it, so the whole modular pulls out as a single unit. The top shelf has a 5 inch board to keep items on the shelf. Side rails for top shelf will be added.
Each shelf modular has a 1/8" luan sheet nailed and glue to the back of it. Drawers are only 15" deep and drawers can only be pulled out 9 1/2" so there is a dead spot in each drawer so items can be slid into the back of the drawers.
Again this modular can be removed in about 5 minutes by removing approximately 20 screws and removing each modular shelf one at a time. This would be necessary for washer/dryer servicing. Pictures are taken before staining so pictures come out better.
Sorry about the sideways pictures, working from iPhone.
Very nice job Doug's.
 

jassson007

Founding Louisiana Chapter Leaders-Retired
Changed out studor valves as well as I figured it could only help with smell when tanks start getting full. Also changed out clothes hanging rods to make room and get ready for a washer and dryer install next month.


Sent from my iPhone using Tapatalk
 

Dumboldles

Well-known member
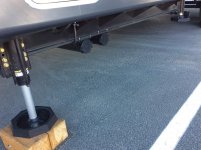
I added an extra sewage hose carrier, with the help of my DW we put the Snappads on the 6way leveling system feet, (I considered making the mods to the pads, but because my camper is stored under a roof and we live in a dry climate I didn't modify) and washed and wax the camper. Three days worth.

image.jpg image.jpg image.jpg
Dumboldlles
 

JWalker

Northeast Region Director-Retired
Changed out studor valves as well as I figured it could only help with smell when tanks start getting full. Also changed out clothes hanging rods to make room and get ready for a washer and dryer install next month.


Sent from my iPhone using Tapatalk

Going to have to check that out in July. Ginger has always wanted the washer/dryer set up.
 

TravelTiger

Founding Texas-West Chapter Leaders-Retired
Going to have to check that out in July. Ginger has always wanted the washer/dryer set up.

Jamie, not sure, does your ER have the dedicated separate closet for the W/D or just the hookups in the regular closet? If just the regular hookups, it may be difficult to get two separate units in there due to the height. Consider a combo. Though it takes some getting used to, (smaller loads, longer times, etc) it is IMHO far better than going to the laundromat or park laundry.
 

Dennyha

Well-known member
We had to take our Cyclone 3010 in for the its last repair under warranty. Heartland had installed the wrong rollers in the bedroom slide, and both of them came off during use. I found the first one the first week after purchasing it. I found the second one after removing the 1/2" OSB from the bed to address my wife's complaints that our heads were lower than our feet in bed, and it seemed like the bed sloped toward the middle. The slide worked fine, but after finding the second roller, I called Heartland and got it in for service.
Now that the dealer has installed the correct rollers, our heads are not lower than our feet anymore. To address the "sloping" issue, I added two additional cross supports to the bed. Originally, Heartland only had a single 2" x 3" across the middle. I added the 2" x 4" s you see up at shoulder level, and at knee level.
image.jpgI also added the short length at the bottom to give more support sitting on the foot of the bed.
 

JohnDar

Prolifically Gabby Member
Hauled it 200 miles back up to our seasonal site yesterday. No problems with it on the road. Set up the water and sewer systems and the Porta-Deck. Then drove back home to get the cats and the rest of our stuff. Heading back up tomorrow until the end of the month. First order of business will be to install the check valve bypass on the tank flusher. That leak left a nice stain on the bottom riser of the stair carpeting.

Did have a minor scare while putting out the slides, though. The kitchen slide didn't want to fully seat at the top. After a couple of WTF moments, I got up on a step ladder and found a short piece of 1x2 that we'd put up there last season to balance a decoration on the top edge. Wife took down the decoration but forgot about the board. All's good now.
 

windviewer

Well-known member
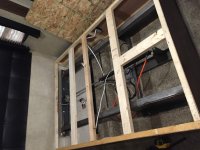
Ran the battery monitor wire from the charging center to the back up the trailer. Had to drop the coroplast on one side to route the flexible conduit along the trailer frame. This is where you discover the poor (IMO) construction/wiring from the factory. They use wire loom on the battery/trailer wiring from the battery until the coroplast starts. Then it is just (it seems) a run of bare wires until the end of the coroplast, then more wire loom. The wire to the slideout motor was just 'draped' loosely' over a cross member piece (where it could bounce and rub over time and eventually short out). All the wires to the tank sensors were unprotected (and unsecured in most places, just resting on cross member trailer frame pieces).

Will put wire loom and secure the wires the best I can before buttoning up the coroplast.

Note to future self: If (BIG if) I ever buy another new trailer, I will either PAY someone for a THOROUGH inspection (requiring removal and replacement of panels/covers), or make sure I do it myself (the only reason I found it was because I was adding a new monitor wire myself).:confused:
 

Diamondjim

Well-known member
3892fbf7cd0f5c3e6e3d5d850cc24c47.jpg


Thought it would be a quiet day on the street in our gated community to find some shade to work on restoration of the decals etc.
Washed & treated nose with 303 & some automotive super quick wax. Cleaned the roof & outside before the forecast rain came, 3 hours early! Will have to wait to apply UV protection to the roof. Am pretty sure its rinsed now! !!
b3560bed4c55f7c2a1d1c9973067c6d5.jpg


Sent from my LGL41C using Tapatalk
 

danemayer

Well-known member
Changed out several light fixtures. Pinbox light is now LED. Doorside basement light is now LED with motion sensor (thank you Jerrod). UDC light is now LED.

Added stick-on motion sensing LED battery powered lights inside several cabinets.

Installed an outlet in the rear corner of the doorside living room slide, next to my chair. Picked up power from a J-box located in the corner of the slideout.
 

TravelTiger

Founding Texas-West Chapter Leaders-Retired
Changed out several light fixtures. Pinbox light is now LED. Doorside basement light is now LED with motion sensor (thank you Jerrod). UDC light is now LED.

Added stick-on motion sensing LED battery powered lights inside several cabinets.

Installed an outlet in the rear corner of the doorside living room slide, next to my chair. Picked up power from a J-box located in the corner of the slideout.

And.... Where are the pictures? Oh, never mind.
 

Jesstruckn/Jesstalkn

Well-known member
Changed out several light fixtures. Pinbox light is now LED. Doorside basement light is now LED with motion sensor (thank you Jerrod). UDC light is now LED.

Added stick-on motion sensing LED battery powered lights inside several cabinets.

Installed an outlet in the rear corner of the doorside living room slide, next to my chair. Picked up power from a J-box located in the corner of the slideout.

Your welcome Dan once you start enjoying them, I'm sure you'll find many more places you will want to install them.
 

Bones

Well-known member
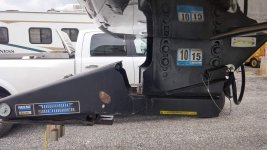
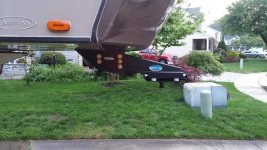
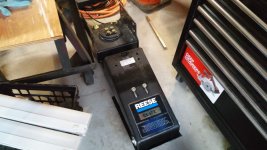
I installed a MorRyde pin box today. It is 3 inches higher than the old pin box so I will have to move my hitch up tomorrow to make sure everything is pretty close to level. Right now the whole rig is level so I will back under it tomorrow to see how far the hitch is off then adjust.

0522161524a_HDR.jpg

0523162002a.jpg

0523162002.jpg

The old pin Box with my lock out bolts.
 

DougS

Doug S
Added a wireless backup camera to my PU "V" gate. I miss my camera while traveling. I also made a temporary bracket to move the camera to for hooking up to the King Pin. I haven't tried the camera yet for hooking up, but it should make aligning the King Pin up easier.
 
Top